*This post may contain affiliate links for which I earn commissions.*
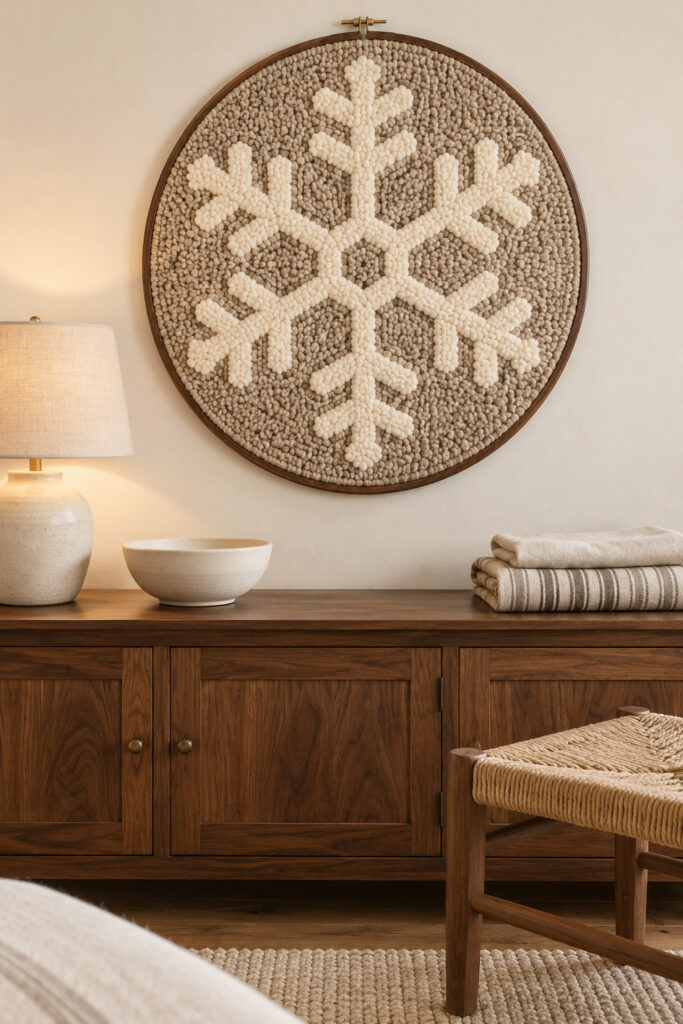
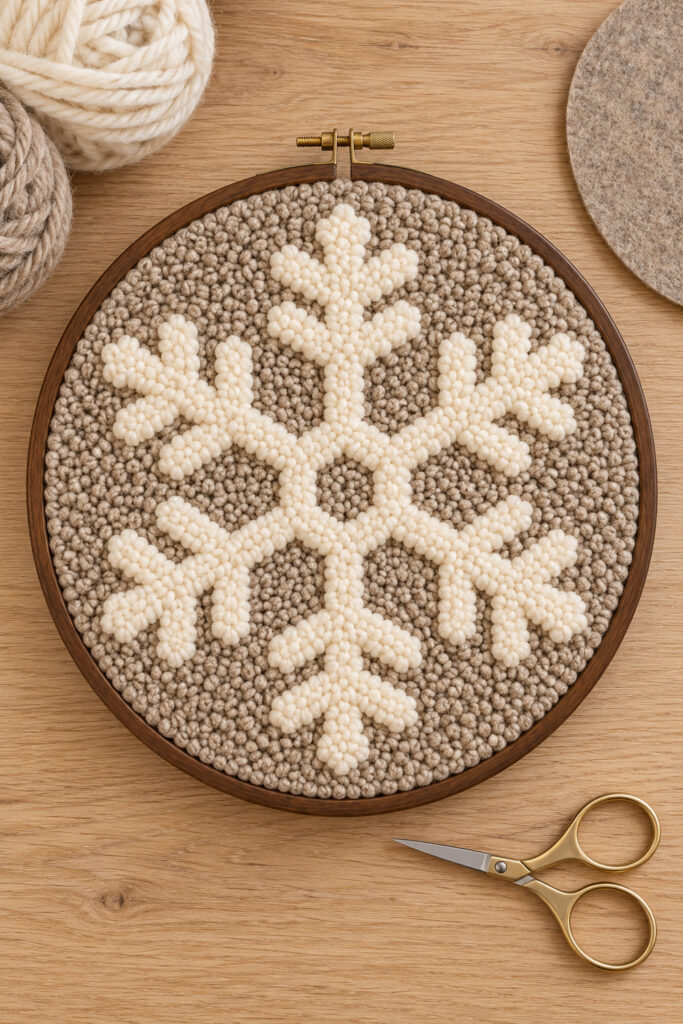
An ivory snowflake stitched in wool loops gives a simple hoop plenty of winter character. The inspiration pairs the pale shape with an oatmeal background and a dark wooden frame, so the texture stands out without a strong color contrast.
This tutorial proposes a smaller, manageable version of that idea using a yarn punch needle. You will work from the back of taut fabric, creating loops on the opposite side, then fill the background and finish the hoop for display. Make a small practice sample first; the method has not been physically tested for this particular design.
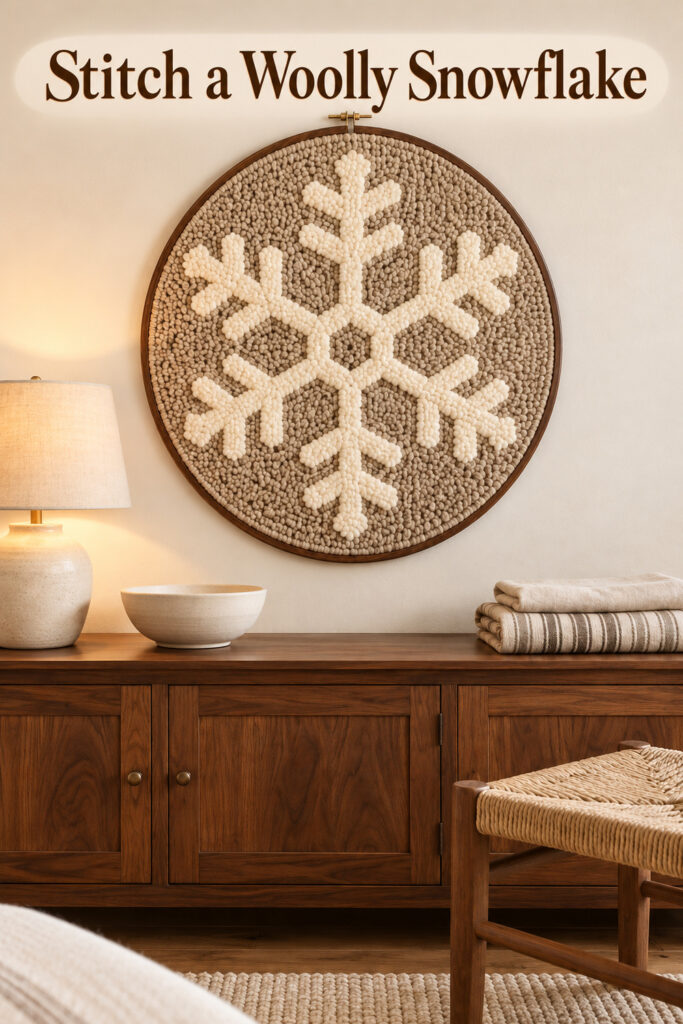
The inspiration and instructional images were created with AI to illustrate a proposed DIY method rather than document a physically constructed project.
What You’re Making
The suggested version is a 10 inch hoop (although I really think that inspo image shows something much larger so keep that in mind!) with an approximately 8 inch six-spoke snowflake. These are planning dimensions, not measurements taken from the image.
The smaller scale preserves the broad ivory branches, oatmeal field, and round brown border while reducing the amount of stitching compared with the oversized inspiration.
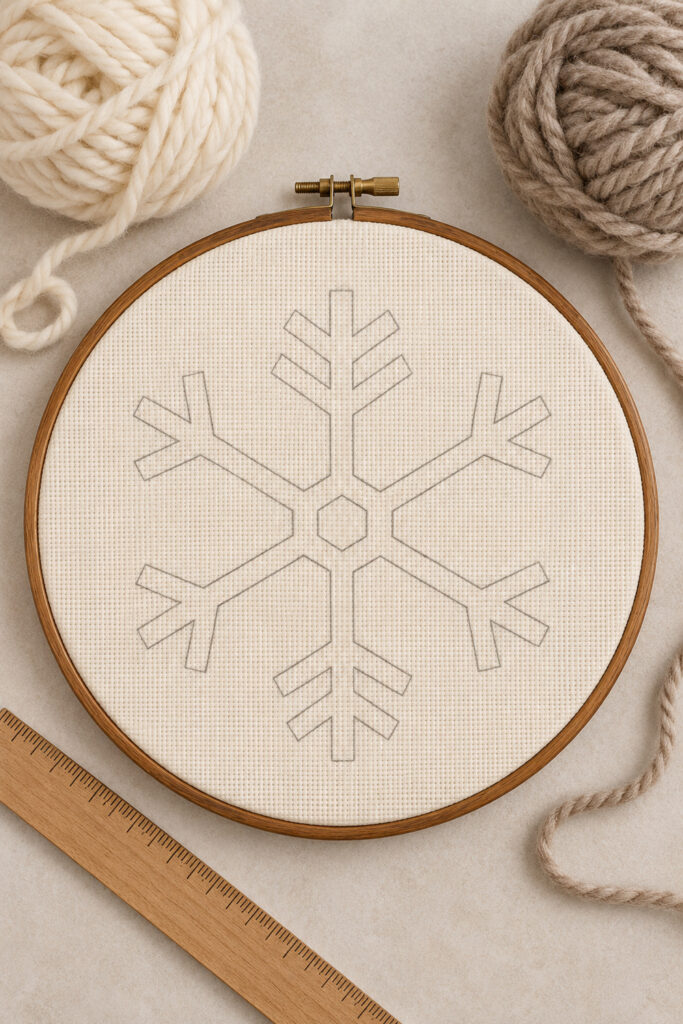
The outline is a guide to the overall geometry, not an exact stitch chart. Keep the six arms evenly spaced and broad enough to hold several rows of yarn loops. Small differences in branch thickness will soften once the background is filled.
Materials and Supplies
Materials
- Punch needle monks cloth compatible with your yarn needle and large enough to extend at least 3 inches beyond the hoop on every side
- Ivory and oatmeal wool yarn in the same weight recommended for your chosen punch needle (I recommended a punch needle set below that has a 5mm needle and if you use that then yarn sized 3-5 – or DK to Bulky – would work)
- A 10 inch locking working hoop that holds the cloth firmly
- A suitable 10 inch wooden display hoop if the working hoop is not intended for display
- Strong sewing thread and a hand sewing needle for gathering the backing
- An optional felt circle and thread to cover the back
Tools
- A hollow yarn punch needle with its required threader
- Small sharp scissors
- Pencil or suitable fabric marking tool
- Ruler and paper for drawing the design
- A protractor if helpful for spacing the six arms
Want to Make This Wall Hanging?
I’ve put together a convenient Amazon supply list featuring hand-picked, well-rated products that match the supply list above to save you time. No need to spend hours hunting down the right items!
See My Hand-Picked Supply ListAs an Amazon Associate I earn from qualifying purchases but this doesn’t increase your price at all!
Do not buy a tiny embroidery-floss punch needle for bulky wool. Choose the tool, yarn, and fabric as a compatible set of specifications.
Yarn quantity depends on loop height, thickness, and density, so use the supplier’s coverage guidance and your sample rather than a guessed number of skeins.
I have not yet done any punch needle projects myself BUT I have crocheted for years and started knitting a few years ago. I have a massive yarn stash and find fiber arts are very relaxing for me. I could see taking on this craft but let’s not tell my husband just yet. 😉
Before You Start
Make a small sample using both colors on the same fabric. Thread the needle as its maker directs and keep yarn feeding freely from the ball. Stretch the fabric firmly; slack cloth makes consistent punching difficult.
Work with free space under the hoop so the needle cannot strike the table or your hand. Keep fingers away from the point, and put the tool down safely when you stop. Check the reverse of the sample: the side facing you while punching has flatter stitches, and the opposite side carries the loops that will be displayed.
If loops pull out, check cloth tension, yarn feed, full insertion, and tool compatibility before continuing. Do not try to solve an unsuitable combination by packing more stitches into the same holes.
Step by Step Snowflake Tutorial
1. Draw a Broad Six Spoke Design
On paper, mark the center and draw three straight lines crossing there at 60 degree intervals. This creates six evenly spaced arms. For the suggested 8 inch design, each arm extends approximately 4 inches from the center.
Turn the lines into broad bars, starting around three eighths to half an inch wide as a suggested proportion. Add two pairs of short outward branches near the end of each arm. Keep the branches wide enough for several yarn rows and leave visible space between neighboring arms. A small center gap can remain as oatmeal background, or you can join the arms into a filled ivory center; choose before stitching and keep it consistent.
2. Transfer the Outline and Tension the Cloth
Trace the design onto the working back of the cloth using a method appropriate for the fabric. The snowflake is symmetrical, so reversing it does not change its basic appearance. Leave a clear background margin between the outer branches and the intended display edge.
Secure the cloth in the locking hoop with the design centered. Tighten according to the hoop instructions and recheck tension across the whole surface. Do not cut off the spare fabric yet; you need it for adjustment and finishing.
3. Punch the Ivory Outline and Fill the Arms
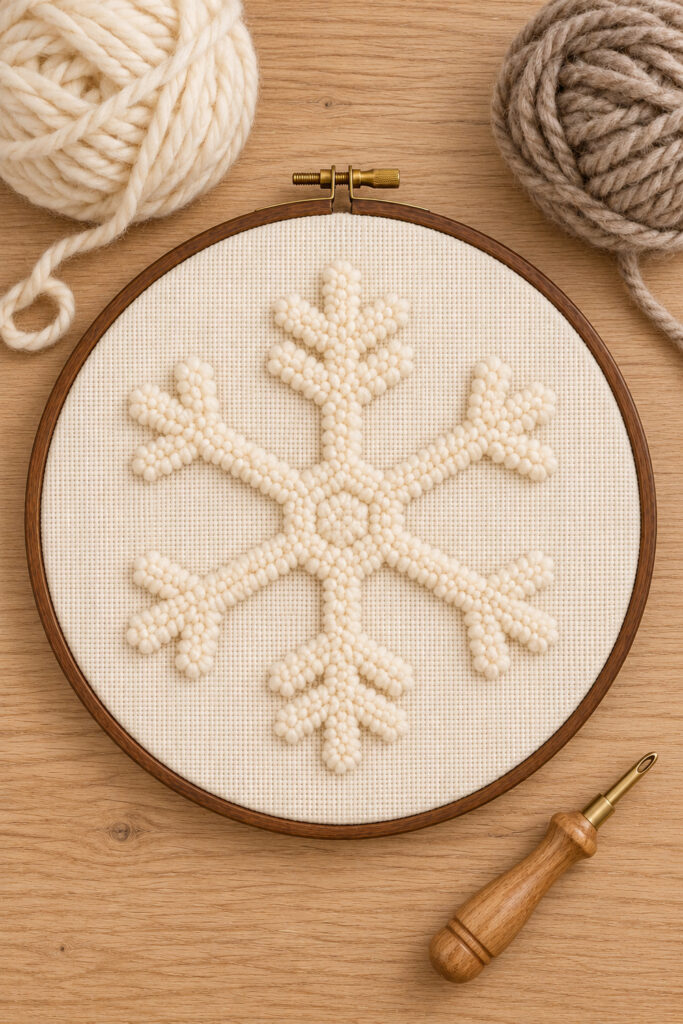
Thread the ivory yarn through the punch needle as directed for that tool. Punch from the marked working back, inserting fully to the tool’s stop or prescribed depth. Withdraw only until the point clears the cloth, then slide to the next stitch with the tip close to the surface. Keep the opening facing the direction of travel as your tool instructions specify.
Start with an outline row inside the snowflake boundary, then fill each broad arm with neighboring rows. Follow the spacing recommended for your needle and check the loop side frequently. The goal is even coverage without stretching the cloth into a hard, crowded patch.
Feed slack yarn freely; tension on the supply can pull out the loops you have just made. Turn the hoop to change direction instead of lifting the tool high. At a color stop, follow the tool maker’s method for bringing the tail to the loop side and trimming it to the surrounding loop height. Do not pull the needle away while it is still dragging yarn through the last stitches.
Complete the six arms and branches. Use the needle tip or another blunt suitable tool to separate loops that obscure the outline, taking care not to snag them. Leave any chosen central background opening unfilled for the oatmeal stage.
4. Fill the Oatmeal Background
Return to the working back and thread the oatmeal yarn. Outline around the ivory shape, staying in the background area, then fill the spaces between arms. Continue in orderly rows toward the outer display boundary.
Turn the hoop over regularly. Use the point gently to untangle neighboring colors at their shared edge rather than cutting a trench between them. If the fabric begins to distort, stop and inspect stitch spacing and tension. Adding still more yarn can make the crowding worse.
Keep the outer display margin filled, but stop before the hoop’s clamped edge so the needle does not strike wood. A narrow plain fabric margin can be hidden beneath the final frame. Do not punch through the working hoop simply to chase the last visible gap.
5. Finish the Surface and Back
Inspect the front in good light. Separate crossed loops and trim projecting yarn ends level with the surrounding pile. Do not shear the whole surface if you want to keep the looped texture that makes this project distinctive.
If using a separate display hoop, transfer the finished cloth carefully and center the design without crushing the loops under the rim. Tighten enough to hold the work flat. Keep at least a couple of inches of spare backing until you are satisfied with the position.
Trim the excess cloth to a manageable allowance, then run gathering stitches around its edge and draw it inward behind the hoop. Secure the thread. If desired, sew a felt circle to the gathered fabric at the back, keeping stitches out of the front loops. Avoid pulling the backing so tight that it distorts the picture.
Tips for Getting the Finished Look
Use two yarns with comparable thickness so one color does not disappear into the other. Keep the ivory arms substantial, and check all six from a distance before filling the final background spaces. The dark frame will supply the strongest outer contrast.
The instructional pictures are illustrative rather than a precise stitch map. Use your drawn design to govern branch spacing and your sample to govern stitch density. Do not redraw the snowflake midway to match small variations in a generated illustration.
Easy Ways to Customize It
Use a smaller hoop if you prefer, but simplify the branches rather than squeezing the same detail into a tiny space. You can also reverse the colors, keeping enough contrast for the outline to remain readable. Avoid changing yarn thickness without another practice sample.
Displaying the Finished Hoop
Hang the finished piece securely on suitable hardware away from moisture, heat, and frequent handling. Use it above a craft cabinet or on a clear winter wall. Keep it out of reach of children and pets who could pull at the loops or hanging hardware.
Final Encouragement
Begin with the sample and one broad arm. Once the yarn feeds freely and the loops stay even, the rest is a matter of repeating the same careful movement. The ivory shape, oatmeal background, and brown border will carry the idea without duplicating every loop in the inspiration.