*This post may contain affiliate links for which I earn commissions.*
Small embroidery hoops give this Christmas tree a handmade focal point. Cream fabric holds simple stitched houses, trees, a stocking, and a candy cane, while red baubles and gold beads fill the spaces between them. A generous velvet bow at the top repeats the red without hiding the branches.
The appeal comes from mixing flat stitched pictures with reflective round ornaments. You can borrow that balance using your own needlework, similar fabric ornaments, or a few finished hoops that suit the tree. The exact illustrated pieces aren’t necessary to make the arrangement feel collected.
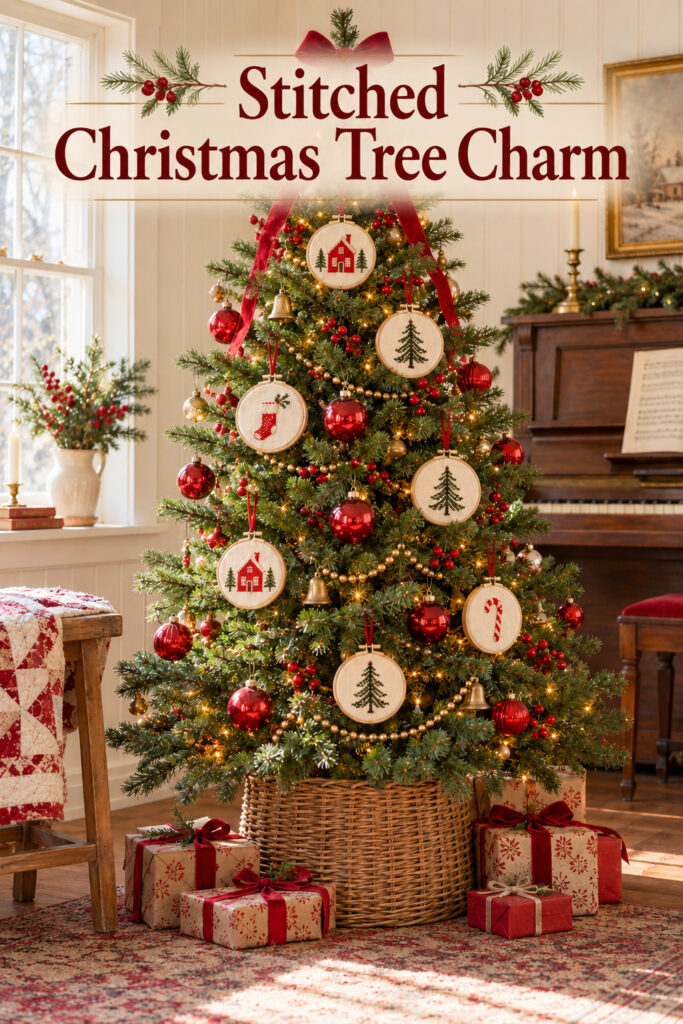
This inspiration image was created with AI and does not depict a verified collection of purchasable ornaments.
Why the Hoops Stand Out Among the Branches
The pale fabric is important. It gives each little stitched design a quiet background against the dark green needles. From across the room, you first notice the cream circles; as you move closer, the individual pictures become readable. That makes the ornaments interesting at more than one distance.
The wooden rings also bring in a softer finish than the glossy red baubles. Their pale brown color connects with the woven tree base and the warm furniture nearby. There are several textures here, but each has a fairly simple shape, so the tree doesn’t feel confused.
Rather than covering every available branch, the hoops follow a loose path down the front. Red ornaments appear at different depths, and the gold bead strands curve between them. The branches still show. That breathing room keeps the stitched details from disappearing into a solid mass of decorations.
Find Miniature embroidery hoops
Browse current Amazon options that can help you recreate this look.
Browse Miniature embroidery hoops on Amazon →As an Amazon Associate I earn from qualifying purchases.
Key Pieces for a Stitched Ornament Tree
Small Wooden Embroidery Hoops
Look for hoops that suit the scale of your tree and the weight of its branches. They should hold the fabric securely, with the tightening screw at the top. Check both the ring and the screw before hanging, particularly if an ornament has been stored for a while.
If you’re making your own, the design needs to leave a visible margin of fabric around the stitching. A picture crammed against the wooden edge is harder to read. Trim and finish the fabric at the back so loose edges don’t catch on needles, and keep the back lightweight.
Cream Fabric and Simple Motifs
The stitched pictures use a limited set of Christmas colors. Red houses and stockings, green trees, and small contrasting details create variety without introducing a different palette on every branch. Linen look fabric, suitable embroidery cloth, or another stable woven fabric can give a related effect.
Use motifs you enjoy looking at rather than choosing the most complicated patterns. A clear tree silhouette may show better than a tiny detailed landscape. If you already have small stitched pieces, compare them together before buying more. Similar backgrounds can unite different designs surprisingly well.
Red Glass Look Baubles and Gold Beads
The red ornaments are the shiny partners to the matte hoops. Some have ribbed surfaces; others look smooth. Keeping those shapes round prevents them from competing with the stitched scenes. Choose ornament materials appropriate for your household and the branches that will hold them.
Gold bead strands provide a smaller repeated highlight. Let them dip gently between supported points instead of pulling them straight across the tree. They should remain separate from any electrical light cords so you can remove and store each layer without a tangle.
A Velvet Bow and a Woven Base
The red bow has long tails that extend down into the upper branches. Its soft surface connects with the fabric ornaments, while its larger scale gives the top a clear finish. Secure it to a suitable branch or trunk support without forcing a thin tip to carry too much weight.
At the bottom, a woven collar surrounds the tree stand. That natural texture repeats the wooden hoops. Use a collar designed to fit around your stand, or keep a basket strictly decorative around a properly supported tree. Water access and electrical connections still need to remain accessible where relevant.
Decorate the Tree in a Useful Order
Put the tree and its lights in place first. Check that the stand is stable and that the tree has enough clearance from furniture and heat sources. The inspiration places it near a window and piano, but your best spot is the one that keeps the room comfortable to use.
Add the largest hoop ornaments before the small fillers. Turn the stitched faces toward the main viewing area and check that neighboring branch tips don’t cross the designs. A hoop can hang slightly deeper in the tree if the pale fabric remains visible, but don’t bury its picture behind another ornament.
Distribute repeated motifs. If you have several trees and two houses, avoid putting all the trees down one side. Move one of the pale circles lower or toward the opposite edge to spread the visual weight. It helps to step back after every few ornaments rather than fixing the whole arrangement at the end.
Hang the red baubles next, placing some nearer the trunk and others toward the tips. This gives the tree depth while keeping the hoops readable on the front. Leave a little space around each stitched design. The fabric backgrounds already act like small signs, so they benefit from a clear outline.
Drape the gold beads loosely, then secure the bow. Check the bow tails from the front and side; they should fall between ornaments instead of covering them. If your ribbon is narrow, a smaller bow with shorter tails can look more natural than an oversized shape that lacks enough body.
Finish at floor level with a few wrapped gifts. The cream and red wrapping in the inspiration repeats the ornaments, but you can use plain paper and ribbon you own. Keep access to the stand and tree lights clear rather than packing the base solidly for the sake of appearance.
Shop Similar Pieces Without Buying a Whole New Set
Look for Miniature Embroidery Hoops
Check the inner opening, not just the overall size. The stitched design has to fit inside that opening with enough blank fabric around it. Smooth wood and a secure screw are more useful than decorative packaging, especially if you’ll reuse the hoops for future ornaments.
Shop Similar Red Ornaments
A small mix of round finishes can add interest while retaining the limited palette. Begin with the ornaments you have and fill only the visible gaps. Too many large baubles will reduce the importance of the needlework that makes this tree distinctive.
Add Gold Bead Garland and Velvet Ribbon
Match the ribbon’s depth of red reasonably closely to the baubles, then let the textures differ. The beads can be a soft gold rather than a highly polished yellow. Both pieces should support the stitched pictures, so stop adding them once the front of the tree feels connected.
Final Styling Tip
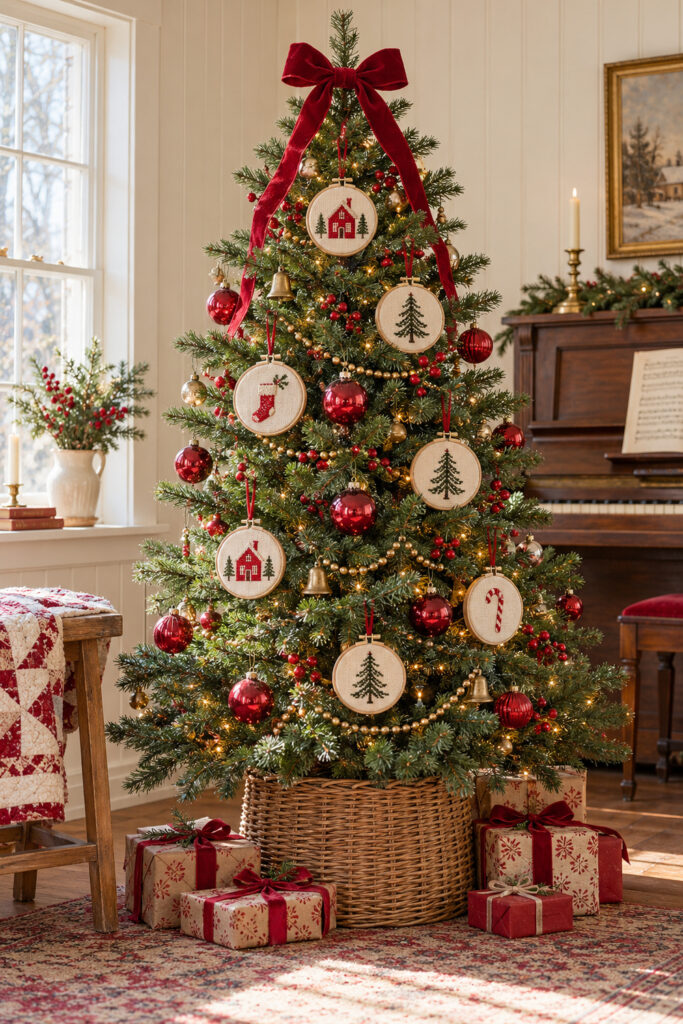
View the tree with its lights switched off as well as on. If the little stitched pictures remain easy to see in ordinary room light, the spacing is working and the hoops will keep their character throughout the day.