*This post may contain affiliate links for which I earn commissions.*
Some Christmas projects make their impact through intricate details. These ornaments take the opposite approach.
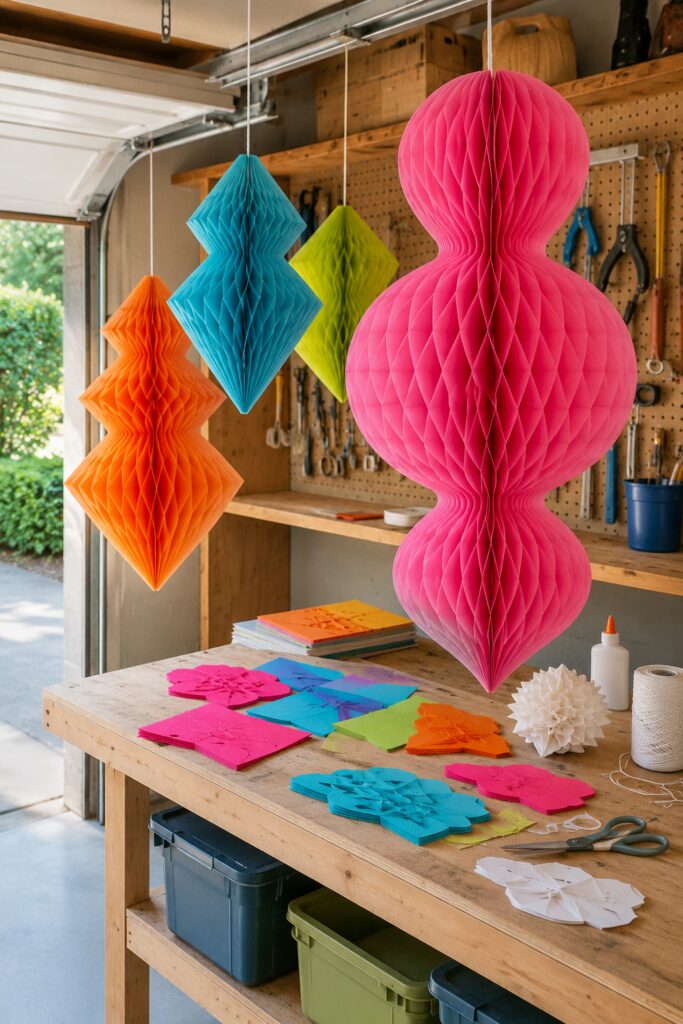
Oversized honeycomb-paper forms hang above a workshop table in hot pink, turquoise, orange, and lime. Their colors are bold, their shapes are simple, and their scale makes them impossible to overlook.
Instead of copying a traditional round bauble exactly, the designs combine spheres, diamonds, and softly pointed sections. The largest pink ornament stacks three rounded forms into one dramatic vertical decoration. The orange version uses three diamonds, while the blue and lime pieces create shorter double-diamond silhouettes.
They resemble festive paper lanterns, but their real beauty comes from the honeycomb structure itself. Light moves across hundreds of paper cells, creating shadows and depth without glitter, paint, or added embellishment.
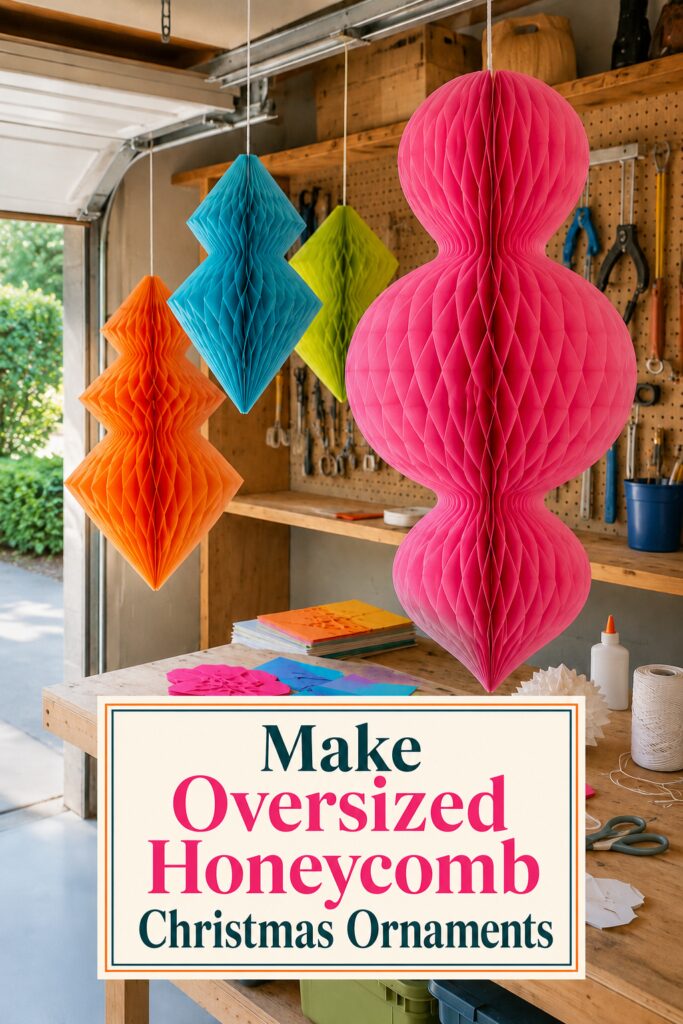
Image disclosure: This inspiration image was created with AI. It is intended to provide decorating ideas rather than represent specific products available for purchase.
Why These Ornaments Look So Dramatic
Honeycomb paper expands from a flat stack into a dimensional form.
As the layers open, the adhesive pattern between them creates a repeating cellular texture. Rounded cuts become spheres, while angled cuts open into diamonds and pointed shapes.
The construction is lightweight enough for overhead display, even when the decorations appear visually substantial.
Scale is also important. A six-inch honeycomb ball is a useful party decoration. A cluster of forms measuring several feet from top to bottom becomes an installation.
The uncomplicated color palette allows the shapes to remain clear. Each ornament uses one saturated shade rather than several competing patterns.
Decide Between Premade Pads and Individual Tissue Sheets
The easiest approach begins with honeycomb tissue-paper pads that have already been glued in a repeating pattern.
These pads can be cut into custom silhouettes, opened, and secured into dimensional forms. They save considerable time because the internal honeycomb structure is already established.
Creating honeycomb paper from individual tissue sheets offers more control over size and color, but it requires careful repetition. Each sheet must be glued along alternating lines so the cells open correctly.
For a first attempt, start with commercial honeycomb pads. Once the opening pattern is understood, a larger custom construction becomes easier to plan.
Standard gift tissue can still be useful for testing templates, practicing cuts, or creating handmade pads. Choose tissue that is consistent in weight and does not tear easily.
Choose Bright Paper Colors
The workshop display uses four highly saturated colors:
- Hot pink
- Turquoise blue
- Vivid orange
- Lime green
White appears in the small sample on the workbench and could be introduced as a fifth color.
These colors feel festive without relying entirely on traditional red and forest green. They would work especially well with colorful, retro, maximalist, or candy-inspired Christmas decor.
If a softer display is preferred, the same designs could be made in blush, pale aqua, butter yellow, mint, and cream.
Use one color per ornament so the structure remains easy to appreciate. Several single-color decorations will look more polished than one ornament assembled from unrelated paper scraps.
Develop the Ornament Silhouettes
Begin by drawing the ornament in profile.
Remember that the cut edge of the flat honeycomb pad will determine the dimensional outline after the paper opens. A semicircular outer edge creates a sphere, while angled edges create pointed or diamond forms.
The image offers several silhouette options:
Three Rounded Sections
The pink ornament includes a medium sphere at the top, a very large central sphere, and a smaller pointed sphere at the bottom.
Three Diamond Sections
The orange ornament uses three stacked diamonds, with the largest at the bottom.
Two Diamonds
The turquoise ornament combines a smaller upper diamond with a larger lower diamond.
Elongated Double Diamond
The lime ornament has a narrow top section and a longer pointed lower section.
Sketch the complete side profile before cutting. Smooth transitions between sections will prevent the opened ornament from looking like separate decorations placed randomly on top of one another.
Make a Reusable Template
Fold a large sheet of inexpensive paper in half and draw one side of the ornament against the folded edge.
Cut through both layers, then unfold the paper to inspect the complete symmetrical shape.
This paper pattern can be adjusted before any honeycomb material is cut. Widen a section, sharpen a point, or smooth a narrow transition until the silhouette feels balanced.
For very large ornaments, create the template from taped sheets of paper, kraft paper, or lightweight poster board.
Mark the center line, top hanging point, widest areas, and connection points between sections. These reference marks will help when transferring the design.
If the honeycomb pad is smaller than the final ornament, plan separate sections that can be joined rather than attempting one oversized cut.
Cut the Honeycomb Paper Carefully
Place the honeycomb pad on a self-healing cutting mat.
Trace the template lightly without pressing hard enough to damage the upper tissue layers. Use a sharp precision knife for controlled curves and narrow transitions.
Make several light passes instead of forcing the blade through every layer at once. Excessive pressure can compress the honeycomb cells, shift the stack, or produce torn edges.
A metal ruler can guide straight cuts, but curved areas should be cut slowly by hand. Rotate the mat when necessary rather than twisting the knife into an uncomfortable angle.
Keep the protective cap on the blade whenever it is not in use. Replace dull blades promptly because they are more likely to snag the tissue.
Scissors may work for thin pads or loose tissue, but a craft knife generally provides more control through a glued stack.
Test the Form Before Final Assembly
Open the cut pad gradually and observe the shape as it expands.
Do not force the paper. If layers remain stuck, separate them carefully near the edge rather than pulling on the complete ornament.
Bring the two flat backing sides together temporarily with clips, removable adhesive, or small magnets. Check the symmetry from several angles.
If one section looks too narrow, too round, or visually unbalanced, make notes before cutting the next ornament. A small template adjustment can substantially improve the opened shape.
Confirm that the top and bottom points remain centered. An asymmetrical cut may cause the ornament to lean when suspended.
Join Multiple Honeycomb Sections
Extremely large designs may be easier to build from separate forms.
For example, the pink ornament could be constructed from three individual honeycomb spheres joined vertically. The orange ornament could combine three diamond forms.
Align the center points carefully before connecting the sections. Use reinforced paper tabs, hidden internal supports, or another lightweight joining method appropriate for the material.
The connection should be strong enough to support the lower sections without visibly crushing the paper.
A continuous hanging cord can pass through or alongside all the sections so the bottom forms are not supported only by tissue-paper glue.
Test the complete weight while holding the ornament close to the worktable. Do not install it overhead until every connection remains secure.
Apply Adhesive With Precision
Honeycomb construction depends on controlled lines of glue.
A fine-tip applicator makes it easier to place narrow lines without soaking the tissue. Too much adhesive can spread into neighboring areas and prevent the cells from opening properly.
When constructing a pad from loose tissue, alternate the glue-line positions from one sheet to the next. A simple guide beneath the paper can help maintain a consistent pattern.
Allow each layer to settle before adding another. Follow the adhesive manufacturer’s drying instructions rather than opening the finished stack too soon.
Choose an adhesive suitable for thin paper that dries clear and remains flexible. Test it on spare tissue first. Some wet glues may wrinkle, bleed through, or discolor bright paper.
Keep the applicator tip clean so dried glue does not produce sudden blobs.
Add Reinforced Backing Panels
The two outer faces of the honeycomb pad may need sturdier backing.
Cut matching panels from lightweight cardstock or thin poster board. These panels give the ornament a cleaner closing surface and provide better support for magnets, tabs, clips, or hanging loops.
The backing should follow the cut silhouette without extending visibly beyond the tissue edge.
Avoid thick cardboard that adds unnecessary weight or creates a wide seam. The purpose is reinforcement, not structure heavy enough to support the ornament independently.
If the decoration will be stored flat and reused, consider a closure that can be opened without tearing the tissue. Small magnets, reusable tabs, or discreet clips may work better than permanently gluing the final sides together.
Attach the Hanging Cord Securely
Use strong cotton cord, fine braided line, or another material rated for more than the ornament’s completed weight.
The cord should connect to a reinforced point rather than a single tissue layer. For a stacked design, it can extend through the length of the ornament to support each section.
Keep the hanging line visually simple. The white cord in the image nearly disappears against the ceiling and lets the bright paper remain dominant.
Test every ornament near the worktable before lifting it overhead. Hold it by the cord for several minutes and watch for stretching, tearing, or shifting.
The ceiling attachment must also suit the surface and weight. Adhesive hooks are appropriate only when their instructions confirm compatibility with the ceiling material and the completed load.
Arrange Several Shapes at Different Heights
The four ornaments are not lined up evenly.
The large pink ornament hangs closest to the foreground and lowest in the arrangement. The orange decoration occupies the left side, while the blue and lime pieces sit farther back.
Varying the heights keeps the pointed ends from forming one straight row. It also allows smaller ornaments to remain visible behind the largest form.
Leave enough space for the paper structures to rotate gently without colliding. Honeycomb tissue can crush if two large pieces repeatedly rub together.
For a home display, three ornaments may be enough. One large statement piece with two smaller companions can create the same visual rhythm without filling the ceiling.
Use Them as Ornaments, Not Heat-Producing Lanterns
These decorations have lantern-like forms, but ordinary honeycomb tissue paper should not surround candles, incandescent bulbs, or other heat sources.
If illumination is desired, use only cool-running battery lights specifically intended for enclosed paper decorations. Confirm that the light manufacturer permits the planned use.
The safest option is to light the ornaments from outside. A nearby lamp or small spotlight can emphasize the cellular texture without placing anything inside the paper.
Keep the decorations away from fireplaces, heaters, cooking areas, exposed bulbs, and direct contact with electrical fixtures.
Never leave an experimental illuminated paper decoration operating unattended.
Find the Right Place to Display Them
Oversized ornaments need both vertical space and secure hanging points.
Possible locations include:
- A tall entry hall
- A vaulted living room
- An enclosed porch
- A party room
- A large studio
- A covered stair landing
- A retail or event display
- A spacious dining area
Keep the ornaments away from ceiling fans, vents, sprinklers, smoke detectors, doors, and busy walkways.
Do not suspend them where someone can pull the cord, hit the pointed end, or become entangled.
If the ceiling is low, make smaller versions and hang them above a table, along a wall, or inside an open doorway that is not used for walking.
Store the Ornaments for Reuse
One advantage of honeycomb decorations is their ability to fold nearly flat.
Open the closure carefully, bring the backing panels together, and protect the tissue with clean paper. Do not press the folded pad beneath heavy decorations.
Store each color separately if there is any risk of dye transfer. Keep the ornaments in a dry location away from humidity, insects, and direct sunlight.
Label the outside of each storage sleeve with the color, silhouette, and hanging length. This will make it easier to recreate the arrangement next Christmas.
Inspect the cord and reinforced attachment points before rehanging them.
Shop Similar Pieces
Start With Honeycomb Tissue-Paper Pads
Choose premade pads in bright colors to simplify the internal gluing pattern.
Add Large Sheets of Colored Tissue
Use them for templates, tests, additional layers, or fully custom honeycomb construction.
Cut Shapes With a Precision Knife and Mat
A sharp blade and protected work surface make curves and narrow transitions easier to control.
Apply Adhesive With a Fine Tip
Use narrow, consistent glue lines to preserve the honeycomb structure.
Hang the Ornaments With Strong White Cord
Support each section from a reinforced point and match the ceiling hardware to the surface.
Use Ready-Made Honeycomb Balls as a Shortcut
Combine several purchased spheres to create stacked ornament silhouettes without building every honeycomb pad from scratch.
Final Styling Tip
Vary the silhouette as well as the color. A group of identical honeycomb balls will look like party decorations, while a sphere, double diamond, and elongated triple form will feel like a custom Christmas installation.