*This post may contain affiliate links for which I earn commissions.*
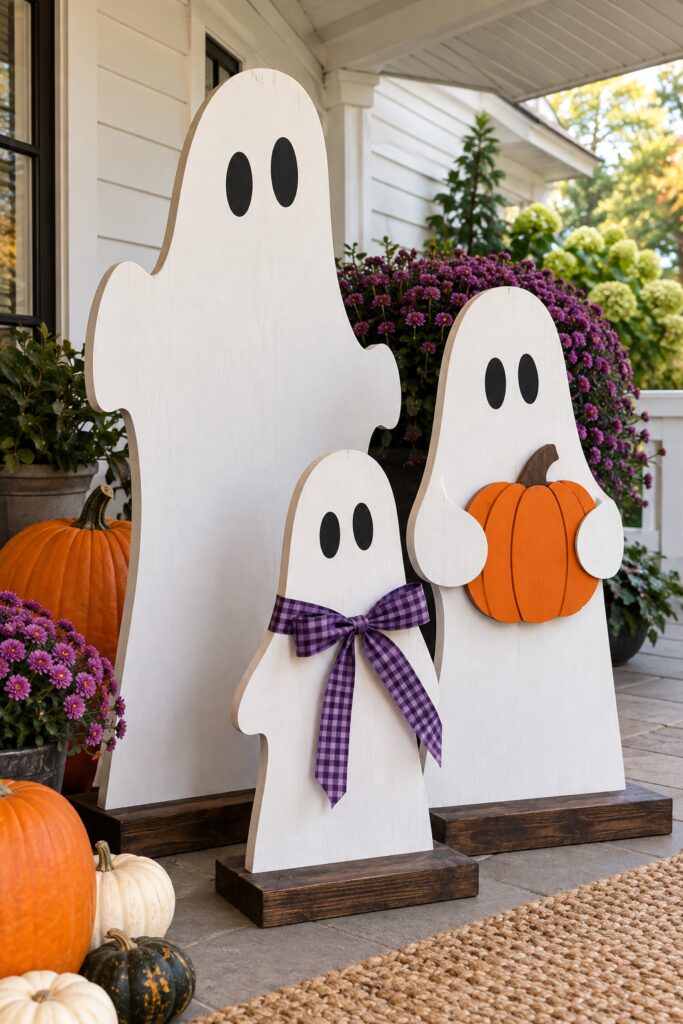
The three white ghosts in the inspiration image stand at different heights on dark wood bases. One wears a purple checked bow, while another holds a bright orange pumpkin. This tutorial turns that playful patio scene into a set of cut and painted plywood figures with a practical braced base. The sizes are suggestions: adjust them to your covered space and the sheet goods you have.
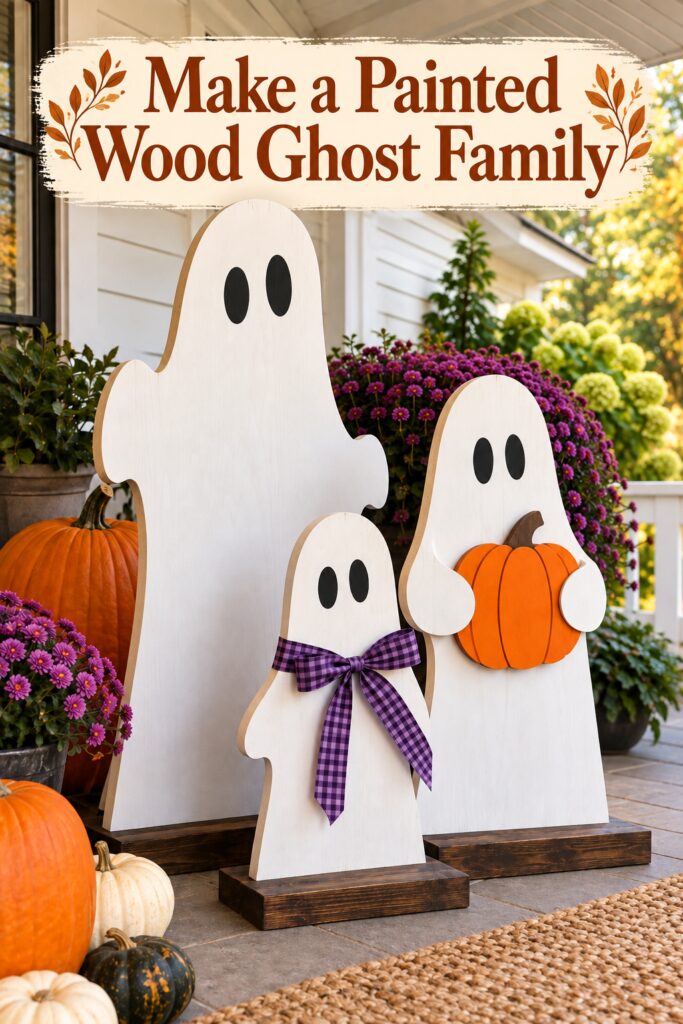
The inspiration image and the instructional demonstration images were created with AI. The steps below describe a practical construction approach, not a photographed build of the pictured objects.
What You Are Making
Make three flat ghost silhouettes in graduated sizes, each screwed to its own wide dark plank base and held upright by two rear braces. A suggested height range is about 18 to 42 inches, with the largest broad enough to read clearly from the patio. Their simple black oval eyes and softly irregular edges create the friendly expression. The smallest gets a removable bow; the medium ghost gets a separate painted plywood pumpkin.
The image suggests thick sculpted forms, but cutting flat plywood and stabilizing it from behind is more realistic for a home project. From the front, the braces can be hidden by the silhouette. Use the finished pieces on a covered porch or patio, or choose materials and finishes rated for the degree of weather exposure they will actually receive.
Materials and Tools
- Exterior-rated plywood about one half inch thick sized for three silhouettes and a small pumpkin accent
- Three straight wood planks wide and long enough to form stable bases plus six triangular wood braces
- Exterior wood screws of suitable length for the plywood and base and wood glue approved for the setting
- Exterior primer white paint black paint orange paint and a dark exterior stain or paint for bases
- Sandpaper or sanding block brushes and a pencil
- Large paper or cardboard for templates and painter tape
- Purple checked ribbon for a removable bow
- Jigsaw drill and bits
- Wood clamps
- Eye protection and a dust mask appropriate for cutting wood
Before You Start
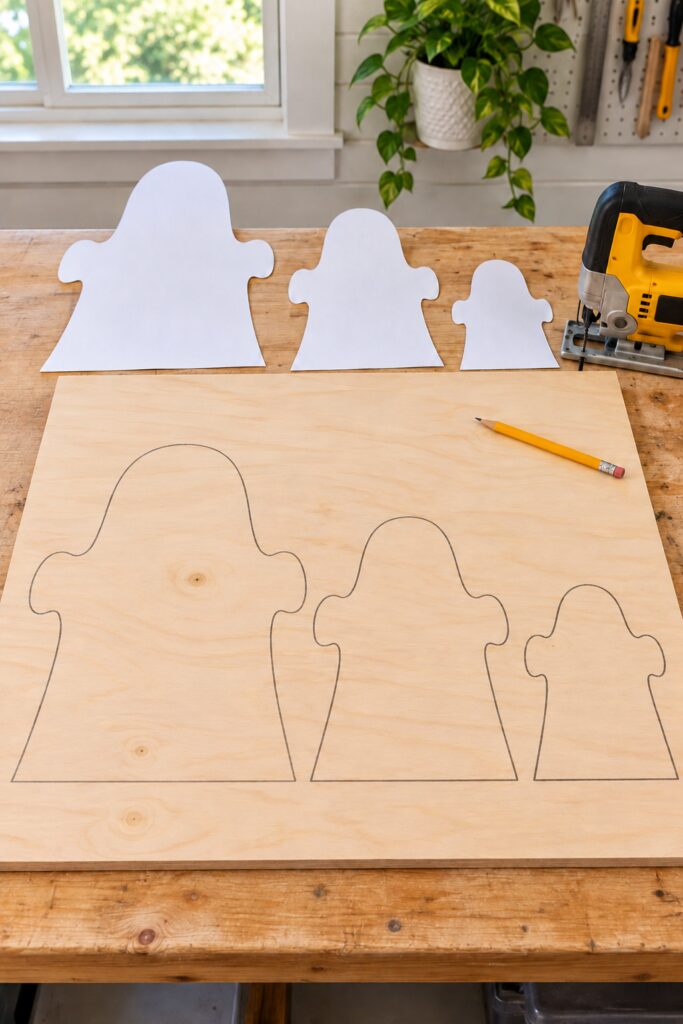
Measure the area where the figures will stand. Lay out three paper templates at different heights, using a rounded head, loose sweeping sides and modest arm bumps. Keep the bottom edge straight so it can sit against a base. Draw oval eyes on the templates to check expression and spacing before you cut anything. Place the shapes side by side and confirm that the smallest remains easy to see in front of the larger two.
Choose base planks with enough front-to-back depth to resist tipping. A useful starting point is a base that projects several inches both in front of and behind each silhouette, but increase its depth for taller or wider pieces. Test the arrangement on a flat floor before fastening it. Cutting and drilling should be done on a secured work surface with eye protection and the tool maker’s guidance.
Step 1: Trace and Cut the Three Shapes
Tape each paper template to the plywood and trace its outline. Arrange the shapes so there is room for the jigsaw to turn around each curve without crossing the next outline. Cut slowly around the head and arm bumps, keeping the sheet supported and clamped. Make the small pumpkin accent separately from an offcut. A simple flattened round shape with a short stem will remain readable from a distance.
If you are unfamiliar with a jigsaw, practice on a spare offcut first or ask the lumberyard or a capable helper to make the main cuts. The goal is a smooth silhouette, not exact symmetry. Slight differences between the three profiles make them look like a family.
Step 2: Smooth, Prime and Paint
Sand the cut edges, the faces and especially the lower corners until there are no splinters. Wipe away dust. Apply primer to the faces, edges and backs, following its drying instructions. Paint the ghosts an opaque warm white and the oval eyes black; keep the eyes separated enough to read at a distance. Paint the small pumpkin orange, with a darker stem or shallow curved lines if desired.
Finish the base planks in a dark wood tone or dark paint. Coat all exposed edges and the underside according to the finish directions if the figures will be used outside. Let the coatings dry fully before assembling, since pressing a damp painted edge against a base can spoil the finish and weaken a joint.
Step 3: Build the Stable Bases
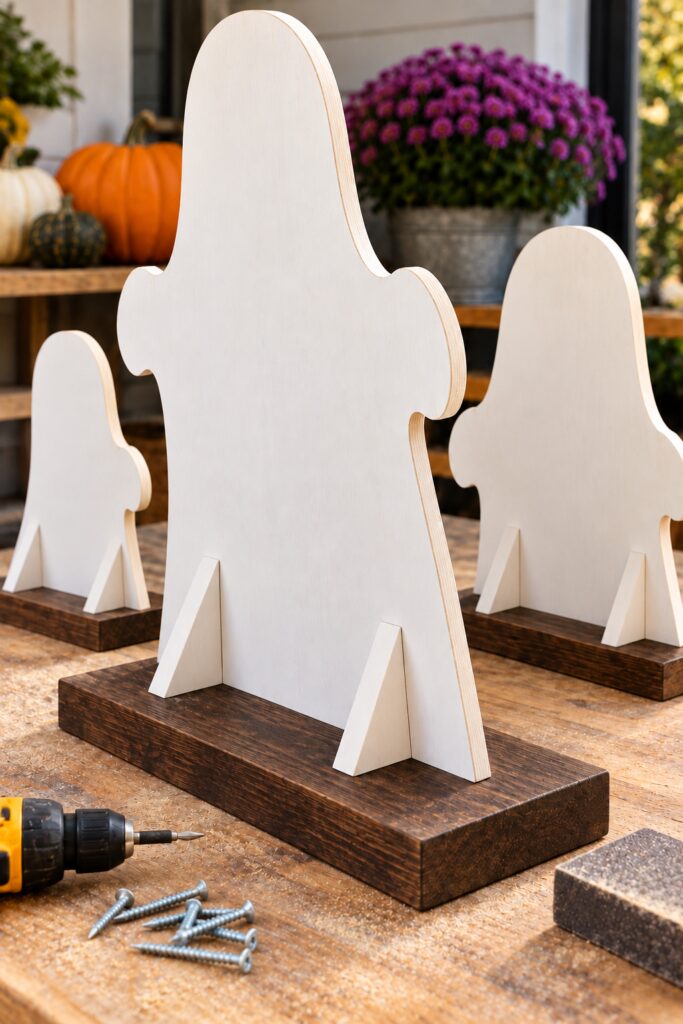
Mark the center line of each plank. Stand the bottom edge of the matching ghost on that line and check the balance with a helper holding it upright. Predrill appropriate pilot holes through the underside of the plank and into the plywood edge where the material allows; do not depend on edge screws alone. Add two triangular braces behind each silhouette, one near each side, attaching them into solid wood on the plank and the back face with appropriately sized screws and exterior-rated glue.
Check screw length against the actual wood thickness before driving it so no point emerges through the front. Let the glue cure as directed, then gently test each figure on a level surface. If a tall one rocks or tips under a light push, widen or weight its base before displaying it. The braces are part of the structure, even though they disappear from the main front view.
Step 4: Add the Bow and Pumpkin
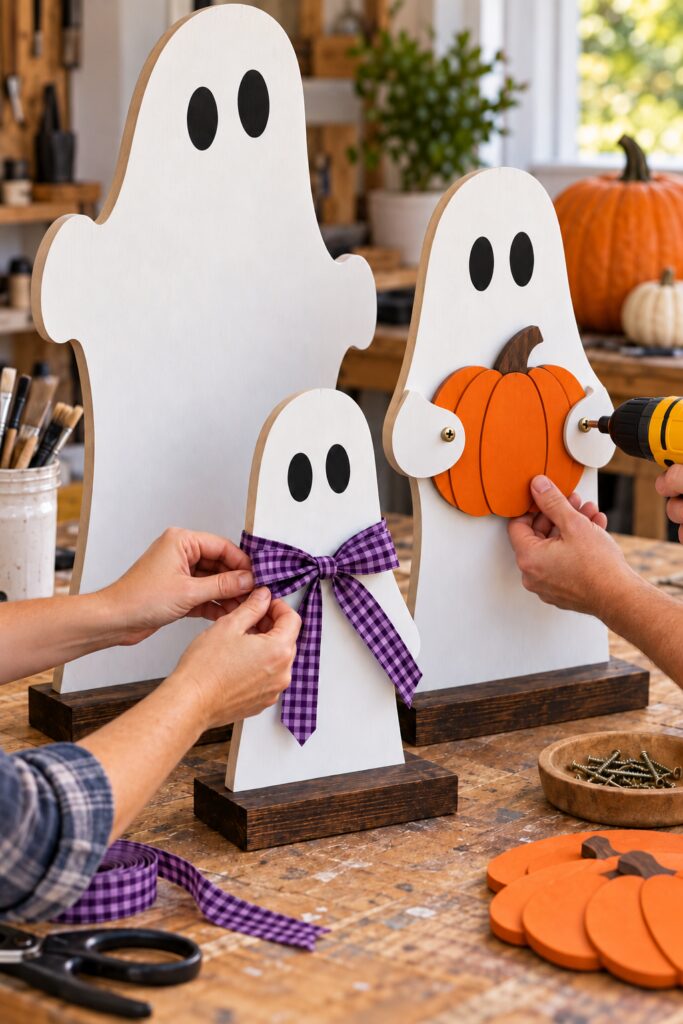
Tie a purple checked ribbon around the smallest ghost in a loose, generous bow. A short removable tie or small fastener on the back can keep it from slipping without damaging the painted front. For the medium ghost, position the separate orange pumpkin across its lower front, making sure it does not cover the eyes or protrude beyond the base. Predrill and secure it from the back with short screws if the layers permit, or use an exterior-rated construction adhesive according to its directions.
The pumpkin in the inspiration appears to be held by small ghost arms. Trace a pair of arms only for the medium sized ghost and round the shape.
Secure a screw through one hand, into the pumpkin shape, and then into the body of the ghost on each side. This will give the impression of folding hands holding on to the pumpkin.
Keep the tall ghost plain so the three figures do not compete for attention. Touch up visible screw holes or edges with paint and allow the final finish to cure.
Tips for the Finished Look
Arrange the tall ghost behind and slightly to one side of the other two. Put the small bow ghost toward the front, and turn the pumpkin ghost just enough for the accent to show. The dark planks anchor the white silhouettes against a light patio wall. Purple mums and pumpkins can echo the bow and orange accent, but leave some space between the bases so each figure reads as an individual.
Easy Ways to Customize the Family
Change the heights to fit a shallow porch, or make only two figures if a trio would crowd the entrance. A narrower ribbon creates a quieter accent; a broader purple check makes the smallest figure more playful. You could also swap the orange pumpkin for a flat painted candy pail. Keep the black oval eyes consistent across the set so the figures still look related.
Displaying the Ghosts
Set the figures on a flat covered patio or porch away from a door swing, steps and the main walking route. Wind can catch a broad plywood shape, so add discreet weights to the bases or secure the arrangement appropriately for your site. Bring indoor-finished pieces inside during wet weather. If the bow becomes damp, remove and dry it separately rather than letting moisture sit against the wood.
The charm comes from the three different heights, clear white silhouettes and two small color accents. Once the bases stand securely, you can make those details your own without copying every object in the imagined patio.