*This post may contain affiliate links for which I earn commissions.*
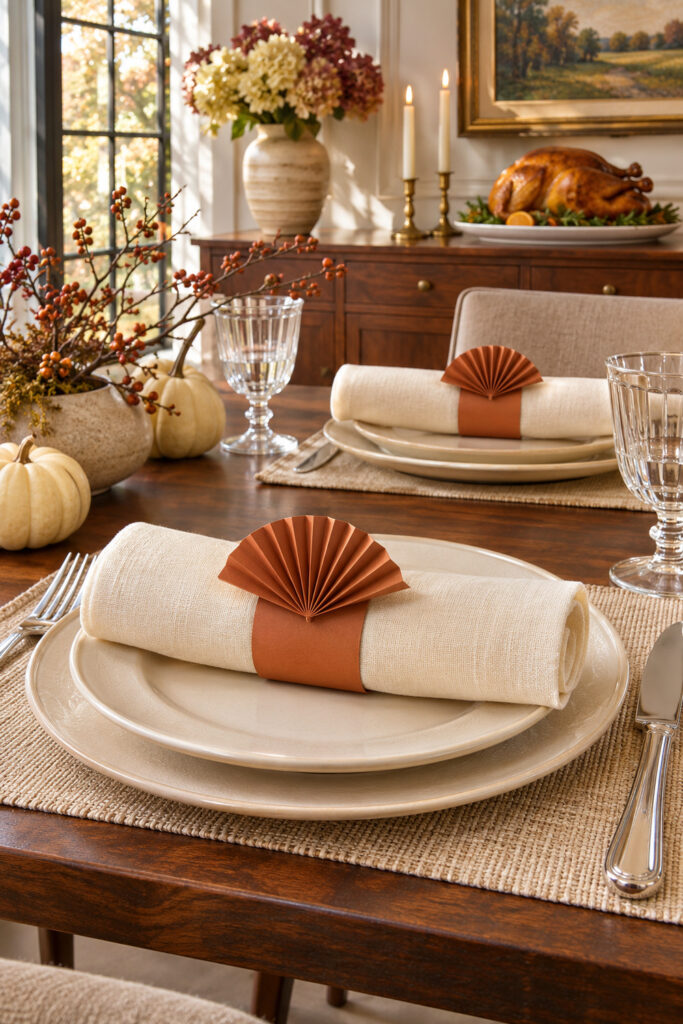
A small paper fan gives an ordinary cloth napkin a Thanksgiving finish. In this setting, the rust-colored paper stands out against a cream roll, and the same shape appears at the next place. You can make a set with cardstock, scissors, a ruler, and craft glue. The size is easy to change once you’ve made one sleeve that fits the napkins you own.
How the fan sleeve is built
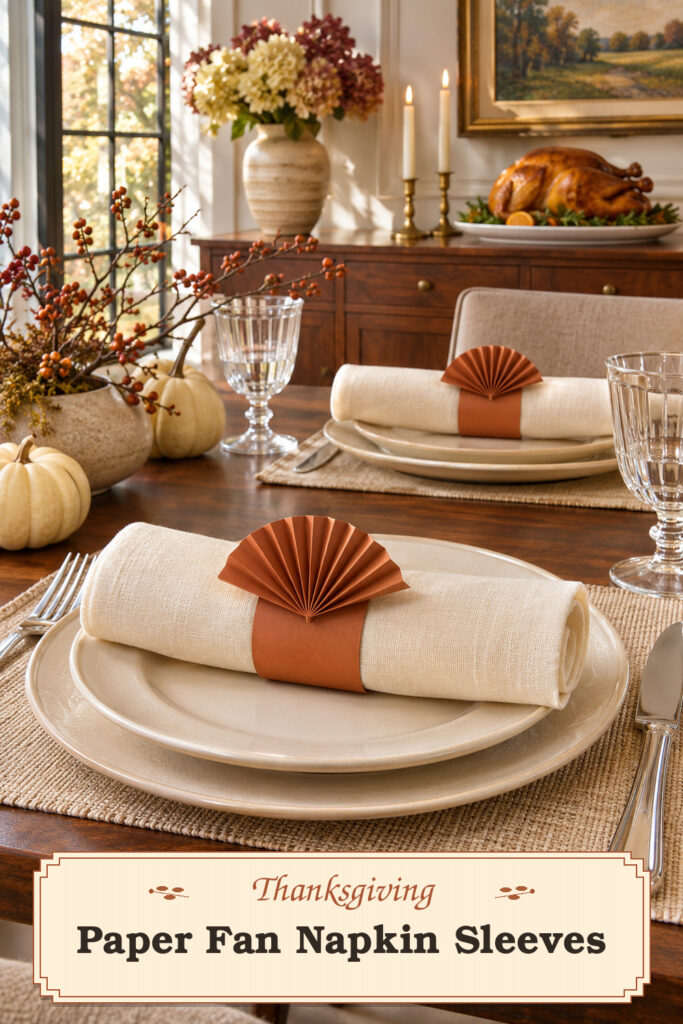
The inspiration and instructional images were created with AI. The tutorial describes a practical way to make similar napkin sleeves.
Each holder has two parts. A straight strip curves around a rolled napkin to form the sleeve. A second piece folds back and forth into an accordion. The accordion opens into a fan, which sits on top of the band. The napkin slips in and out so the paper can stay intact.
The inspiration shows a broad fan with a clear row of ribs. A shorter version is easier to keep open, especially when the napkins have to travel from the kitchen to the table. The cream cloth is a good background because it shows the edge of the band and each fold. Start with one before you decide how many to cut.
Materials and tools
- Matte medium-weight terracotta cardstock for both the bands and the fans
- Cream cloth napkins or other napkins you plan to use at dinner
- Ruler, pencil, sharp scissors, and a scrap sheet for testing
- Optional scoring board and bone folder for making even folds
- Quick-setting paper craft glue and a scrap of clean paper for catching drips
- Small spring clips to hold paper joins while they dry
- Optional permanent double-sided craft tape for the overlap on each sleeve
Step 1 Size the band and cut the fan paper
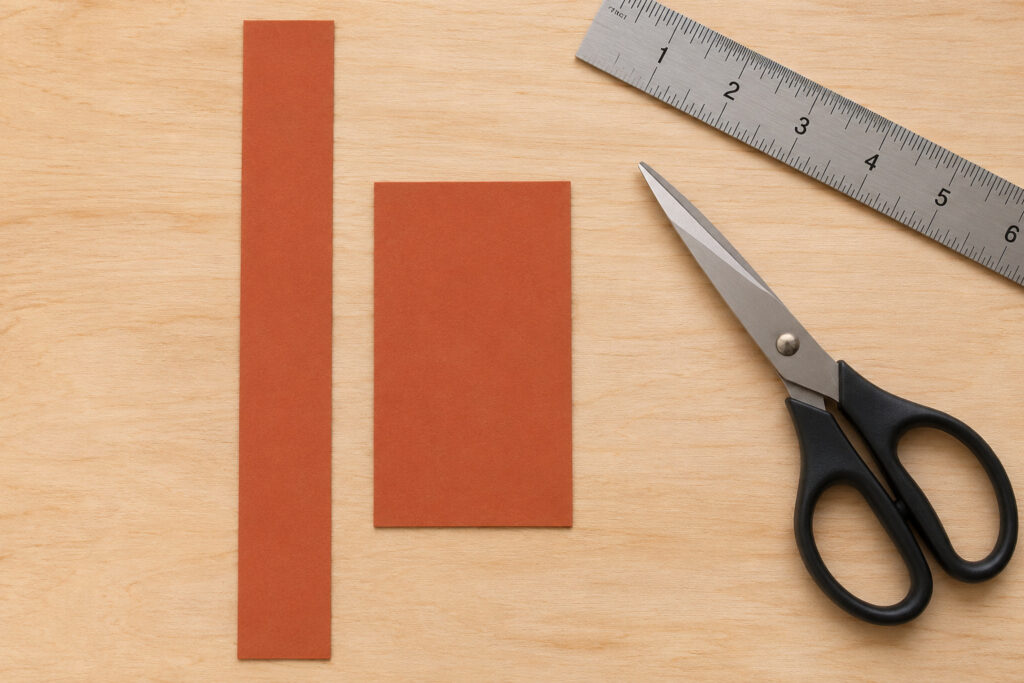
Roll one napkin in the shape you want to use at the table. Wrap a scrap paper strip around the middle, allowing the ends to overlap by about half an inch. The band should slide easily along the cloth without flattening the roll. Mark the length. Unwrap the scrap and use it as a pattern for the cardstock strip.
A band about an inch wide is a useful starting point. A wider band will hide more cloth. Cut a second rectangle for the fan, roughly 2 inches high and 4 inches wide. The shorter dimension becomes the height of the folds. If the finished fan looks too wide for the plate, trim the rectangle before you make the rest.
Step 2 Fold a short accordion
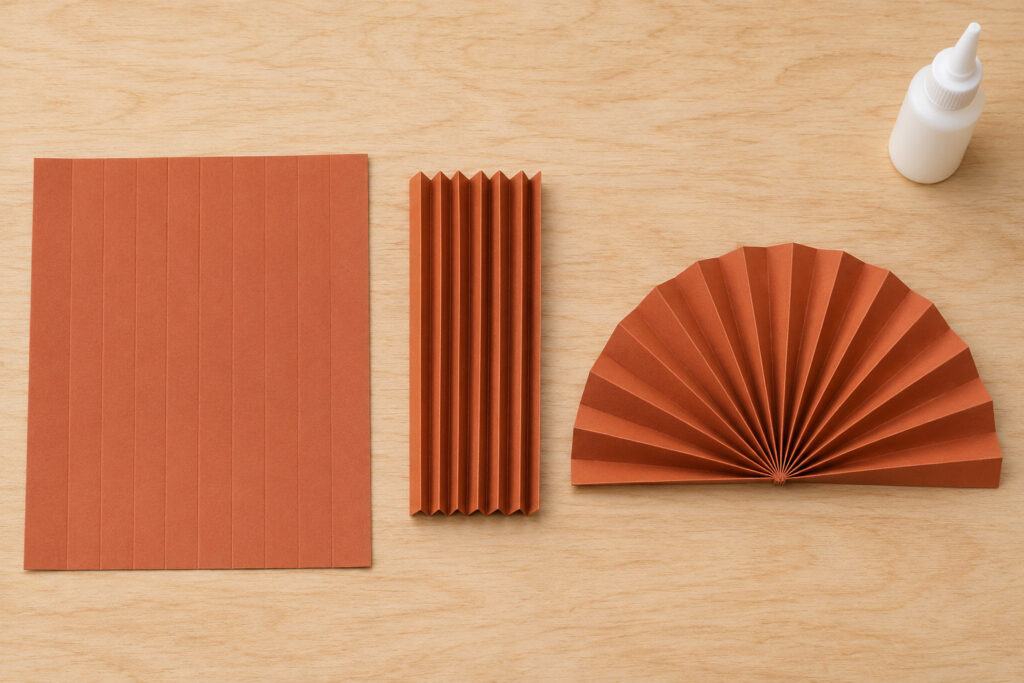
Put the rectangle on the table with a long edge facing you. Mark even spaces along that edge, about a quarter inch apart. Lightly score straight lines across the shorter dimension with a blunt scoring tool. Press just enough to guide a fold. The paper should stay whole. If you skip scoring, use the ruler to help start the first crease, then fold each new section against the last.
Make the first fold along a scored line and turn the paper over for the next one. Keep turning the paper over after each fold. The strip will grow into a small stack with peaks and valleys. Press the stack between your fingers to make the folds even. Check that the top and bottom edges line up before you open it.
Hold the folds together at the bottom, keeping the opposite edge free. Open the top gradually until it forms a half fan. Add a tiny bit of paper glue between the folds at the pinched base so they stay together. Hold the base with a light clip until the glue sets, following the glue directions. If the clip wants to slip, put a small scrap over the point to give it a better grip.
Step 3 Close the sleeve and attach the fan
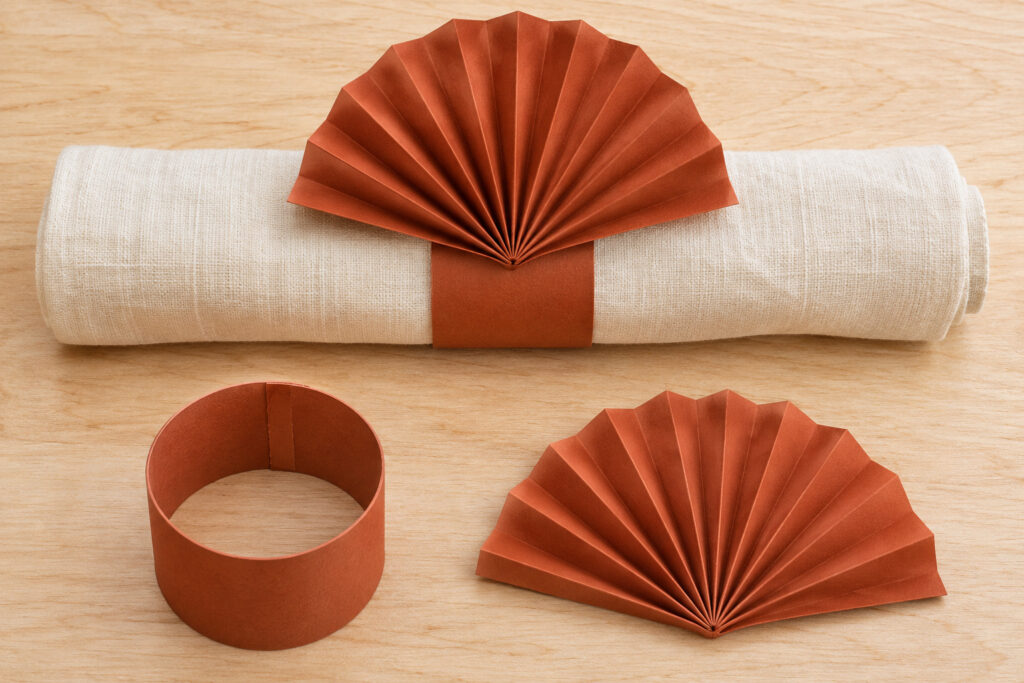
Curve the band around the napkin again to check the fit, then slide the napkin out. Join the short ends of the strip with about half an inch of overlap. Use a narrow line of glue or a strip of permanent double-sided tape inside the overlap. Keep adhesive away from the exposed edges. Hold the sleeve closed until the join stays put.
Turn the sleeve so the overlap sits at the back. Place the pinched end of the fan against the opposite side, keeping the folds open above it. A small dab of craft glue where the base touches the band will usually do the job. If the fan only touches along a narrow point, flatten a small bit of the back at its base to make a wider contact patch. Let everything dry before you put cloth inside.
Slide the napkin into the sleeve and turn the fan upright. If the sleeve twists too easily, unroll the napkin and roll it a little wider so it fills the space. If the fan tips forward, let it rest against the cloth while you decide whether its base needs a wider contact point. Once the fit works, make the remaining sleeves to match the first.
Make the place settings feel like a set
Put the first finished napkin across the middle of an empty plate. The fan should be easy to see from the chair without covering the napkin ends. Turn the join to the underside so only the smooth paper shows. Compare two settings side by side. If the fans open to different widths, gently press the wider folds in before you set the rest out.
Warm terracotta is a useful color for Thanksgiving because it works with cream dishes and dark wood. You can use two close shades of rust if you need to finish a set from spare sheets. Repeat each shade more than once around the table so the change looks planned. If your centerpiece is already colorful, leave the paper plain so the fold stays the main detail.
Batch the work for a larger table
Cut every strip first, using one paper pattern. Then cut the fan rectangles and score them in a group. It’s easier to keep your spacing even when you repeat one action at a time. Leave the glued fans on a clean tray or counter in a single row until they’re dry. Check the point on the first one before gluing the next batch so you know it opens to the size you want.
Store the sleeves in a shallow box after the meal if the paper is clean and dry. You can lay them on their sides with the fans facing up, then put a loose sheet of tissue between rows. If one band is stained, you can save its fan and glue it onto a new strip later.
If the paper cracks at the folds, try a lighter sheet for the fan and keep the thicker stock for the band. Test any change on one sample. The folds should stay crisp without a line of white showing through the terracotta surface. Keep the trial piece to check the width as you cut the rest.
Set the last plate
Test the sleeve with the actual napkin at each place. A thicker cloth can change the fit even when the rolls look the same. When the fan stands up and the napkin slides out with an easy pull, you’re ready to set the table.