*This post may contain affiliate links for which I earn commissions.*
Three oversized textile stamps turn this wall into a Christmas display with a sewing room personality. The tree, stocking, and red bow are familiar holiday shapes, but the scalloped cream edges make them feel like a collection. Red running stitches tie the panels together and give the pale background a clear outline against the wall.
Below them, an oak sewing cabinet holds a spool tray, folded fabric, a pincushion, and a pitcher of greenery. Those details make sense beside the quilted artwork, but the cabinet isn’t packed. There’s room to appreciate the wood as well as the cloth. The idea is useful for a craft room, a hallway chest, or any small surface where Christmas decorating can borrow from something you enjoy.
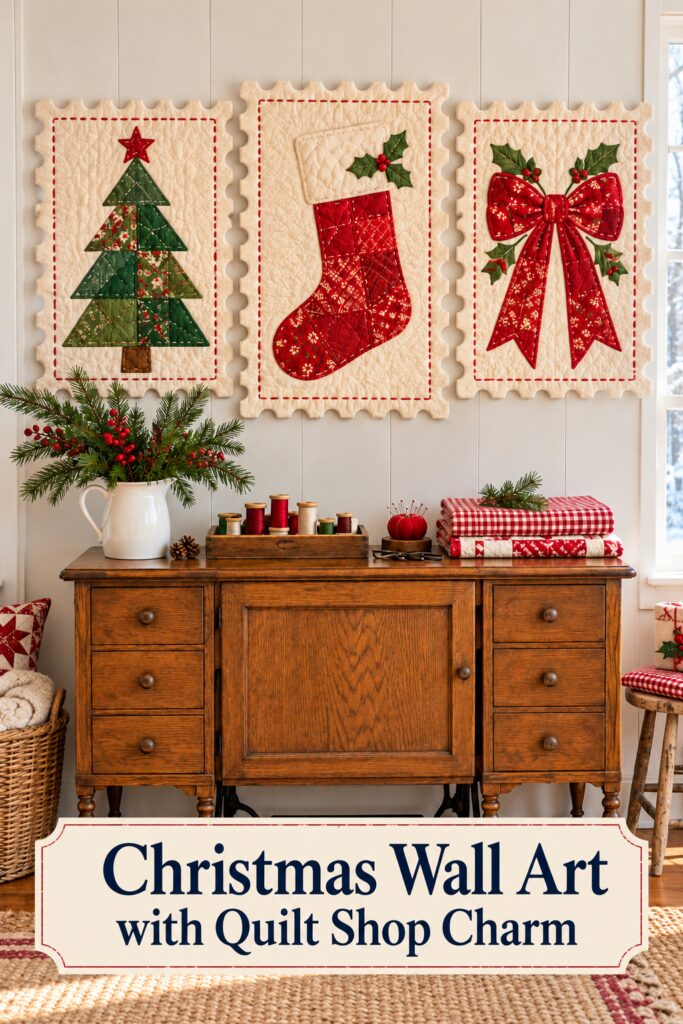
This image is AI generated inspiration and similar pieces can be used to recreate the decorating effect.
Keep the Postage Stamp Silhouette
The cream scalloped borders are the detail worth protecting when you adapt this look. Without them, the panels would become three ordinary Christmas pictures. With them, different motifs belong to the same playful little collection, even though there are no words or postal marks.
Look for textile art with a clearly defined outer edge and a simple central motif. A small quilted hanging, an appliqued panel, or fabric art mounted on a suitable support can suggest the same idea. These are alternatives to investigate, rather than exact finished versions of the AI objects.
Find Christmas Textile Wall Hangings
Browse current Amazon options that can help you recreate this look.
Browse Christmas Textile Wall Hangings on Amazon →As an Amazon Associate I earn from qualifying purchases.
Build a Wall Group That Reads as One Set
The middle stocking panel sits slightly higher than the two side pieces. That small rise gives the group a gentle arch above the cabinet. You can use that arrangement if your wall has enough height, or line the tops up for a quieter effect in a room with lower ceilings.
Lay paper templates on the wall before committing to hanging positions. Mark the full outer edges, including the scallops, so you can judge the actual gaps. Measuring only the rectangular centers could leave the scalloped edges closer together than you intended.
Keep the spaces between panels narrow enough that the group reads together, but wide enough for the individual stamp outlines to stay clear. View the templates from the doorway as well as from the cabinet. Small shifts are easier to make while you’re still moving paper around.
Use hanging methods that suit the weight and construction of the pieces. Soft textile panels may need a sleeve, concealed bar, or backing to keep them hanging as intended. Follow the maker’s instructions and avoid attaching a substantial hanging solely through a decorative scallop or a few visible stitches.
Let Cream Fabric Connect the Holiday Motifs
The shared cream ground makes the green tree and red shapes feel related. It also creates a light area above the darker cabinet. If your own Christmas textiles contain several prints, a consistent background can help them look like a deliberate set rather than unrelated seasonal finds.
The image uses patchwork and stitched texture within broad, readable silhouettes. That balance matters. A tree with a clear outline still looks like a tree from across the room, even when several fabrics appear inside it. Tiny detailed scenes would need closer viewing and could lose impact above furniture.
Choose one dominant red and one family of greens, then let small print differences add interest. They don’t need to match exactly. Repeating the same general warmth of cream across all three panels will usually do more to unite the group than finding identical patterns for every motif.
Give the Cabinet a Sewing Room Connection
The spool tray works because its long low shape sits below the wall art without hiding it. It also gathers many little objects into one contained group. If you display spools, choose a shallow tray that lets you see them and keeps them from rolling around the top.
A small folded stack of fabric at the other end repeats the panels’ textile texture. Place the folds toward the room so the stack has a tidy edge, and keep its height low enough that the wall art still feels separate. You can use fabric you already have instead of buying seasonal cloth purely for display.
The pincushion adds a rounded red detail among the straight lines. In a working craft room it can stay useful; in a shared hallway, put sharp tools and pins away rather than leaving them within easy reach. The decorating connection survives perfectly well with a closed sewing box or a small red fabric ornament.
You don’t need an antique sewing cabinet for the arrangement to work. A plain chest gives the wall group the same horizontal base. Keep the styling connected to cloth, stitching, or handmade textures so the display retains its character when the furniture changes.
Balance the Greenery with the Fabric
The white pitcher holds a loose evergreen arrangement with red berries. Its pale surface connects to the quilted backgrounds, while the branches provide a different texture from the folded fabric. A smaller pitcher or vase can do that job on a shallow cabinet.
Keep the tallest stems to one side rather than directly in front of the lowest panel. This lets the greenery frame the wall group instead of covering a piece of it. Try the vase in position before filling it, then turn the arrangement until the branches point away from the artwork.
For a living workspace, keep greenery and any water container clear of fabric you need to use and finishes you want to protect. A secured faux spray can be more practical near stored cloth. Avoid placing loose needles, berries, or damp stems where they’ll get mixed into an active sewing project.
Adapt the Set to Your Available Wall
If three large pieces overwhelm the space, use one stamp shaped panel above a narrow chest and repeat its colors in a folded textile below. The scalloped outline and stitched border still communicate the idea. A single well sized piece will read more clearly than three squeezed between trim and shelving.
For an existing gallery wall, give the textile group its own small area rather than scattering the three pieces among unrelated frames. A consistent border is the collection’s strongest feature. Keeping the pieces near one another lets that detail do its work.
Find Similar Pieces with Visible Texture
Start with the wall art. Accessories should be chosen after you know its size and colors.
Shop Similar Christmas Textile Wall Hangings
Look for readable tree, stocking, or bow motifs with stitched or appliqued detail. Check whether the hanging includes a support or needs a separate mounting method.
Look for Scalloped Cream Fabric Panels
A defined scalloped edge can suggest the stamp effect even when the motif differs. Compare border proportions so the edge is visible from your normal viewing distance.
Shop Similar Wooden Spool Trays
Choose a shallow divided shape that contains the spools without concealing them. Warm wood will connect naturally to a cabinet in a similar finish.
Look for White Pitchers and Evergreen Sprays
A simple pitcher keeps attention on the fabric artwork. Choose branches with a restrained spread so they frame the group rather than reach across its motifs.
Check the Display at Working Height
Open the drawers, use the cabinet surface, and check that the styling leaves room for its everyday purpose. Look for a clear gap between the objects and the lowest textile edge. Remove one accessory if the cabinet starts competing with the wall.
Final Styling Tip
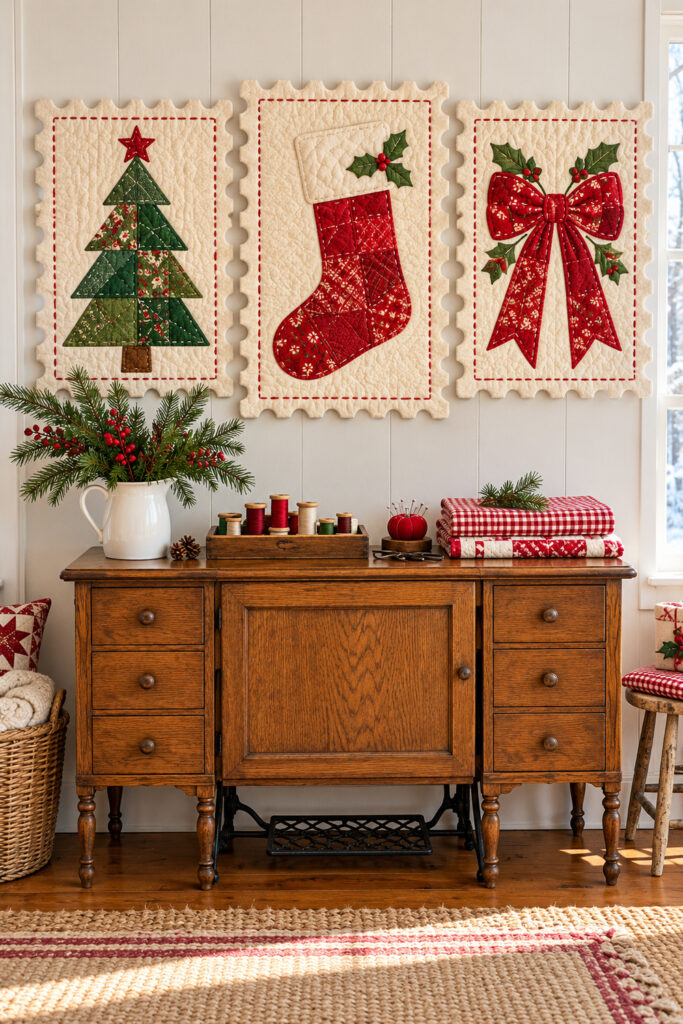
Repeat the artwork’s red in one folded fabric stack below it. That small connection brings the wall and cabinet together while leaving the three stamp shapes easy to enjoy.