*This post may contain affiliate links for which I earn commissions.*
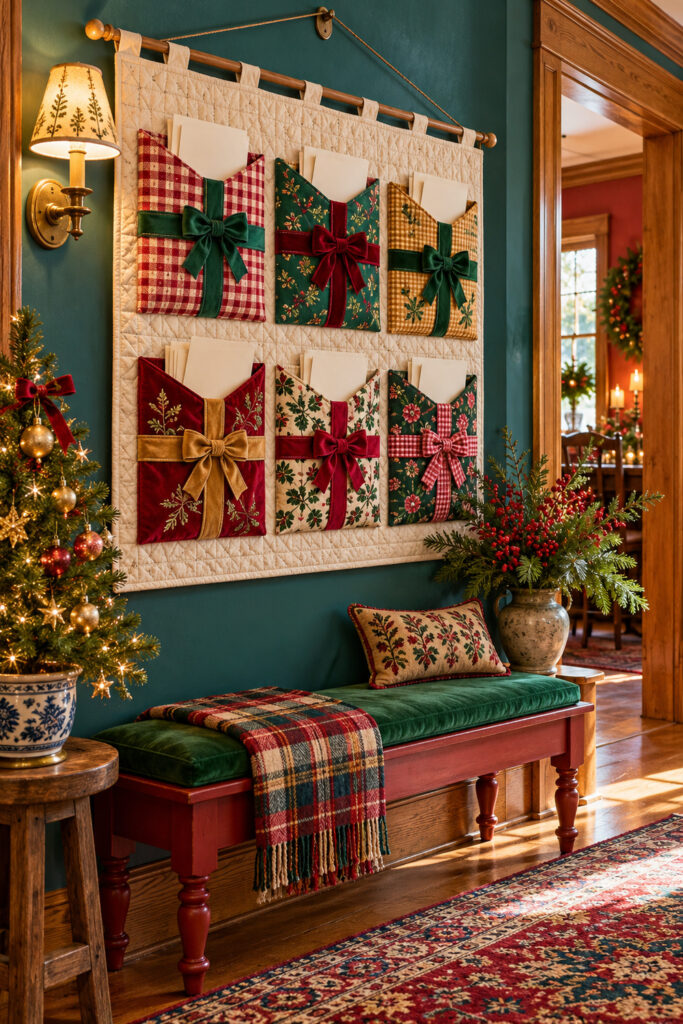
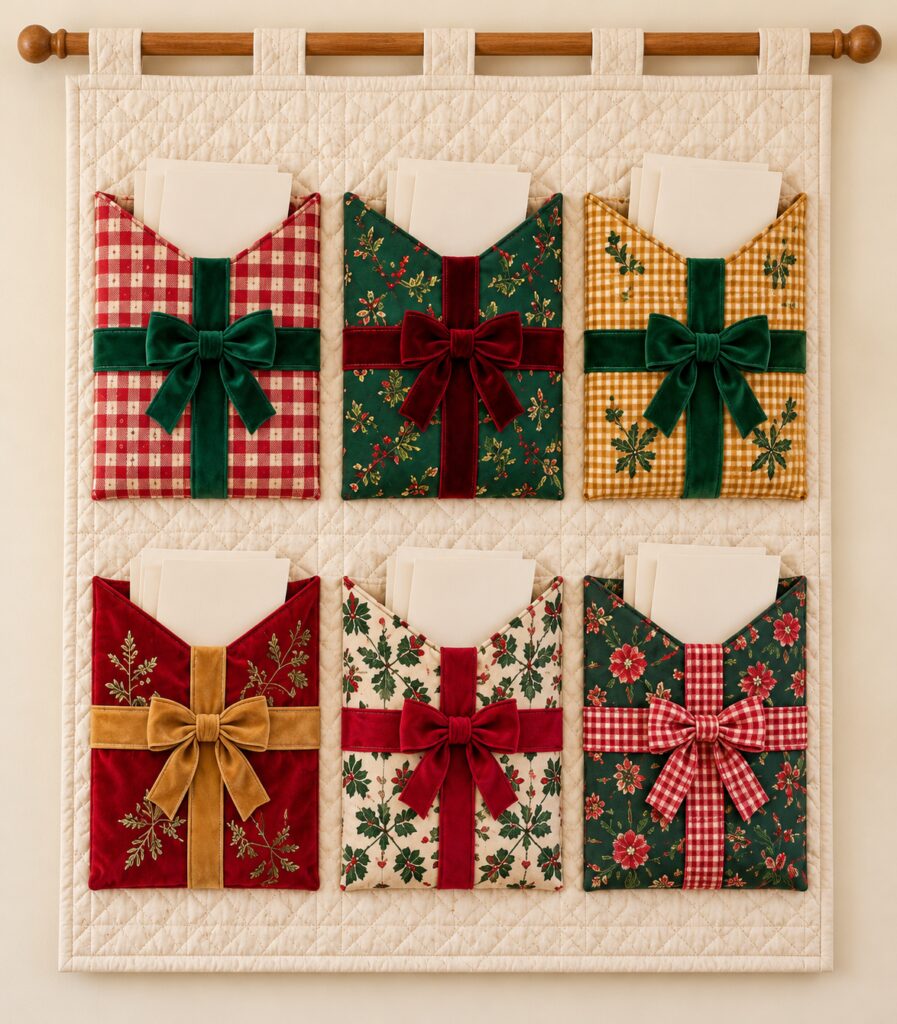
Six fabric parcels turn Christmas cards into part of the decorating in this inspiration. Gingham, little botanical prints, and velvet bows sit against a cream quilted panel. The pockets have dipped tops, so the cards show above the fabric instead of disappearing inside.
The proposed version below uses lined pockets stitched onto a quilted backing. Ribbon decorates the fronts without closing the openings. It’s a sewing project with repeated pieces, so making one complete sample first will save you a lot of adjusting later.
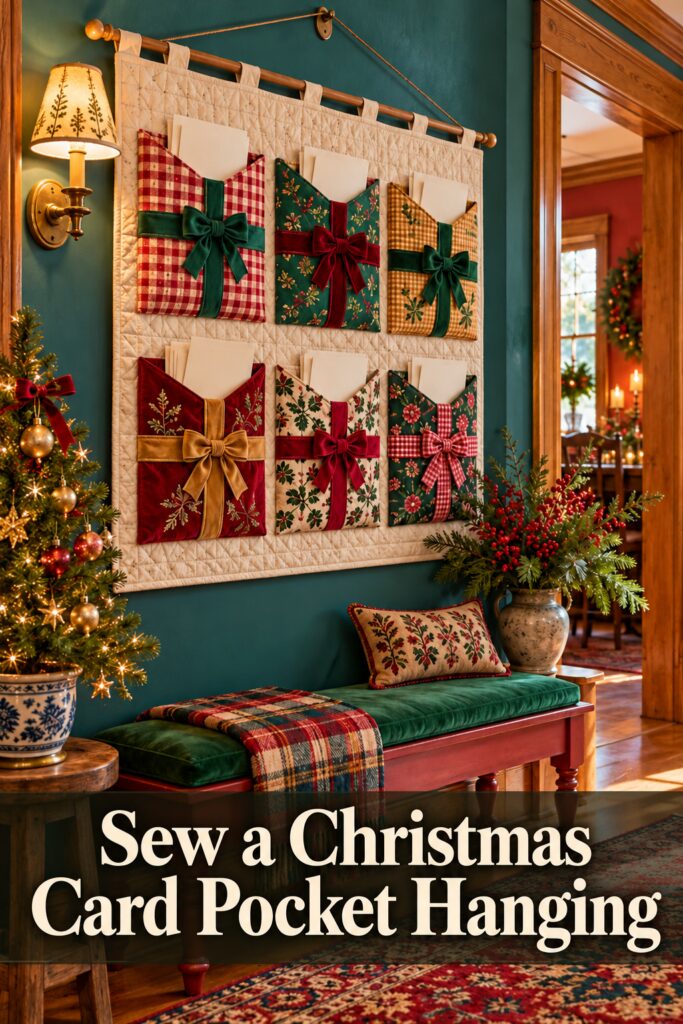
The inspiration and demonstration images were created with AI. They illustrate a proposed practical method rather than documenting a physically tested project.
What You’re Making
You’ll make an indoor wall hanging with three columns and two rows of flat card pockets. A wooden dowel passes through fabric tabs at the top. Each pocket has a shallow V opening, ribbon crossing its front, and a small bow.
As a suggested starting size, use a finished backing about 30 inches wide by 34 inches tall and pockets about 8 inches wide by 10 inches tall at their upper corners. These are proposed dimensions, not measurements taken from the image. The parcels are separate fabric pockets, which is simpler than constructing a fully pieced quilt.
Materials and Supplies
Materials
- Cream prequilted fabric sufficient for the backing plus trimming allowance
- Cream fabric binding for all four edges
- Six coordinating cotton prints with enough fabric to cut one pocket front AND back from each (you may need two sets of the cotton prints OR get coordinating solid colored fabric you can use for the back of each envelope)
- Plain cotton lining sufficient for six matching pocket pieces and five hanging tabs
- Sewable nonwired ribbon in deep green, solid red, red gingham, and mustard velvet or other coordinating colors
- Matching sewing thread
- Smooth wooden dowel slightly wider than the panel you’re planning (36″ would give you about 3″ hangover on each end)
- Wall supports suitable for the dowel the finished weight and your wall
Tools
- Paper pencil ruler and fabric marker suitable for your fabric
- Fabric scissors pins or sewing clips and a hand sewing needle
- Sewing machine if preferred and an iron with a protected pressing surface
Use fabrics of similar weight. Heavy velvet pockets beside thin cotton ones can hang differently. For the first version, let the ribbon provide the velvet texture and use cotton for the pocket bodies.
Before You Start
Wash and press washable fabrics according to their care instructions before cutting. Check the ribbon care directions separately. Some trims need gentler treatment than cotton, so decide now whether the finished hanging will be washable or spot cleaned.
Keep fingers clear of the sewing needle and rest the iron on a stable heat safe surface while adjusting the fabric.
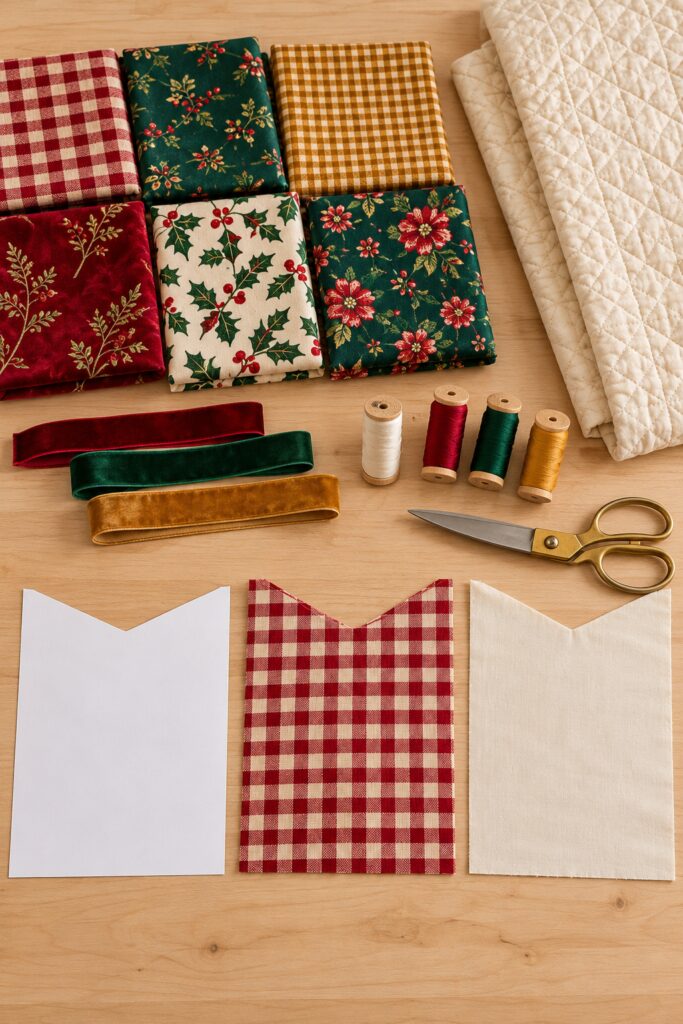
Make a paper shape 8 inches wide and 10 inches tall. Mark the center of its top edge, then mark a point about 2 inches below that center. Draw lines from both upper corners to that lower point to create the shallow V. This outline is your proposed finished pocket shape.
Add a quarter inch seam allowance outside every edge, including both V slopes. Cut the enlarged pattern and mark its original stitching line. Test a folded card against the finished outline before cutting fabric. Increase the pattern if your cards are wider, then revise the backing layout to match.
Step by Step Tutorial
1. Cut One Sample Pocket Pair
Cut one printed outer and one plain lining from your enlarged pattern, keeping any directional print upright. Transfer the V stitching line and center mark with a removable fabric marker. Place the pieces beside each other to confirm that their shapes match.
Try red gingham first because its lines make crooked cutting easier to spot. Keep the other fabrics folded until this sample is complete. A pattern adjustment is much less frustrating when you haven’t already cut all twelve pieces.
2. Sew Ribbon to the Outer Front
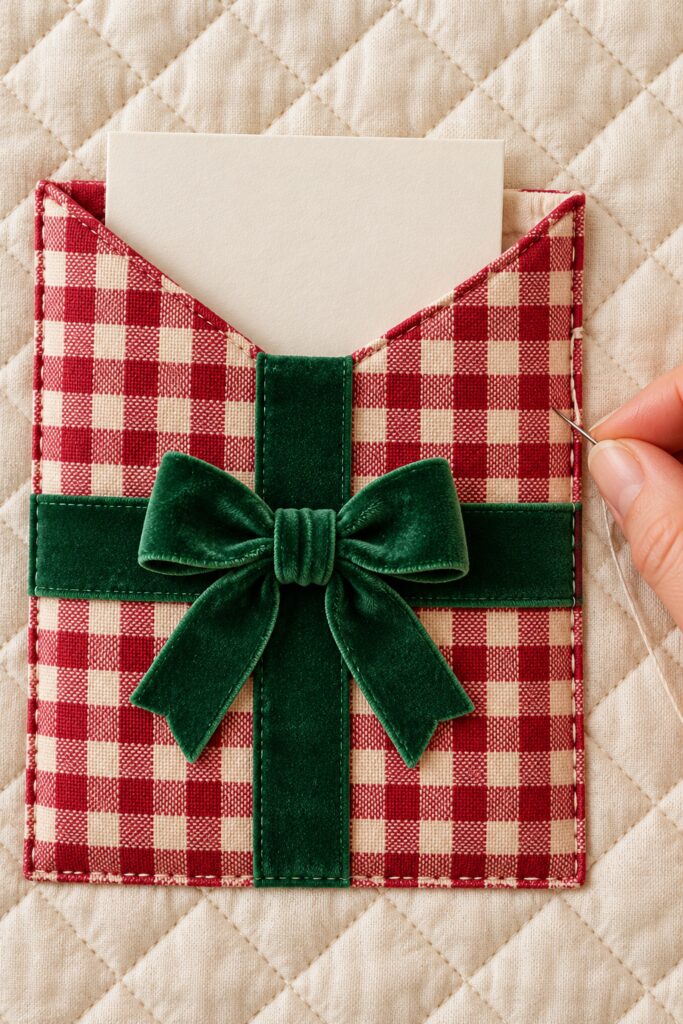
Lay the printed piece right side up. Position a vertical ribbon from the bottom to the center dip, then a horizontal ribbon across the lower half of the pocket. Pin them flat without stretching. Trim their ends to meet the raw edges so the lining seam will enclose them.
Sew close to both long edges of each ribbon, attaching them to the printed outer only. Keep the seam allowance around the fabric clear of bulky folds. The horizontal ribbon must not wrap around the pocket or its lining, because that could restrict the space intended for cards.
Tie a small bow from a separate ribbon length and stitch it securely to the crossing now, through the printed outer only. Keep its loops away from the edges during the lining seam in the next step.
3. Line and Turn the Pocket
Place the lining and decorated outer right sides together. Sew around the marked outline with a quarter inch allowance, leaving a turning opening along a clear portion of the bottom edge. Backstitch at the opening ends. Shorten your stitch length as you approach the V point and pivot carefully there.
Trim corner bulk and clip toward the V seam without cutting its stitches. Turn through the bottom opening, ease out the corners, and press from the lining side at a temperature suitable for the trim. Tuck the opening allowances inside and hand stitch it closed. Topstitch just below the V edge to keep the lining from rolling outward.
4. Finish the Remaining Five Pockets
Slip a card into the sample before continuing. Check that it fits below the V corners and that the ribbons lie flat. Make any changes to the paper pattern now, then cut and sew the remaining pockets using the same method.
For each remaining pocket, attach its ribbons and bow before adding the lining, just as you did for the sample. Each finished piece still needs to open freely across its entire dipped top once attached to the backing.
5. Prepare the Backing and Position the Pockets
Trim the prequilted panel to your chosen finished size, then bind its raw edges. For the suggested layout, three 8 inch pockets with 1½ inch gaps fit across a 30 inch panel with 1½ inch side borders. Position the upper row about 4 inches below the top and the lower row about 6 inches below the first row’s bottoms.
That leaves about 4 inches below the lower row. Treat these spacings as a starting plan and check them with your actual sewn pockets. Pin all six in place and insert cards temporarily. Make sure the upper cards don’t interfere with the hanging tabs and the lower cards don’t hide behind the row above.
6. Attach Along the Sides and Bottom Only
Remove the cards. Sew each pocket to the backing close to its finished left edge, bottom, and right edge, using a machine or small secure hand stitches. Reinforce both upper corner attachment points with a few extra stitches. Leave the entire V edge unattached.
Flatten the panel frequently so a fold doesn’t get stitched underneath. For hand sewing, use small backstitches along the attachment edges. Insert a card after securing each pocket and check that its base rests on the closed bottom without catching a loose ribbon end.
7. Add the Hanging Tabs and Dowel
For five suggested tabs, cut cotton strips about 4 by 7 inches. Fold each lengthwise with right sides together, sew its long edge with a quarter inch seam, turn, and press. Turn the short raw ends inward and stitch them closed. Fold each strip into a loop around your dowel to test the fit.
Space the loops across the top and overlap their ends on the back of the bound panel. Sew them securely through the backing with a small stitched box at each joined end, leaving enough loop above the panel for the dowel. Test the hanging with a few cards before filling every pocket. Use supports appropriate to the wall and keep the panel beyond children’s reach.
Tips for Getting the Finished Look
Alternate light and dark fabrics rather than grouping all the cream prints together. Repeat a few ribbon colors across the six pockets, and keep the bows small enough that the fabric patterns remain visible. Press the backing flat before hanging it; a twisted panel makes even carefully spaced pockets look uneven.
Easy Ways to Customize It
Use three pockets in a single row for a smaller wall, or make wider pockets for unusually large cards. Recalculate the panel from the finished pocket widths plus gaps and borders. Keep the same V opening and ribbon fronts so the smaller version still looks like parcels.
Displaying the Finished Hanging
Choose a dry indoor wall with enough space for the dowel ends. Above a bench works if people can sit without brushing the pockets. Keep it away from candles, heaters, and door swings. Fill with lightweight cards only, rather than treating the pockets as storage for heavy gifts.
Final Encouragement
Finish one pocket and try it with a favorite card before committing to the full panel. Once the opening, ribbon, and lining work together, the remaining pieces are repetitions of the same useful little shape.