*This post may contain affiliate links for which I earn commissions.*
A garden shed may spend most of autumn holding empty pots, hand tools, and the remains of the growing season. Here, it becomes one of the most imaginative places in the home to celebrate Thanksgiving.
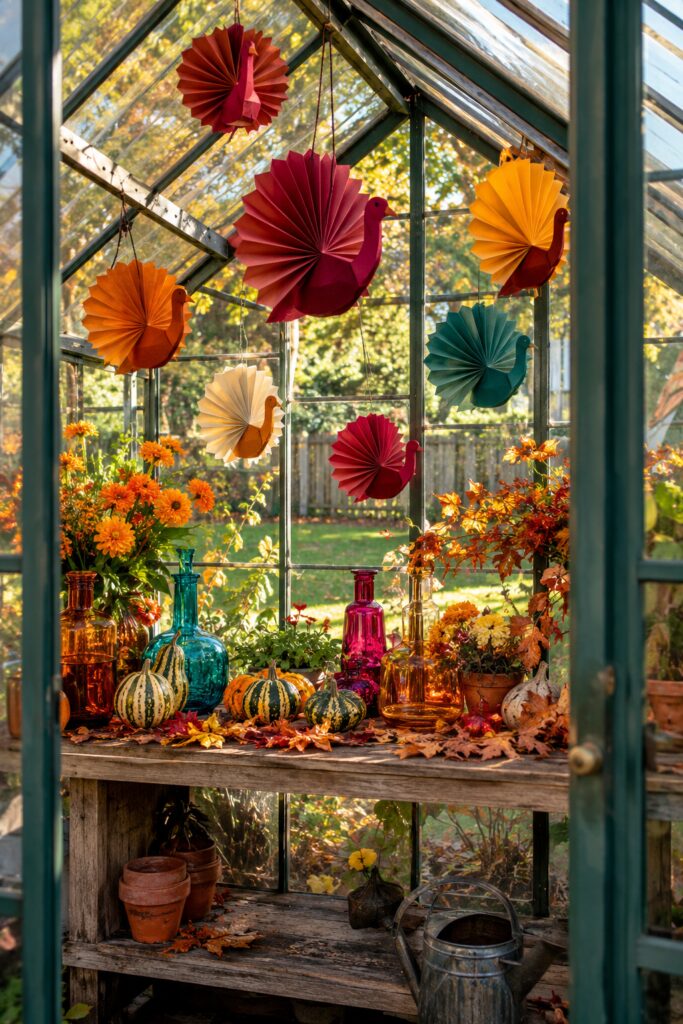
Folded-paper turkeys hang beneath the glass roof like a colorful flock. Their fan-shaped tails glow as sunlight passes around their burgundy, orange, cream, ochre, and teal folds.
Below them, striped gourds, jewel-toned bottles, fall flowers, terracotta pots, and scattered leaves transform an old potting bench into a harvest display. The setting still feels like a working garden space, but it has been given a wonderfully unexpected seasonal purpose.
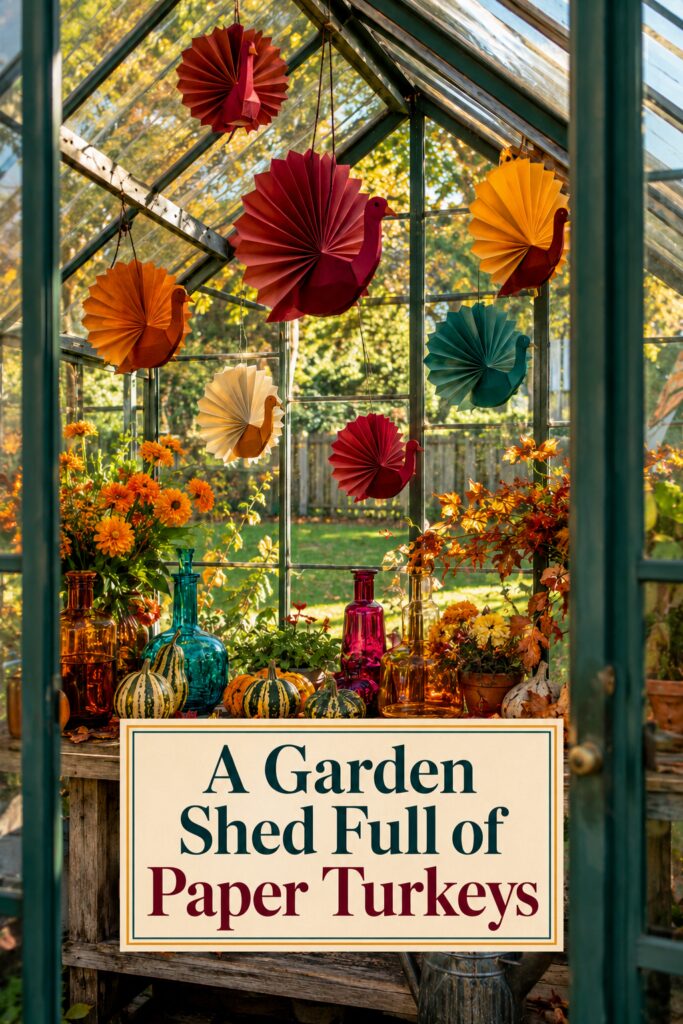
Image disclosure: This inspiration image was created with AI. It is intended to provide decorating ideas rather than represent specific products available for purchase.
Why the Paper Turkeys Look So Striking
The turkeys use simple shapes, but their scale and repetition create considerable impact.
Accordion folds give each tail depth. The raised ridges catch the sunlight, while the valleys create darker shadows. A flat paper cutout would not produce the same texture or movement.
The color choices also elevate the project. Rust, orange, burgundy, and cream suit Thanksgiving naturally, but the teal turkey adds surprise. That one cooler color connects the hanging display to the green framework and turquoise bottle below.
Varying the sizes makes the flock appear collected and active. The largest turkey establishes the focal point, while the smaller pieces carry the idea into the surrounding space.
Choose a Rich but Varied Paper Palette
Begin with heavy craft paper or lightweight cardstock that can hold an accordion fold without becoming too difficult to manipulate.
Select four or five warm colors, then introduce one cooler accent. A useful palette might include:
- Deep burgundy
- Burnt orange
- Rust red
- Golden ochre
- Warm cream
- Deep teal
The body and tail do not have to be identical. Pairing a burgundy body with a rust tail or an ochre body with a cream tail creates more variety.
Avoid glossy paper if you want the handcrafted appearance shown here. Matte paper produces softer shadows and feels more natural beside weathered wood, terracotta, foliage, and gourds.
Test one turkey before cutting the entire flock. Some cardstock looks beautiful but becomes difficult to crease repeatedly.
Form the Accordion-Folded Tails
Cut rectangular sheets in several sizes. The largest sheet will become the central turkey’s tail, while progressively smaller rectangles can create the surrounding flock.
Score parallel lines across each sheet before folding. Even spacing will create a cleaner fan and help the paper open smoothly.
Fold the paper back and forth along the scored lines. Press every crease firmly with a bone folder or another smooth paper-folding tool.
Once the complete sheet has been folded, pinch or secure one end so the opposite edge opens into a fan. Depending on the desired shape, two folded sections can be joined to create a broader circle.
Experiment with the number and depth of the folds. Narrow folds create a more detailed tail, while wider folds produce the bold, sculptural appearance seen in the image.
Cut Simple Turkey Bodies
The bodies should remain relatively plain so the tails receive most of the attention.
Sketch a single continuous silhouette containing the rounded body, curved neck, and small head. Create a reusable template from cardstock or thin cardboard, then trace it onto the remaining papers.
Cut a separate triangular beak in ochre or orange. Add a small black paper eye, or draw one with a marker.
A tiny wattle can be included, but it is not necessary. Too many small pieces may make the turkeys feel more like classroom crafts than sculptural decorations.
Attach each body near the pinched center of its fan. Before the adhesive sets, check that the neck remains upright and the tail opens evenly behind it.
Use an adhesive appropriate for the paper’s weight. Heavy bodies may need more support than a small dot of ordinary glue.
Make Several Sizes Instead of Exact Copies
The suspended display succeeds because the turkeys are related without being identical.
Create one large focal turkey, two medium turkeys, and several smaller ones. The smallest pieces can be used near the outer edges or lower part of the arrangement.
Change the color pairings throughout the flock. If every burgundy body receives a matching burgundy tail, the result may feel too uniform.
Repeat a few colors so the pieces remain connected. Burgundy appears in several turkeys, while orange returns in both the paper decorations and the flowers below.
Lay the finished flock on the floor or a large table before hanging anything. This makes it easier to judge the balance of sizes and colors.
Suspend the Flock at Different Heights
The largest turkey should occupy a prominent central position without touching the glass roof or framework.
Hang medium pieces to either side, then use the smaller turkeys to fill high and low openings. Avoid placing all the bodies on one horizontal line.
Fine cord or clear hanging line will let the paper shapes appear to float. Brown or burgundy cord can create a more visible handcrafted effect.
Each turkey may need two attachment points to keep it facing forward. A single centered cord could allow the decoration to rotate or tilt.
Fasten the lines only to stable structural points that can safely support them. Do not attach decorations to delicate glass panes, vents, electrical wiring, heaters, or moving windows.
Make sure the flock hangs above head level and does not interfere with doors or work areas.
Protect Paper Decorations in a Garden Setting
A garden shed or greenhouse can be beautiful but challenging for paper.
Condensation, watering, damp soil, and intense direct sunlight may warp folds, loosen adhesive, or fade color. Display the flock only when the space is dry and weather conditions are suitable.
Keep the paper away from misting systems, wet plants, exposed soil, heated equipment, and open flames.
If the shed becomes very humid, recreate the idea in a dry sunroom, enclosed porch, breakfast nook, or kitchen window instead.
Store the turkeys flat or partially folded when the season ends. Place tissue paper between them and avoid crushing the curved bodies or fan edges.
Turn a Potting Bench Into a Harvest Display
The weathered bench gives the colorful decorations an earthy foundation.
Begin with the objects that naturally belong in the setting. Terracotta pots, an aged watering can, a few garden tools, and simple plant containers will keep the arrangement connected to the shed.
Clear enough workspace for the display rather than covering an active potting area. Brush away soil and moisture before adding decorative bottles or gourds.
Position the tallest bottles and floral arrangements near the back. Gourds and scattered leaves can occupy the foreground without hiding the larger pieces.
Leave some wood visible. The worn surface is part of the setting’s charm and provides a visual pause between the colorful objects.
Arrange Striped Gourds Across the Bench
Green-and-cream striped gourds provide pattern without introducing another strong solid color.
Use three to five pieces in different sizes. Turn them so their most attractive stripes face forward, then vary their positions rather than arranging them in a straight line.
Fresh gourds work beautifully when they are in good condition. Artificial versions can be reused and will not soften or deteriorate in a warm shed.
Place several leaves beneath and around the gourds to make them feel settled into the display. Avoid piling leaves so deeply that the bench becomes difficult to clean.
The gourds should support the paper flock rather than compete with it. Keep the largest pieces below the central turkey or toward one side of the bench.
Add Jewel-Toned Glass Bottles
Amber, turquoise, magenta, and clear-gold bottles intensify the sunlight moving through the greenhouse.
Use a small collection of different shapes and heights. Narrow-necked bottles create strong silhouettes while leaving enough room for flowers and gourds.
Position colored glass where it will catch natural light, but remember that direct sun can heat glass considerably. Protect delicate surfaces and keep bottles away from places where they could be knocked over.
The turquoise bottle connects directly with the teal turkey. Amber glass repeats the orange flowers, autumn leaves, and ochre paper tails. A magenta bottle reinforces the rich burgundy decorations overhead.
Empty decorative bottles are enough. They do not all need flowers or foliage.
Fill the Corners With Fall Flowers
Orange chrysanthemums, marigolds, or daisy-like flowers frame the bottom of the flock.
Use fuller flowers on one side and looser branches on the other. This asymmetry keeps the potting bench from looking overly formal.
Fresh flowers suit a working greenhouse, provided they can be watered without splashing the paper display. Artificial flowers offer a practical alternative for a longer seasonal installation.
Add yellow or cream flowers in smaller amounts to soften the orange. Autumn branches can provide height and extend the arrangement toward the hanging turkeys.
Allow some stems to look naturally irregular. The setting should feel like a gardener gathered what was blooming rather than ordered a formal centerpiece.
Scatter Leaves With Restraint
A few autumn leaves help connect the outdoor landscape with the indoor display.
Use real dry leaves only if they are clean, pest-free, and completely dry. Reusable artificial leaves may be more practical around bottles, pots, and indoor surfaces.
Concentrate leaves near the gourds and bottle bases instead of covering the entire workbench. Some should overlap, while others can appear individually.
Keep them away from heaters, lights, flames, and damp soil. Remove any real leaves that begin to curl excessively, crumble, or develop moisture.
Adapt the Idea Without a Garden Shed
The folded-paper flock can work in many other places.
Hang the turkeys in a sunroom window, above a Thanksgiving buffet, across an enclosed porch, or beneath a kitchen shelf. A collection of smaller turkeys could be suspended over a dining table.
The potting-bench display can be translated to a console table using a reclaimed wood tray, terracotta pots, striped gourds, colored bottles, and flowers.
A sunny window will still illuminate the accordion folds and colored glass. The greenhouse architecture is beautiful, but the core idea depends more on light, height, paper texture, and harvest materials.
Shop Similar Pieces
Choose Autumn Cardstock for the Turkey Flock
Look for matte paper in burgundy, orange, ochre, cream, rust, and teal.
Add a Scoring Board and Bone Folder
Use them to create even accordion folds and crisp fan-shaped tails.
Try Ready-Made Paper Turkeys as a Shortcut
Honeycomb or folded-paper decorations can provide a similar lightweight effect when there is not enough time for a complete DIY flock.
Arrange Striped Gourds Below the Turkeys
Mix green-and-cream gourds in several shapes and sizes.
Add Amber, Turquoise, and Magenta Bottles
Use colored glass to catch the autumn sunlight and repeat the paper palette.
Finish With Orange Flowers and Fall Leaves
Frame the potting bench with warm flowers, autumn branches, and a restrained scattering of leaves.
Final Styling Tip
Choose one color that does not traditionally belong in the Thanksgiving palette. A single teal turkey and turquoise bottle make the familiar burgundy, orange, and gold colors feel fresher and more memorable.