*This post may contain affiliate links for which I earn commissions.*
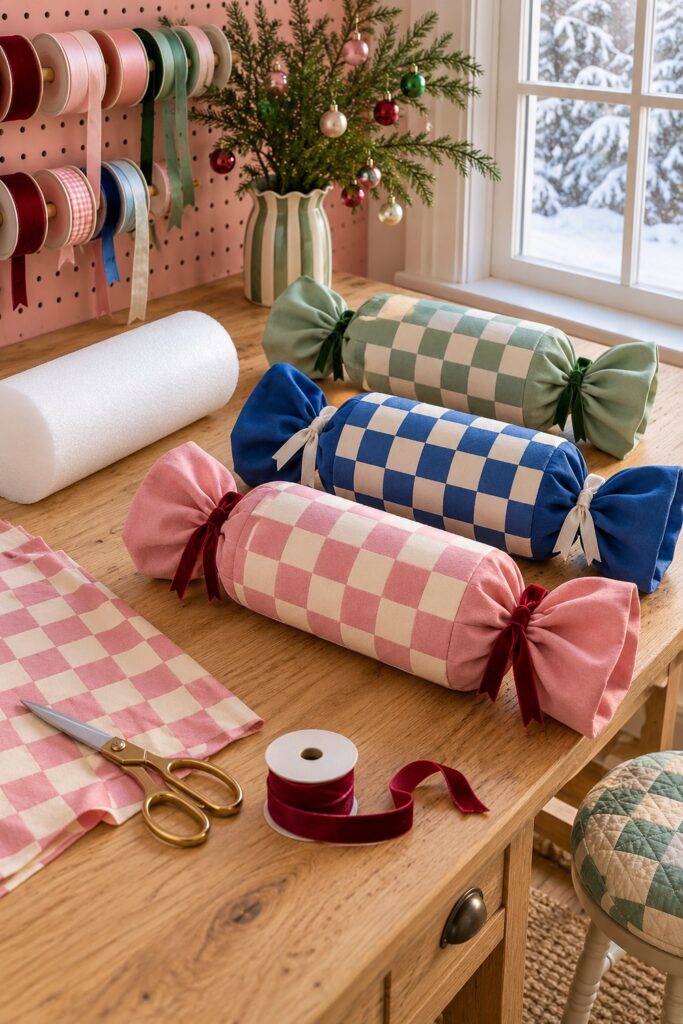
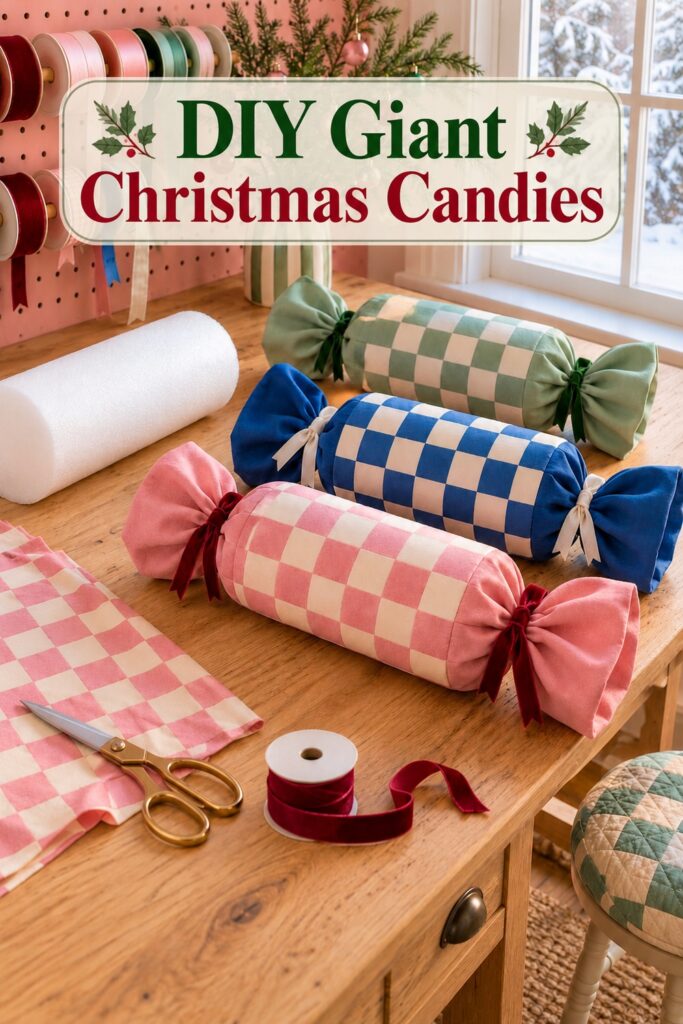
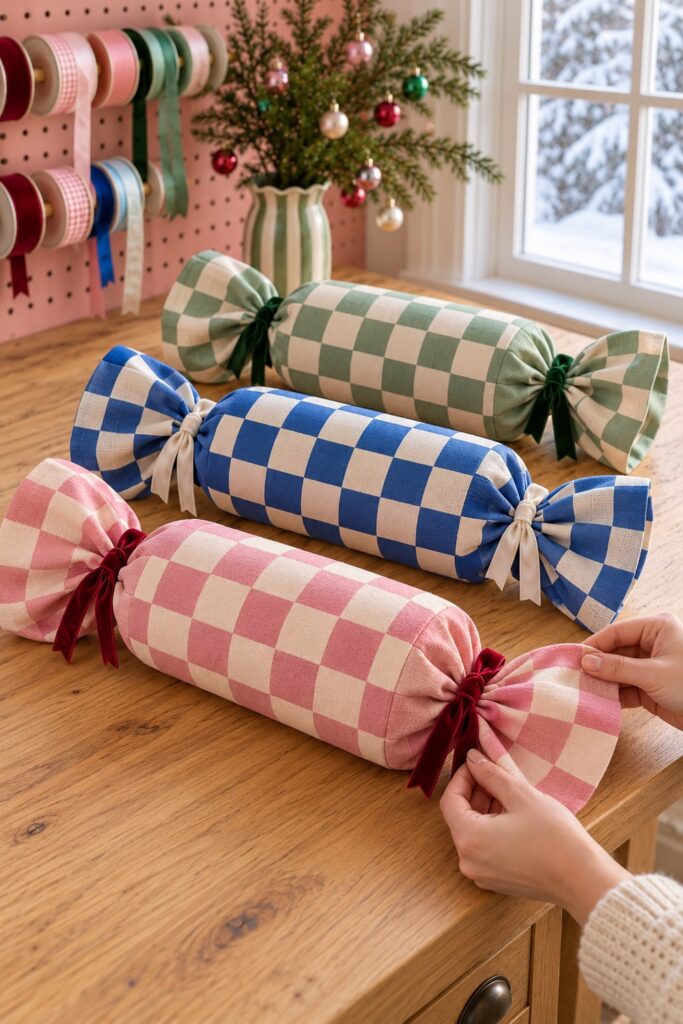
These oversized Christmas candies are decorative props, with checked bodies and gathered wrapper ends that make them recognizable before you notice anything else. Pink, cobalt, and sage give the set a pleasantly mismatched look. Contrasting ribbons finish the narrow necks on either side.
For a practical version, you’ll wrap lightweight foam cylinders in cotton fabric, secure an overlapping seam underneath, and gather the extended fabric beyond each end. The inspiration shows solid-colored ends. This method uses the same checked fabric all the way through, avoiding extra seams while keeping the broad candy silhouette.
The inspiration and instructional images were created with AI. They illustrate a proposed construction method rather than documenting a physically tested project.
What You’re Making
You’ll make a set of indoor fabric-wrapped candy decorations with firm cylindrical centers and soft, fan-shaped ends. They can sit in a basket, on a broad shelf, or among larger Christmas decorations. They are props, not pillows or toys, and they contain no edible candy.
A suggested starting size is a cylinder about 10 inches long and 4 inches across. With roughly 5 inches of wrapper beyond each end, the finished piece is around 20 inches long before gathering changes its shape slightly. Adjust the proportions to your display area rather than treating those measurements as essential.
Materials and Supplies
Materials
- One lightweight rigid craft foam cylinder per decoration in your chosen size (I had a hard time finding the size I wanted in craft foam but I found this bolster pillow form set that was ideal)
- Medium weight cotton fabric with large pink and cream, blue and cream, or sage and cream checks
- Soft ribbon for two ties per decoration with extra length for bows
- Fabric adhesive suitable for the chosen cotton and its intended indoor use
Tools
- Fabric scissors
- Flexible measuring tape and ruler
- Fabric clips for holding the overlap while the adhesive sets
- A removable fabric marking tool if you need a cutting guide
Optional Finishing Supplies
- Fray control treatment compatible with your fabric
- Needle and matching thread if you prefer to stitch the overlap instead of gluing it
Fabric quantity depends on the cylinder circumference and the length of the wrapper tails. For the suggested size, a rectangle around 20 inches along the cylinder and 15 inches around it is a useful starting point. Measure your own blank first, since the overlap and folded edges need room too.
Before You Start
Choose lightweight rigid craft foam, not crumbly wet floral foam. A precut cylinder avoids a separate cutting stage and gives you clean, even ends. If your blank is a different diameter, wrap the measuring tape around it rather than assuming the same fabric width will fit.
Protect the table before using adhesive. Check its instructions for fabric compatibility, curing time, ventilation, and handling. This project doesn’t need hot glue; a suitable fabric adhesive keeps heat away from the foam and your fingers. Keep scissors and other tools out of children’s reach while you work.
Use a fabric with checks big enough to stay visible on the body. A moderately firm cotton is easier to smooth and gather than heavy upholstery fabric. Very thin fabric may show the foam texture, so test a scrap against the blank before cutting the entire set.
Step by Step Tutorial
1. Measure the Cylinder and Dry Fit the Fabric
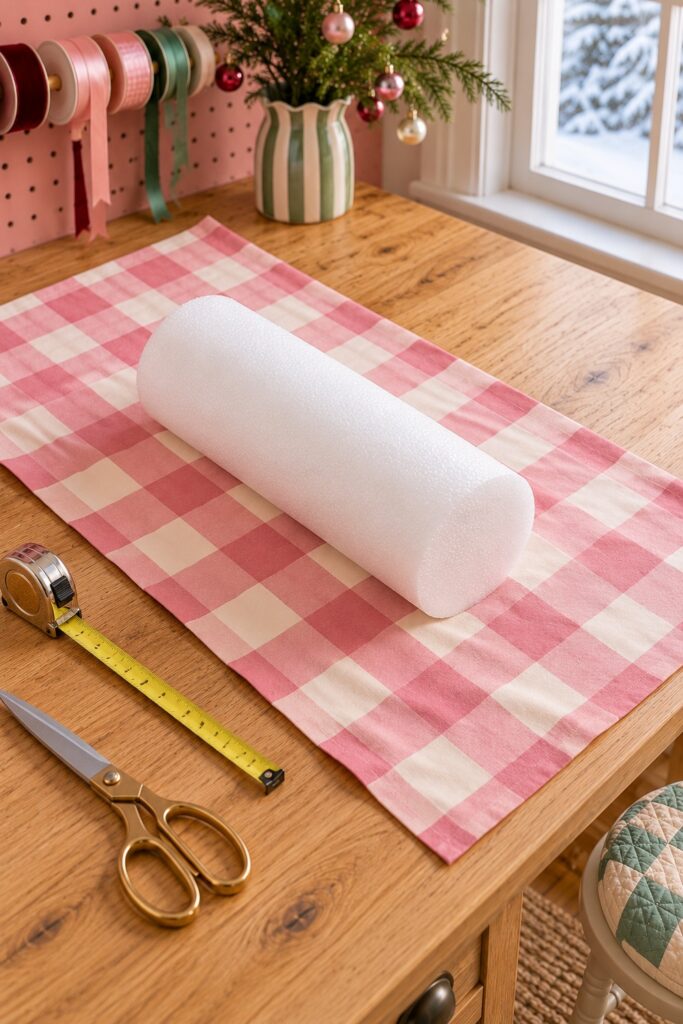
Measure the length and circumference of your foam cylinder. Allow enough fabric to go around it once with about an inch of overlap after folding the long seam edges inward. Along its length, add an extension at each end for the wrapper flares. About 5 inches per end suits the suggested blank, but the dry fit is your best guide.
Place the cylinder lengthwise in the center of the fabric rectangle. Check that the two end extensions are similar. Fold the fabric around the body without gluing and gather one end loosely with your hand. If the tail barely flares or the overlap doesn’t reach, adjust the rectangle now.
2. Cut and Finish the Fabric Edges
Use a row of checks as a visual guide when cutting, but follow the actual fabric grain if the printed pattern is slightly crooked. Keep the rectangle square enough that the seam will run along the cylinder. A diagonal cut can make the checks twist as you roll the blank.
Fold each long edge inward by a small amount to hide the raw cut edge at the overlap. Fold the two short edges inward too, since they will become the outside edges of the flared tails. Secure these folds with a thin line of fabric adhesive, or stitch them if you prefer. Let the adhesive set as directed before wrapping.
3. Wrap the Body and Secure the Underside Seam
Center the blank again, then bring one long fabric edge around it and overlap the second edge. Smooth the checks across the cylinder without pulling so hard that the pattern distorts. Keep the extended fabric free beyond both flat ends. You’ll gather it later.
Turn the cylinder enough to reach the overlap. Apply a small amount of fabric adhesive between the overlapping fabric layers only, following its directions. The seam should run along the underside of the body. Use fabric clips to hold it, taking care not to crease the visible checked surface.
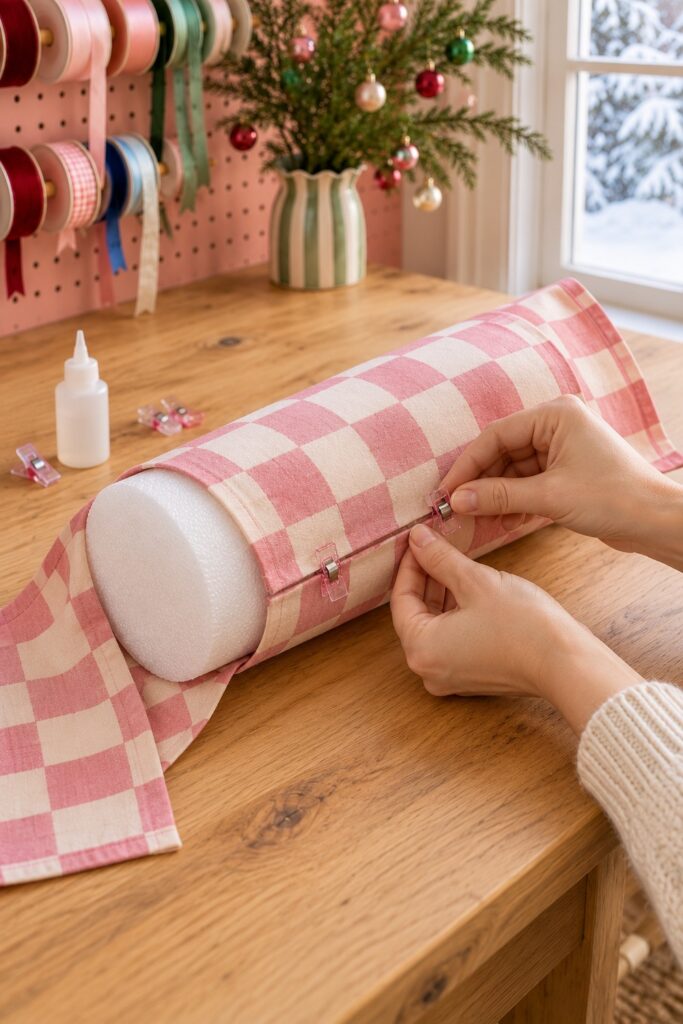
Allow the adhesive to cure for its specified time before gathering the wrapper ends. Don’t rely on a seam that only feels dry at the surface. If you choose the sewing option, hand stitch the overlap securely and keep the stitches underneath. Either method should hold the fabric sleeve closed without attaching decorative ties to the foam.
4. Gather and Tie Both Wrapper Ends
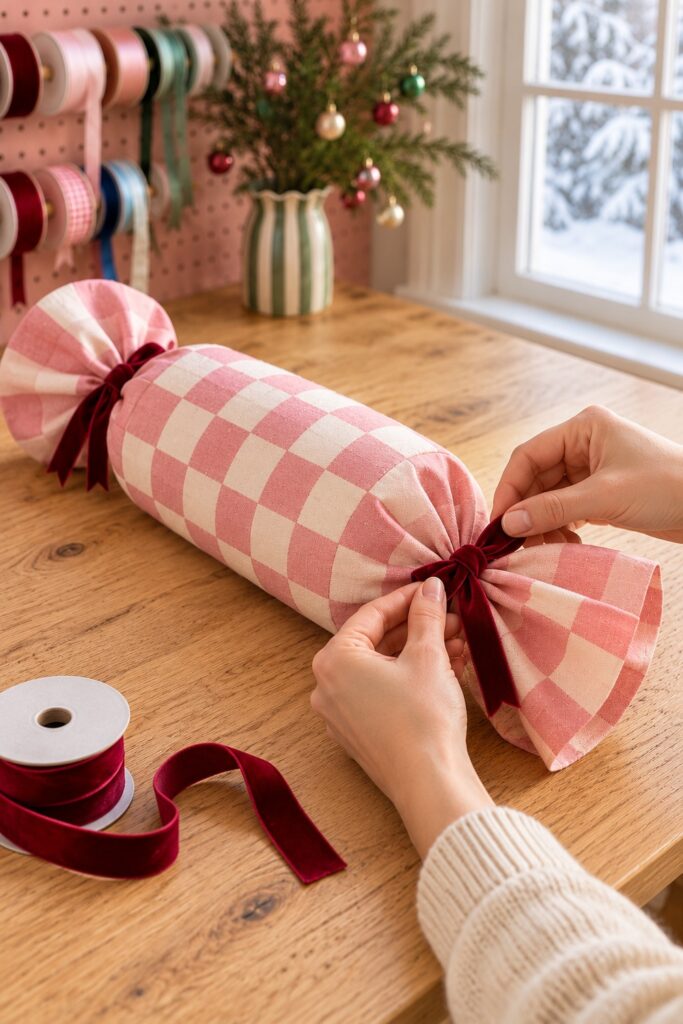
At one end, gather the fabric immediately beyond the cylinder’s flat face. Use your fingers to arrange the folds around that end, covering the foam and forming a narrow neck. Avoid pulling the gathering point far outward, which would leave a loose pouch between the body and the tie.
Wrap a ribbon around the neck and tie it firmly enough to hold the gathers without cutting into the fabric. Finish with a small bow. Repeat at the opposite end, checking that the two necks sit equally close to the cylinder faces. Burgundy suits pink checks, cream suits blue, and dark green suits sage.
5. Fan the Tails and Make the Coordinating Set
Spread each wrapper end into a broad fan by separating the folds gently. The tails will remain checked in this adaptation. Shape them so the finished edges are visible, then turn the candy seam downward. If a tail droops, shorten it slightly or use a firmer fabric on your next piece rather than adding exposed wire.
Make the remaining decorations with the same method, changing the fabric and ribbon colors. Keep the bodies similar in scale so they look related. Place the finished pieces together and adjust their bows and flares once more; the three shapes should feel like a set without matching every detail.
Tips for Getting the Finished Look
The broad checks and narrow gathered necks create most of the candy effect. Keep the body smooth enough to show the squares, but allow folds at the ends. Trying to flatten those gathers would remove the wrapper shape you’re aiming for.
Choose ribbons that contrast with the fabric instead of disappearing into it. Short bows keep the necks visible. If the ribbon tails cover much of the cylinder, trim them to suit the scale of the prop. Before trimming, make sure the bow is firmly tied and comfortably centered.
Easy Ways to Customize It
Use cream and red checks for a more traditional palette, or keep one color across the whole set and vary the ribbon. Smaller cylinders can work in a tabletop basket. Measure again for each new size, because simply shrinking the fabric rectangle may leave too little room for the overlap.
You can stitch every seam if you prefer a glue-free finish. Keep the same underside overlap construction and folded tail edges. Solid fabric can also work, though the large checks are the feature that ties this version most closely to the inspiration.
Displaying the Finished Decorations
Set the props on a broad stable surface or nestle them in a shallow basket so the cylinders can’t roll off an edge. Keep them indoors and away from heat sources, flames, and areas where their ribbons could be pulled by children or pets. Fabric coverings don’t make foam weatherproof.
For storage, loosen crowded tails and place the pieces in a container that won’t crush them. Keep the finished decorations dry. Check the bows and seam before displaying them again, and repair anything that has loosened during storage.
A Finished Set That Still Looks Handmade
Start with one cylinder and settle the fabric fit before making the others. A smooth checked body, two close gathers, and a pair of broad tails are enough to preserve the idea. The simplified wrapper ends give you a consistent method without needing to duplicate every detail of the AI inspiration.