*This post may contain affiliate links for which I earn commissions.*
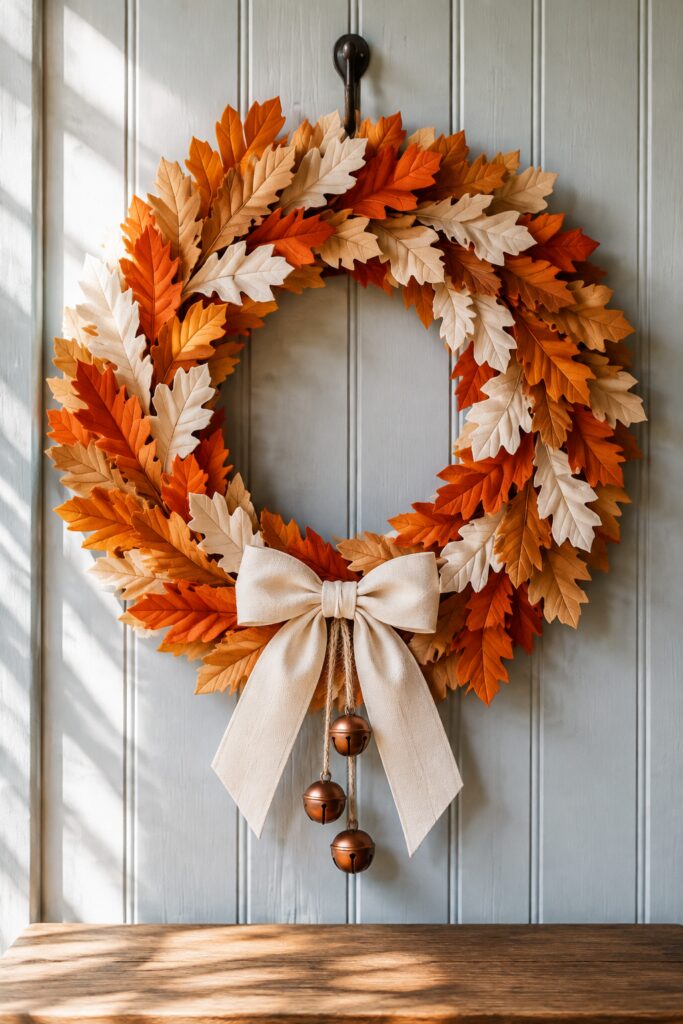
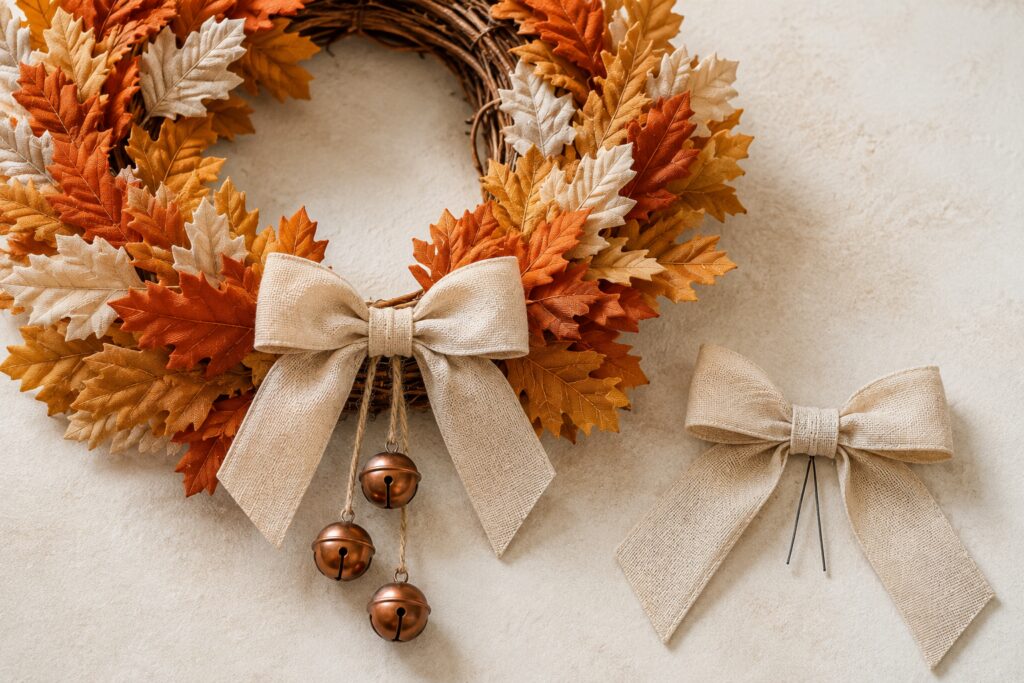
Rusty orange, golden ochre, and warm ivory leaves give this autumn wreath its layered appearance. A generous cream bow softens the foliage, while three copper-colored bells hang below it like little finishing touches collected just for the season.
Using ready-made fabric leaves makes this project much quicker than cutting and folding individual paper shapes. You can spend your time arranging the colors and building fullness, with no templates or scoring tools required. They’re also less fragile than paper and a practical choice for a sheltered outdoor display when the materials are suitable for those conditions.
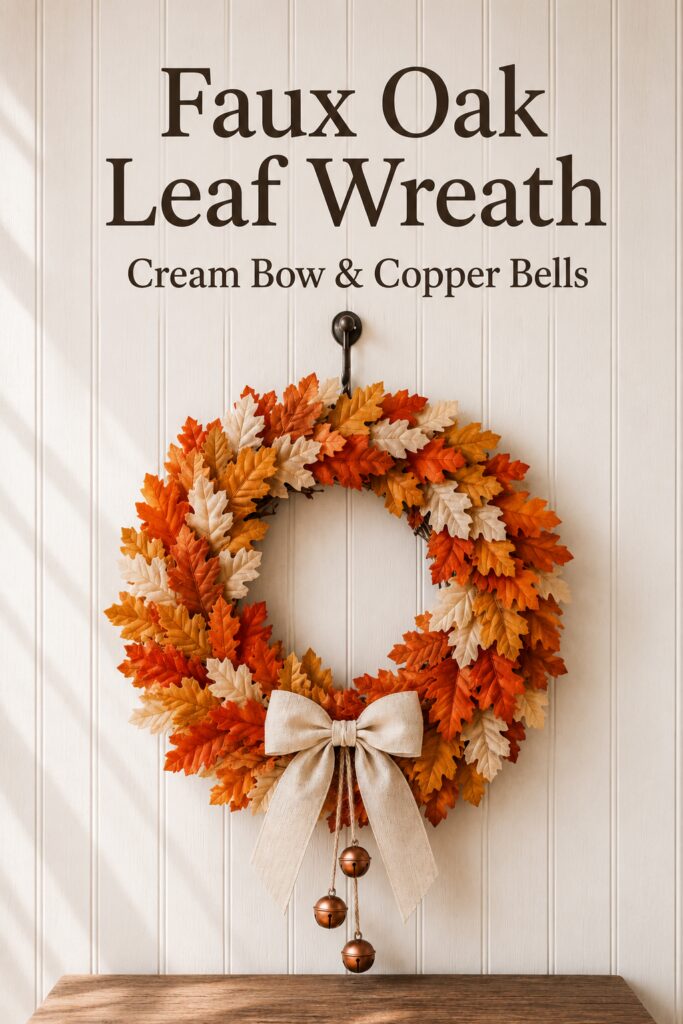
The inspiration and instructional images were created with AI. The inspiration guides the finished look rather than documenting a physically constructed project.
A Full Fall Wreath Without Cutting Individual Leaves
You’ll attach artificial oak leaves to a sturdy wreath base, overlap them around an open center, and finish the bottom with a cream bow and three dangling bells.
Choose fabric leaves with embossed veins or gently shaped surfaces to capture the depth in the inspiration. Their existing texture does much of the decorating work for you.
A suggested 12-inch base produces a finished wreath approximately 16 to 18 inches across, depending on the leaf sizes and placement. The ribbon tails and bells extend below it.
For outdoor use, plan on a covered porch or sheltered entry. Fabric leaves aren’t automatically weatherproof, so check the suitability of the foliage, ribbon, adhesive, and bells before placing the arrangement where moisture or sunlight will reach it.
Materials and Supplies
Leaves and Wreath Base
- Approximately 70 to 100 artificial fabric oak leaves in orange, ochre, and ivory, preferably in mixed sizes
- A sturdy grapevine wreath approximately 12 inches across
- Brown or green floral wire, approximately 22 to 24 gauge
- Adhesive suitable for your chosen materials and expected display conditions
- Strong, weather-resistant cord for the hanger and bell attachments
The leaf quantity is a starting estimate. Broad leaves cover more space, while smaller ones and closer overlapping require a larger supply.
Loose fabric leaves work well for filling gaps. Artificial oak sprays with wired stems are particularly useful for the main structure because you can secure them directly to the grapevine.
Bow and Bells
- Three lightweight copper-colored craft bells, approximately 1 to 1¼ inches across
- About 1½ yards of cream ribbon, approximately 2 inches wide
- Optional outdoor-rated protective pads for the back
For a covered entry, a weather-resistant polyester ribbon with a linen-like texture can give you the soft appearance of the inspiration while being more practical than absorbent cotton.
Tools
Gather scissors, wire cutters, needle-nose pliers, and a protected work surface. If using hot glue, you’ll also need a compatible glue gun and heat-resistant mat.
Use wire cutters for wired stems rather than your fabric scissors.
Sort the Foliage Before You Start
Spread out the leaves and separate them by color and size. Set aside the largest pieces for the outer edge and the smallest ones for filling gaps near the opening.
Start with more orange and ochre than ivory. The pale leaves will stand out strongly, so reserve a handful for the final layer instead of using all of them underneath.
If packaged leaves arrive flattened, separate them gently and let them relax. Shape wired stems by hand. Avoid ironing or heating artificial foliage unless the manufacturer specifically allows it.
Lay a few pieces together on the base before attaching anything. This quick preview helps you decide whether the combination needs more golden tones, deeper orange, or lighter accents.
Assemble the Wreath
1. Prepare the Base and Hanging Loop
Check the grapevine ring for loose pieces and sharp ends. Trim only the protruding bits that interfere with your arrangement, leaving the woven structure intact.
Choose which side will face forward and identify the top.
Thread a strong hanging cord through several substantial vines near the top and knot it securely. Don’t rely on a single thin twig to hold the finished wreath.
Lift the base by the loop to check that it hangs comfortably. Make this adjustment now, before the leaves conceal your attachment points.
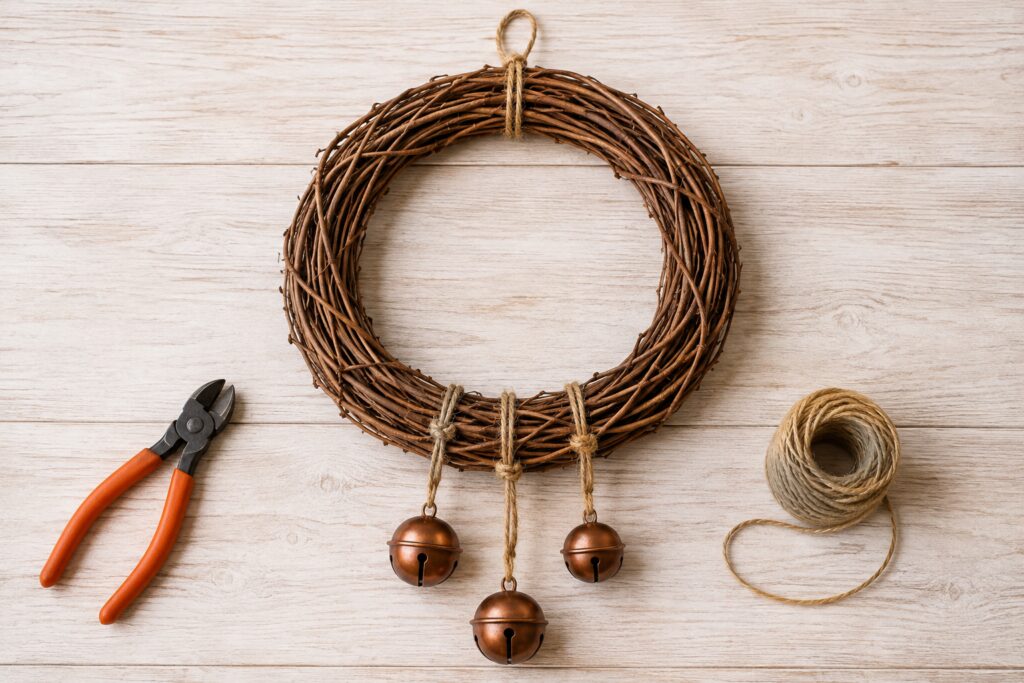
2. Secure the Three Bell Cords
Cut three lengths of weather-resistant cord, leaving extra length for tying.
Thread one cord through each bell’s top loop and knot it securely. Tie the opposite ends around substantial parts of the grapevine at the bottom center.
Arrange the bells at staggered heights. As suggested starting positions, let their tops hang approximately 3, 4½, and 6 inches below the base. You can adjust them later around the ribbon tails.
Keep the upper knots close together where the bow will cover them. Pull gently on each cord to check the attachment.
The bells should hang from the wreath structure, not from the leaves or ribbon.
3. Build the Outer Layer with Larger Leaves
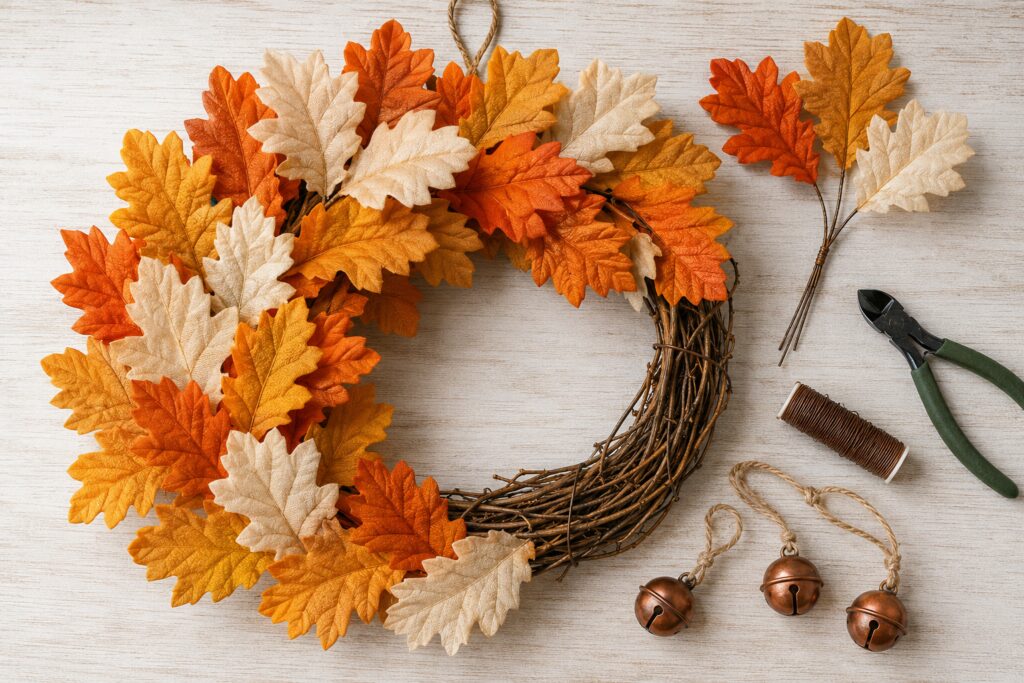
Arrange the largest oak leaves around the outside portion of the base, allowing their tips to extend beyond the grapevine.
Angle them mostly around the circle rather than pointing every piece straight outward. Overlapping small groups will create the sweeping appearance of the inspiration.
If using sprays, tuck their stems into the grapevine and secure them with floral wire. Wrap the wire around a sturdy section of the base, twist it snugly, and tuck the trimmed ends inward.
For loose leaves, apply a modest amount of suitable adhesive near the base of each piece. Attach it where the fabric makes good contact with the vine, following the adhesive’s instructions.
Keep the upper portions free. Gluing down entire leaves can flatten the arrangement and hide their texture.
Work in short sections so you can adjust the balance as you go.
4. Add a Second Layer Toward the Opening
Place medium-size leaves over the attachment points of the outer layer. Stagger their positions so their tips fall between the pieces behind them.
Mix the colors in small, irregular groups. Two ochre leaves beside an orange one can look more natural than repeating the same strict sequence around the entire ring.
Add ivory accents where the warmer shades need a little separation. Let some sit near the outer edge and others nearer the opening.
Preserve a clear center. If a leaf stretches too far across it, rotate its stem or move it outward rather than adding more foliage around the problem.
5. Fill Gaps and Check the Shape
Hold the wreath upright and look for exposed attachment points, uneven areas, and leaves that droop away from the base.
Use smaller pieces to cover visible wire and fill gaps. A little grapevine showing deep between the leaves is fine and can contribute to the natural appearance.
Adjust wired stems to lift a few leaves forward. For unwired pieces, position them over the foliage underneath so they gain support without needing stiff folds.
Check the bottom carefully around the bell cords. Keep the cords free to hang rather than trapping them beneath glued leaves.
Allow all adhesive to set or cure fully according to its directions before hanging the arrangement.
6. Make a Soft Cream Bow
Cut an approximately 18-inch piece of ribbon. Overlap the ends to form a flattened loop, then pinch its center to create two bow loops.
Cut a second piece approximately 24 inches long. Fold it at the midpoint and position that midpoint behind the bow, with both tails hanging down.
Secure the gathered center with floral wire, leaving enough wire at the back to fasten the bow to the wreath.
Fold a short ribbon scrap into a narrow band and wrap it around the middle to hide the gathering wire. Secure the band at the back without covering the attachment wires.
Trim the tails on a diagonal. Leave them slightly long until you see how they frame the bells.
7. Attach the Bow and Arrange the Bells
Position the bow at the bottom center over the bell-cord knots.
Pass its attachment wires through the foliage and around sturdy grapevine, then twist them securely at the back. Tuck the ends inward so they cannot scratch the door.
Open the loops and arrange the tails on either side of the hanging bells. Adjust the cord lengths if necessary so all three copper-colored surfaces remain visible.
The bow should rest against the wreath without crushing the leaves beneath it.
Details That Make the Arrangement Feel Finished
Choose fabric oak leaves with visible veins and a matte or softly textured surface. These features help create depth without extra cutting, folding, or painting.
Vary the sizes. Larger leaves establish the outline, while smaller ones make it easier to disguise attachments and shape the center opening.
Keep the ivory accents distributed around the ring rather than concentrated in one patch. Step back occasionally to judge the whole arrangement instead of focusing only on the section in your hands.
If the bells have a very shiny finish, let them provide the sparkle. The leaves and ribbon can remain soft and understated.
Easy Ways to Change the Palette
For a quieter farmhouse look, combine muted rust, caramel, and cream foliage. For a richer autumn display, add a few burgundy leaves among the orange and ochre.
A narrower bow will reveal more foliage at the bottom. A wider one creates a stronger focal point, especially on a plain door.
If you already own suitable artificial oak stems, reuse them for the main layer and purchase only the extra colors needed to complete the arrangement.
Hanging It Outside and Keeping It for Another Season
A covered entry offers the best outdoor location for this design. Use foliage and ribbon rated for outdoor use where possible, and choose bells with a finish suitable for the conditions.
Artificial fabric leaves can last longer than paper, but exposure still matters. Direct rain, strong wind, and prolonged sunlight may loosen attachments, fade colors, or affect metal finishes. Bring the wreath inside during severe weather.
Hang it from a secure hook rated for its weight. Make sure the bells and wreath don’t strike glass or scratch the door when it moves.
Before storing, allow every part to dry completely. Place the wreath in a roomy box, cushion the bells separately, and avoid compressing the leaves and bow.
Ready-made foliage lets you focus on the enjoyable part: building the shape, mixing the autumn shades, and finding just the right place for those last few ivory leaves. A full outline, a clear center, and the little copper bells will carry the design beautifully.