*This post may contain affiliate links for which I earn commissions.*
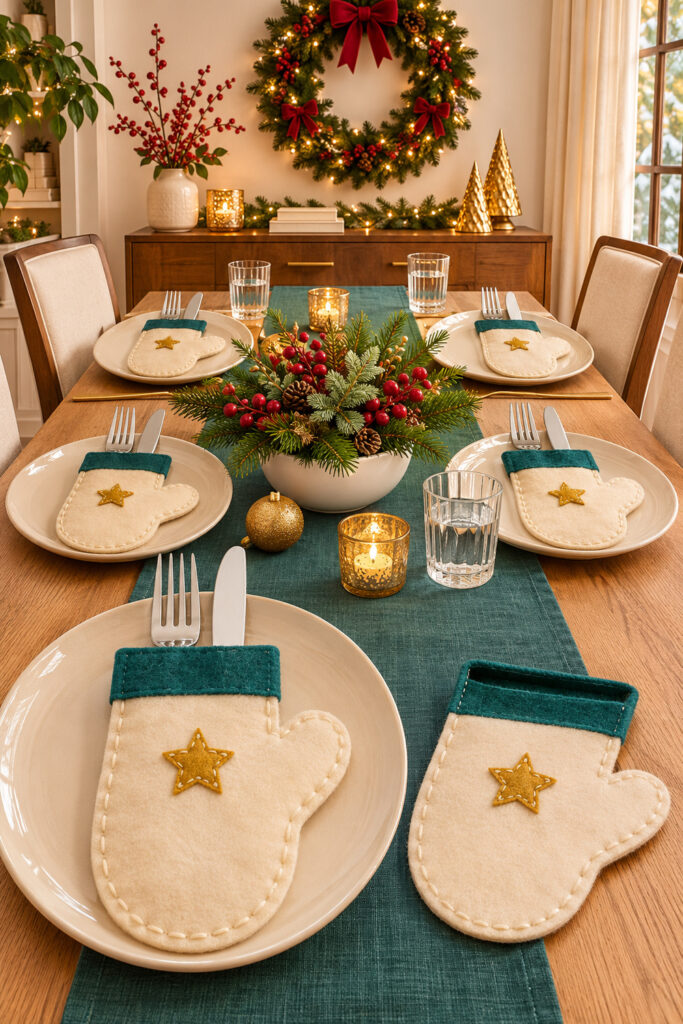
Cream felt mittens give this Christmas table a playful place for the cutlery. Each pocket has a teal cuff, a small gold star, and visible stitches around its rounded edge. The simple colors connect the handmade pieces to the runner, greenery, and gold accents without needing a different decoration at every place.
You’ll make a flat pocket from two matching felt shapes, with a separate cuff strip on each side. The top stays open so the cutlery handles can slide inside. Start with one pocket sized around your own utensils, then repeat the pattern for the number of places you need.
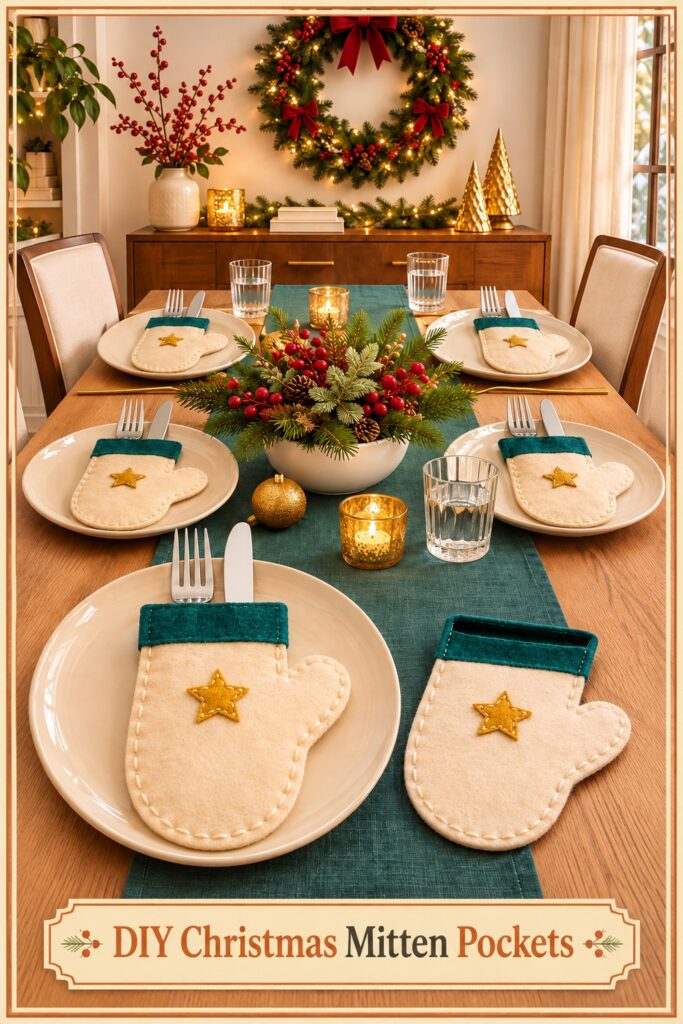
The inspiration and instructional images were generated with AI. This tutorial proposes a practical adaptation and does not document a physically tested project.
Choose felt that holds a clear mitten shape
Use medium-weight craft felt that can support the pocket without becoming stiff and bulky. Cream gives the star and cuff a pale background, while teal repeats the table runner. Choose a small piece of gold or mustard felt for the star rather than a loose glitter decoration that could shed around the plates.
As a proposed starting size, draw a mitten about 8 inches long and 4½ inches across its widest point, including the thumb. Those are suggested dimensions, not measurements taken from the image. Adjust the pattern around your actual fork and knife, allowing room for the seam and for both handles to slide in easily.
For each pocket, gather:
- Two matching cream felt mitten shapes
- Two teal felt cuff strips sized to the straight top edge
- One small gold felt star
- Cream sewing thread or a few strands of embroidery floss
- Matching or gold thread for the star, if preferred
Tools include paper, a pencil, scissors, a ruler, a sewing needle suited to the felt, and removable clips or pins. Use a protective work surface and keep needles and sharp cutlery out of children’s reach while working. A plain paper test pattern is useful before you cut the full set.
Sew the pocket while keeping its top open
Step 1: Draw and test the paper mitten
Draw a broad rounded finger end, one simple side thumb, and a straight open cuff edge. Keep the narrowest part wide enough for your utensils. Lay the fork and knife together over the paper, handles pointing toward the rounded end, to see how far their heads will extend above the cuff.
Add room around the handles and leave a seam allowance inside the outer edge. A suggested stitching line about ¼ inch from the cut edge can work with this flat felt construction. Cut out the paper and test the outline again before tracing it onto felt.
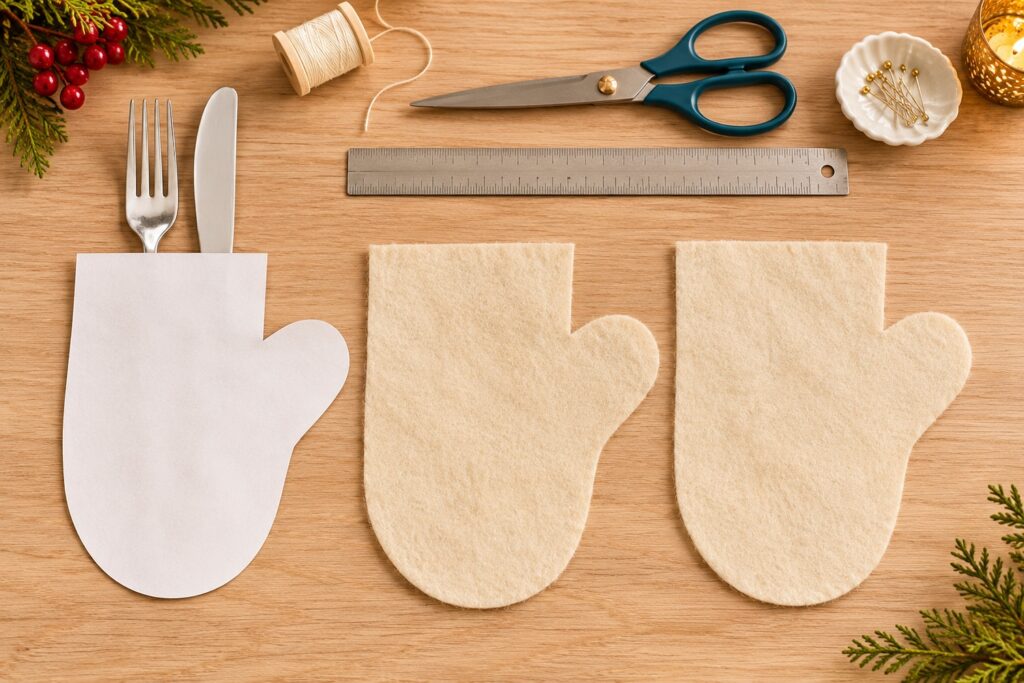
Cut two identical felt shapes for one pocket. Stack them with the thumb outlines facing the same way and the edges aligned. This pocket stays flat after sewing; you won’t turn it inside out. If one piece is larger, trim it now rather than trying to hide the difference with stitching.
Step 2: Attach the star to the front only
Place the star at the center of the front mitten, below the planned cuff. Keep it clear of the outer seam so it won’t be caught when you join the pieces. Use small stitches around its outline, passing through the star and the front piece only.
Knot the thread securely on the back of that single panel. Check that the star lies flat without pulling the felt into a pucker. Adjust the stitches now if one point lifts. The back mitten piece should still be separate and undecorated.
Step 3: Sew the cuff strips before joining the pocket
Cut one teal strip to fit the straight top of the front piece and another for the back. A strip about 1 inch deep is a suggested starting point for an 8-inch pocket. Check the proportions against your pattern and adjust if the cuff would cover the star.
Lay one strip across each separate mitten panel, with its upper edge aligned to the panel’s top. Sew each strip onto its own panel with neat small stitches along its upper and lower edges. Don’t stack the front and back together for this step, or you could accidentally stitch the pocket closed.
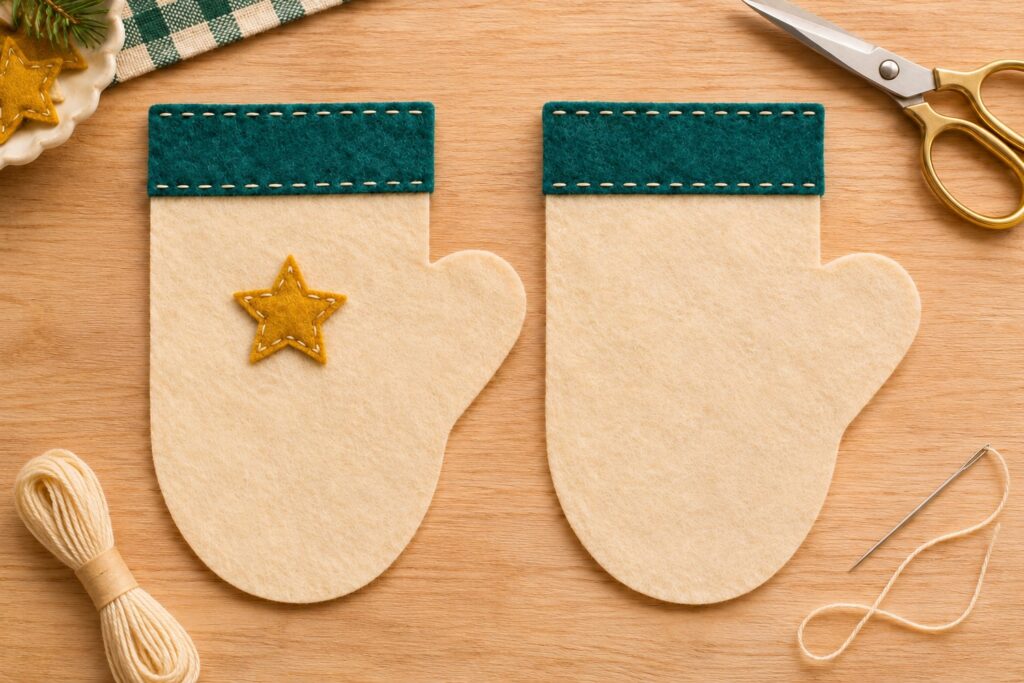
Step 4: Join the curved edges
Stack the two panels again, keeping their thumb shapes and cuff ends aligned. Clip them together and sew from one top corner down the side, around the thumb and rounded finger end, then up the other side to the opposite top corner. Leave the entire straight cuff opening unsewn.
Use a running stitch: bring the needle up and down through both layers in short, even steps. Keep the stitches close enough to hold the edge without pulling the felt tight. Check the thumb curve as you go so the layers don’t shift apart at its narrowest point.
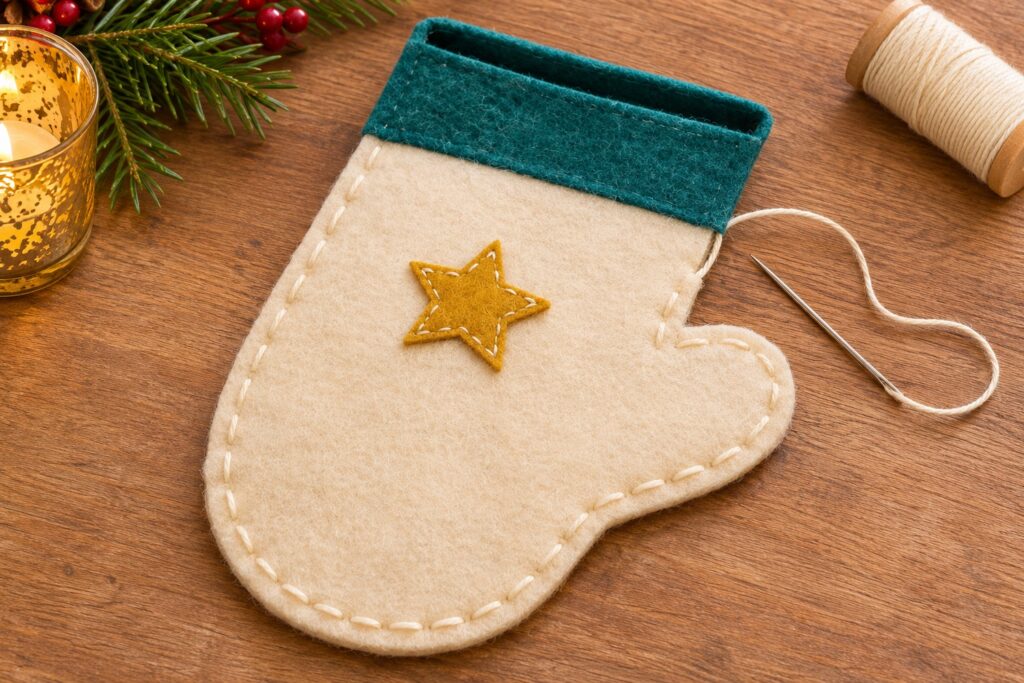
Knot the thread securely at the end and trim the loose tail. Gently open the cuff with your fingers to confirm that no stitch has crossed it. If the layers are caught together, remove those stitches and resew the affected edge before trying to fit the utensils.
Step 5: Check the fit with clean cutlery
Slide the handles into the pocket, leaving the fork head and upper knife blade visible above the cuff. They should go in without stretching the felt or forcing the star panel forward. Remove them again and check the seam for pulling.
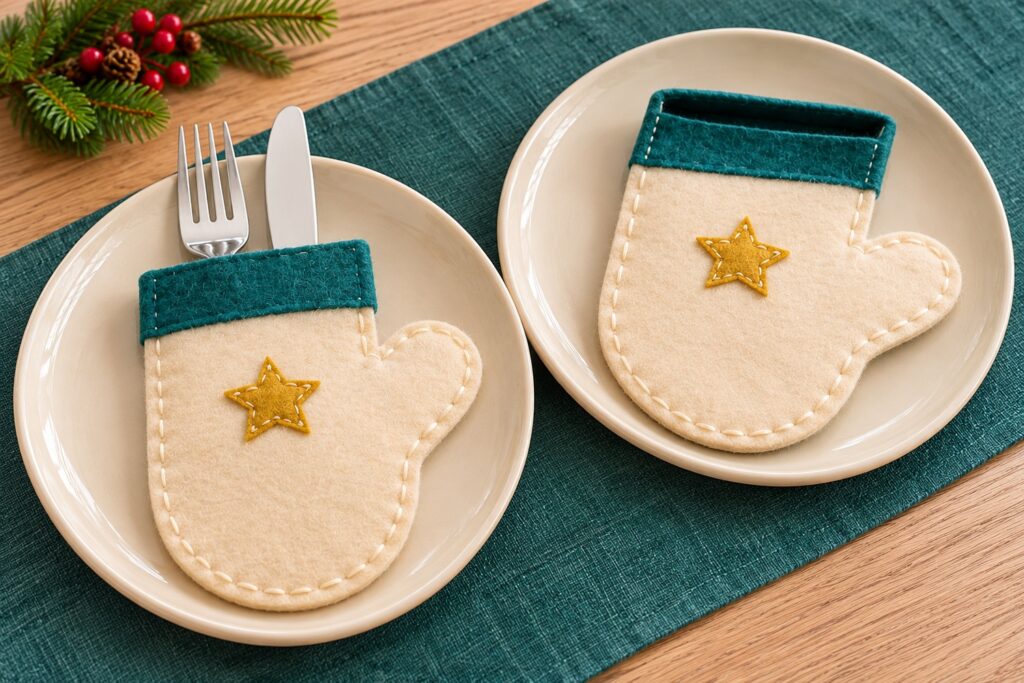
If the pocket is tight, enlarge the paper pattern before making the rest. Keep the first successful pattern as your template so the finished set has a consistent outline. A slightly wider pocket is better than a narrow one that needs tugging at the table.
Keep the finishing simple and washable in practice
Repeat the cuff depth and star position across the set. Use the same thread color for the outer edges so the little differences in hand stitching still look related. You can replace the star with a plain circle or another simple felt shape, provided it is stitched flat and doesn’t add loose pieces.
Check the felt’s care instructions before deciding how you’ll clean the pockets. Keep them dry and clean between uses, and use a separate napkin for wiping hands and mouths. These are decorative cutlery sleeves, not food-contact serving dishes or substitutes for a washable dining napkin.
Set the mittens where guests can use them
Place a pocket on or beside each plate with the opening easy to reach. Keep any greenery or loose ornaments separate from the utensils. You can lay one empty pocket near the serving area to show the shape, as the inspiration does, without filling the whole table with extra examples.
Before sewing the remaining set, put the first pocket through one full routine: fill it, remove the utensils, and place it at the table. Adjust the pattern now if that everyday use feels awkward. The festive detail works best when the cutlery comes out as easily as it goes in.