*This post may contain affiliate links for which I earn commissions.*
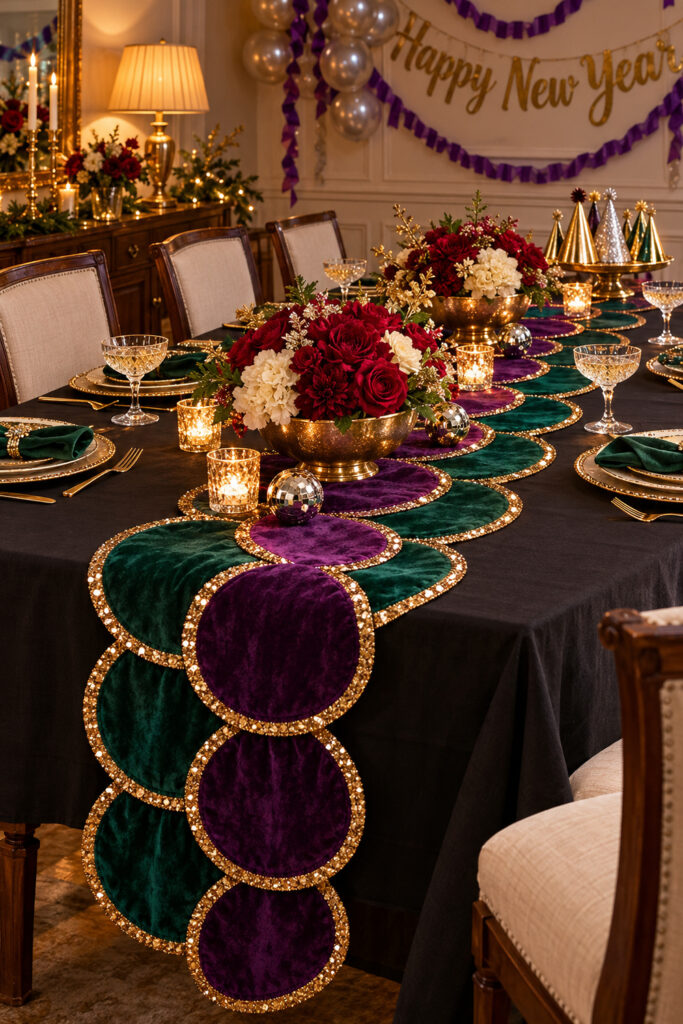
The emerald and plum runner is the detail that carries this New Year table from one end to the other. Large green scallops sit beneath a narrower chain of purple curves, and gold edging outlines the shapes against a dark tablecloth.
This tutorial translates that idea into overlapping, felt backed velvet circles secured to a narrow fabric spine. The construction is a practical adaptation, with separate circles that are easier to cut and edge than one very long scalloped shape.
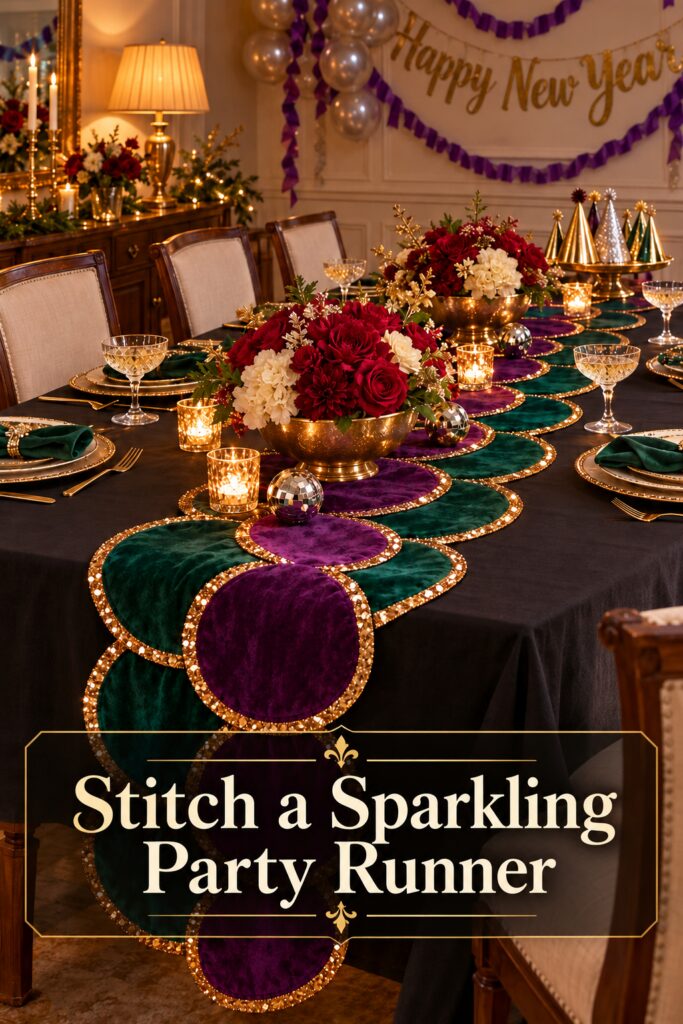
The inspiration and instructional images were created with AI. They illustrate the decorating idea and proposed construction stages rather than documenting a physically tested project.
What You’re Making
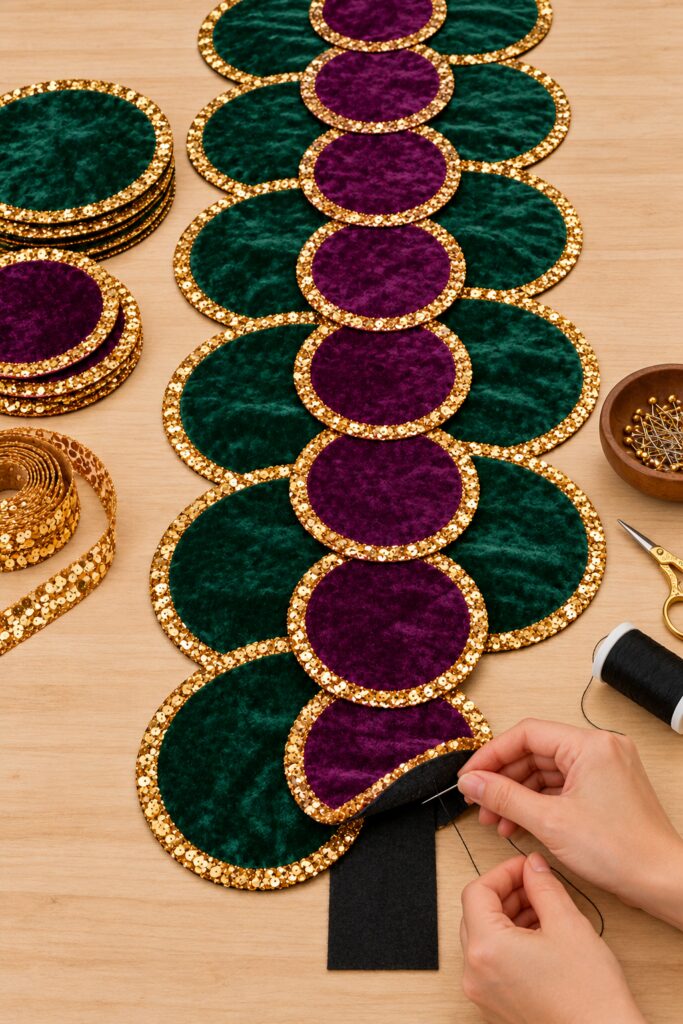
You’ll make a decorative runner with two offset rows of larger green circles and a centered row of smaller plum circles on top. Each circle has a felt backing and a sewn gold sequin border. A concealed black felt strip connects the sections underneath.
The result is intended to lie along a table with a short optional overhang. It isn’t a heat mat or a padded base for dishes. Keep serving pieces on firm, level surfaces beside it, or on a stable tray that doesn’t rock over the overlapping layers.
Materials and Supplies
Materials
- Emerald green and plum velvet or velveteen with little stretch
- Soft matching green and plum craft felt for circle backings
- Black craft felt long enough for a continuous narrow spine
- Flat gold sequin braid with a sewable fabric header
- Matching sewing thread for backing seams and strong thread suited to the trim
- Paper or thin card for two circle templates
Tools
- Fabric scissors and separate paper scissors
- Hand sewing needles suitable for the fabric layers
- Ruler or tape measure and removable fabric marker
- Pins or sewing clips and a pincushion
- A thimble if useful for stitching through several layers
Quantities depend on your finished length and circle layout. Buy fabric only after planning the actual arrangement. Narrow sequin braid around half an inch wide is a suggested starting point, not a measurement taken from the image.
Want to Make the Table Runner?
I’ve put together a list of all the supplies I linked to in the list above so you only have to go to one place to find everything. I hope this saves you time!
See My Hand-Picked Supply ListAs an Amazon Associate I earn from qualifying purchases but this doesn’t increase your price at all!
Before You Start
Measure the clear center of your table with place settings laid out. As a suggested trial, use large circles about 10 inches across and small circles about 6 inches across. Two green rows with centers roughly 6 inches apart create a runner about 16 inches wide before adjustments.
Try these proportions in paper first. If that width leaves too little room for plates, shrink both circles while keeping the purple ones visibly smaller. Set the overall length from your table, allowing only a short overhang that won’t catch on chairs or clothing.
Velvet has a nap, meaning the pile looks lighter or darker depending on direction. Brush each piece with your hand and mark the same direction on the reverse. Cut the circles consistently so a change in reflected color doesn’t make one patch look accidental.
Step by Step Tutorial
1. Plan the Overlapping Circle Layout
Lay out two rows of large paper circles. Offset the rows slightly along the length, then overlap neighboring circles enough to remove gaps down the center. Start with centers about 7 inches apart along each row and adjust until the curves form a continuous scalloped outline.
Place the smaller circles in a centered chain over them. Centers about 4 inches apart give 6 inch circles a modest overlap. Adjust the end pieces so both ends look finished, and count the large and small templates required. Photograph the layout for reference before clearing it.
2. Cut the Velvet and Felt Backings
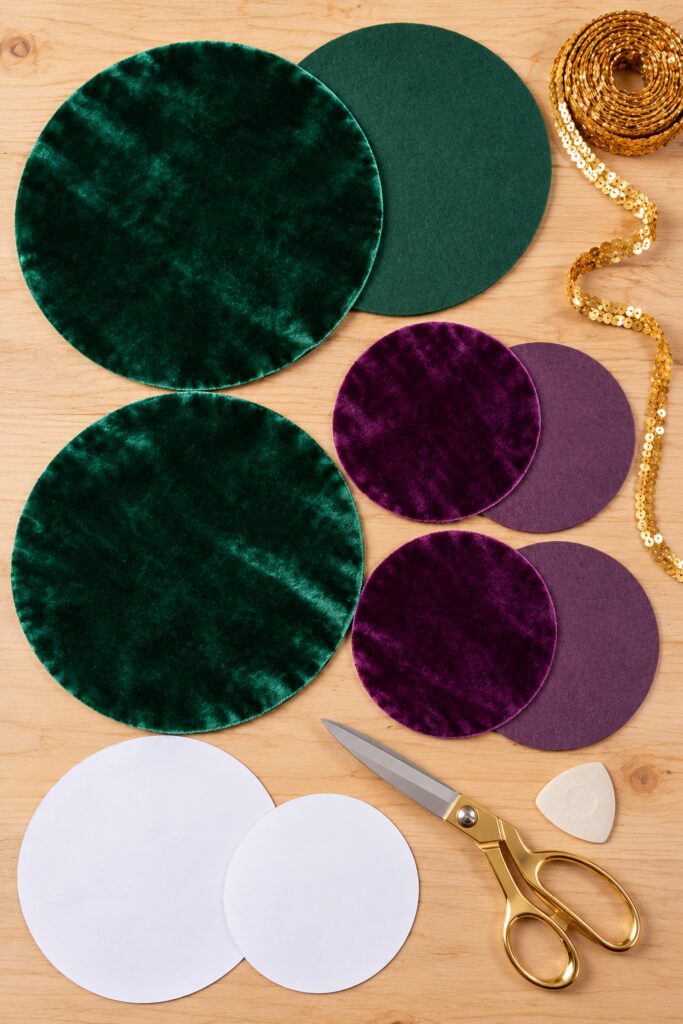
Trace the templates on the reverse of the velvet, keeping the nap marks aligned. Cut one velvet circle and one matching felt circle for each position in your plan. Cut carefully around the curve rather than folding several slippery layers together.
Keep a small offcut to test the marker and stitches. Cut a black felt strip about 4 inches wide for the spine, stopping its ends inside the final circles so it will be concealed. Use a continuous strip when possible; a bulky join beneath a centerpiece would make the surface less even.
3. Join Each Circle to Its Backing
Place a felt circle against the wrong side of its matching velvet circle. Align the edges and clip them together. Hand sew around the perimeter with small overcast stitches, passing the thread over the raw edge and through both layers close to the edge.
Keep the stitches snug without pulling the circle into a shallow bowl. Trim any protruding felt carefully until the edges align. The gold braid will cover this seam, so concentrate on a flat shape and a secure backing rather than an invisible finish.
4. Sew the Gold Border Around Each Circle
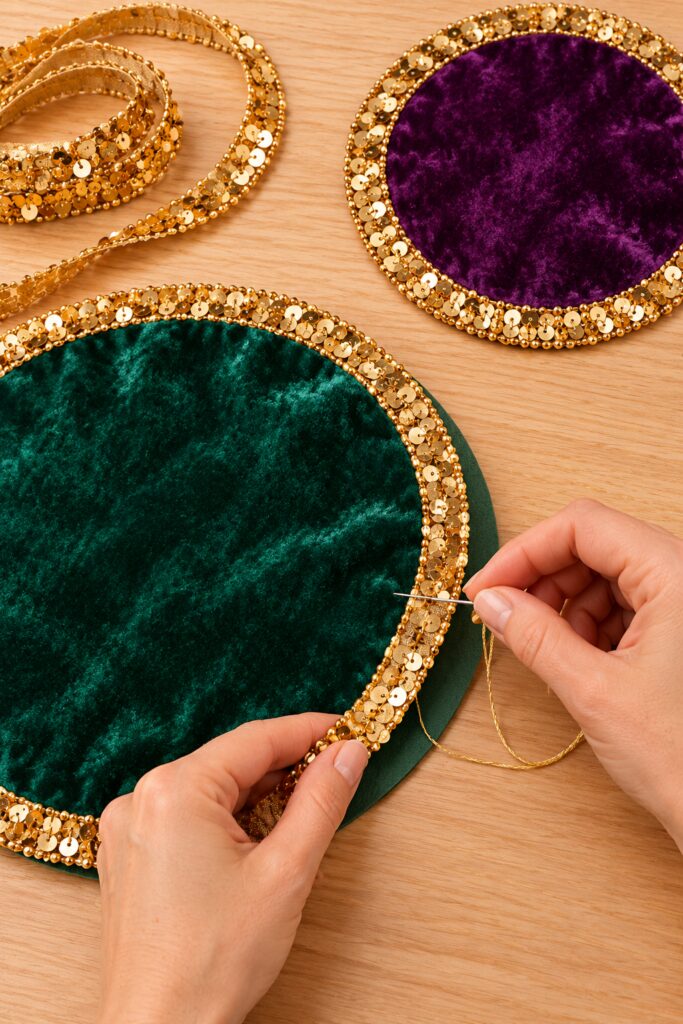
Lay the braid on the face of the circle, covering the joined raw edge. Pin or clip a short section and stitch through the braid’s fabric header and the circle layers. Pass the needle between sequins rather than through them, following the curve in short sections.
Ease the braid around the circle without stretching it. If the edge curls, undo that section and give the trim more length. Overlap the final ends neatly, secure the loose sequin threads, and sew the join firmly. Keep sharp cut ends enclosed under the overlap.
5. Secure the Green Scallops to the Spine
Rebuild the paper layout using the edged green circles, with the black spine beneath the middle. Clip the layers together, checking that the strip remains hidden from above. Work from one end and keep the overlap direction consistent within each row.
Lift an overlapping edge to reach the backing, then stitch the felt backing to the spine with several short rows of secure stitches. Add small hidden tacks between neighboring backed circles where needed. Avoid pulling the thread through the visible velvet pile. Lower each lifted edge and check that the assembly still lies flat.
6. Attach the Plum Center Chain
Lay the smaller circles along the center, keeping their gold edges visible. Overlap each in the same direction so the row looks continuous. Lift the lower edge of each working circle and sew its felt backing to the spine through the green backing beneath, keeping the stitches concealed.
Secure the overlapped sections with discreet backing tacks so they don’t flap when you lift the runner. Trim the spine’s ends inside the end circles and stitch them down. Remove every pin, clip, and loose thread, then check the underside for exposed knots that could catch on the tablecloth.
Tips for Getting the Finished Look
Keep the green outer curves visible on both sides of the purple chain. If the smaller circles cover too much green, reduce their diameter in the paper trial rather than narrowing the gold trim until it loses its sparkle.
Use a dark plain tablecloth to show the edging clearly. Before adding flowers or party accessories, smooth the runner by hand and check the gold curves from the end of the table. A twisted circle is easier to correct before the surface is dressed.
Easy Ways to Customize It
For a narrower table, reduce both circle sizes and use fewer pieces. For a shorter display, make a tabletop length with no overhang. You can also change plum to navy while keeping emerald and gold, but test the fabric colors together under your evening lighting first.
Displaying and Storing the Runner
Keep open flames, hot dishes, and heated serving equipment away from velvet, felt, and sequins. Battery candles can provide the glow without an exposed flame. Place food on proper serving dishes and keep loose sequins out of eating areas.
Lift the runner with support along its length rather than pulling one scallop. Spot clean only as permitted by the least washable component, testing first on an offcut. Store it flat or loosely rolled around a wide support without crushing the edged overlaps.
Final Encouragement
Finish one green circle and one plum circle before cutting the entire batch. Once their edges lie flat and you like the size relationship, the remaining work becomes a repeatable sequence that preserves the inspiration’s scallops and sparkle.