*This post may contain affiliate links for which I earn commissions.*
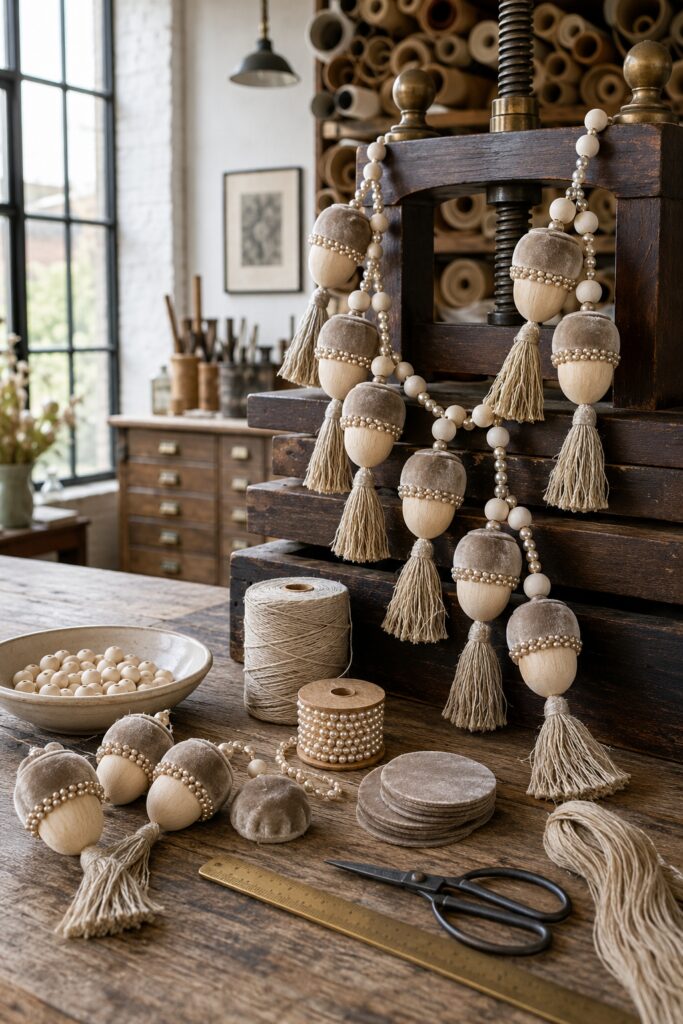
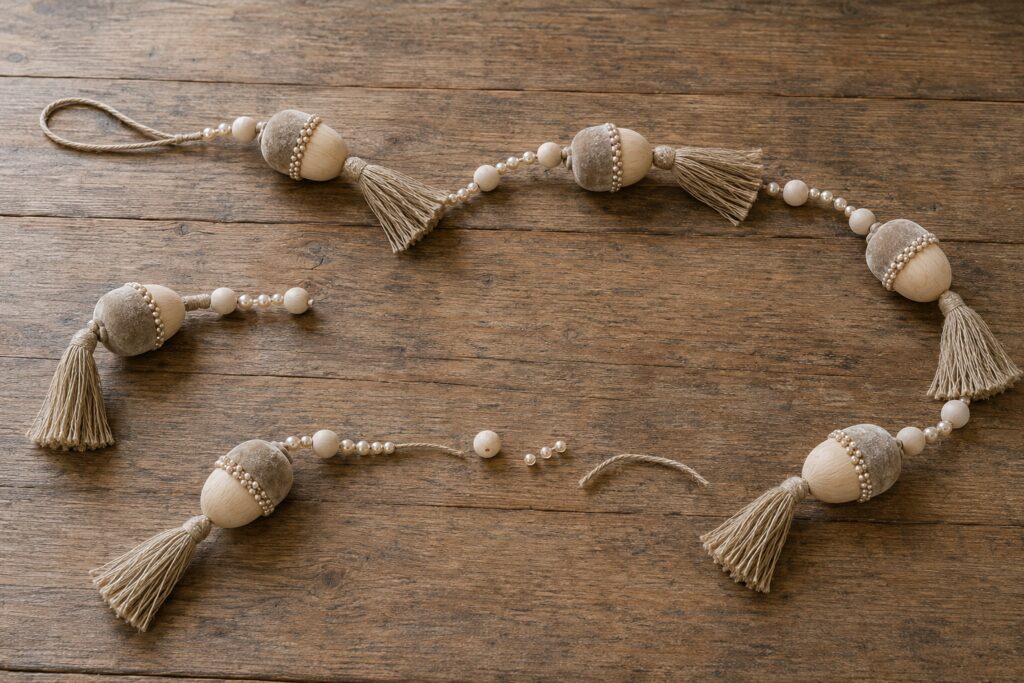
Soft velvet, pale unfinished wood, tiny pearls, and flax tassels give this acorn garland the quiet richness of an antique textile trim. The inspiration image pairs oversized acorn ornaments with matte wooden beads and pearl accents, creating a neutral fall decoration that feels elegant enough for a mantel but relaxed enough for an entryway or cabinet.
This tutorial turns that visual concept into a practical garland made with drilled wooden eggs, gathered fabric caps, cuttable pearl trim, and handmade tassels. The result is especially fitting for a softly warm yet elegant touch in any room, where it can add seasonal texture without relying on oranges and reds.
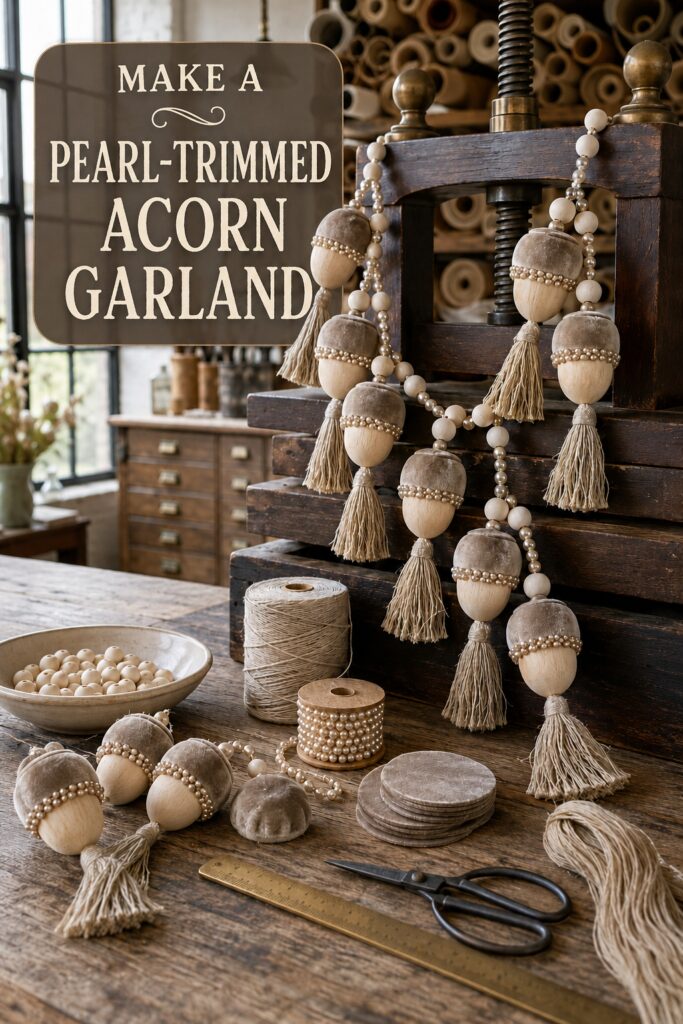
The inspiration and instructional images for this project were created with AI. They present a visual concept and demonstration stages rather than photographs of a physically completed project. This tutorial translates the idea into a realistic method you can recreate at home.
What You’re Making
You will make a flexible indoor garland with approximately seven to nine acorn drops, depending on its finished length. Each acorn begins with a smooth wooden egg. A gathered oatmeal velvet cap covers its rounded top, a narrow pearl strand finishes the cap edge, and a flax tassel hangs from the pointed end. Wooden beads and smaller pearl accents separate the ornaments along a sturdy flax cord.
The inspiration image suggests seamless, perfectly matched components. For a workable version, the wooden eggs are drilled through the center so one continuous tie cord can secure each tassel and provide a hanging loop above the cap. This concealed structure is stronger than gluing a tassel to the surface.
Materials and Supplies
Materials
- Seven to nine smooth unfinished wooden eggs, about 2 1/2 to 3 inches tall
- Oatmeal, mushroom, or light taupe velvet scraps
- Narrow ivory faux-pearl trim or pearl strand that remains intact when cut
- Natural flax, linen, or fine jute cord for tassels and hanging cord
- Unfinished round wooden beads in two or three sizes
- Small ivory pearl beads with holes large enough for the chosen cord
- Strong clear-drying craft adhesive suitable for fabric and wood
- Coordinating sewing thread
Tools
- Fabric scissors and small detail scissors
- Hand-sewing needle
- Long upholstery or doll needle for threading through the eggs
- Pin vise or small drill with a bit slightly wider than the tie cord
- Ruler or flexible measuring tape
- Scrap wood and clamps for safe drilling
- A piece of cardboard for wrapping tassels
Optional Finishing Supplies
- Fine-grit sandpaper
- Clear matte wax or water-based sealer for the wooden pieces
- A thimble for sewing through velvet
Before You Start
Decide where the garland will hang, then measure that space and add extra length for a relaxed drape and end loops. A mantel garland may be around 5 to 6 feet, but the spacing can be adjusted to suit a smaller shelf or a wider doorway.
Test the drill bit on a spare wooden piece. Clamp each egg over scrap wood and drill slowly from the top center through the pointed bottom. Wear eye protection and keep fingers away from the bit. If drilling solid eggs feels uncomfortable, use predrilled wooden egg or teardrop beads instead.
Before cutting all the velvet, make one sample cap. A fabric circle roughly twice the width of the egg is a useful starting point, but velvet thickness changes how tightly it gathers. Adjust the circle until it covers about the upper third of the egg without creating excessive bulk.
Step-by-Step Tutorial
1. Prepare the Wooden Acorn Bodies
Sand any rough areas and clear dust from the drilled channels. Leave the wood natural for the soft look in the inspiration image, or wipe on a very light matte wax. Avoid a glossy finish because it competes with the velvet and pearls. Let any finish dry completely before adding fabric.
2. Sew and Gather the Velvet Caps
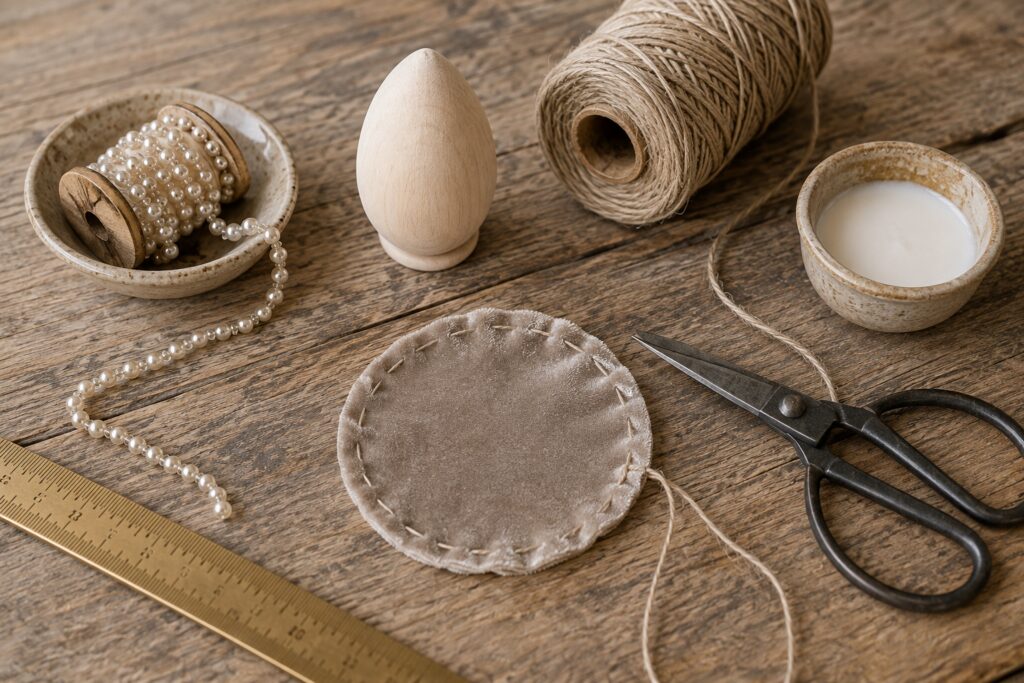
Cut one velvet circle for each egg using the successful sample as your template. Work a loose running stitch about 1/4 inch inside the edge of a circle. Place a small dot of clear-drying adhesive on the rounded top of the egg, center the velvet over it, and draw the thread until the edge gathers evenly around the upper third.
Tie off the thread, distribute the folds, and tuck the raw edge slightly under. Use only small dots of adhesive beneath the edge. Heavy glue can soak through velvet and leave stiff, dark patches. Repeat with the remaining eggs, checking that the caps look related without needing to be identical.
3. Add the Pearl-Trimmed Edge
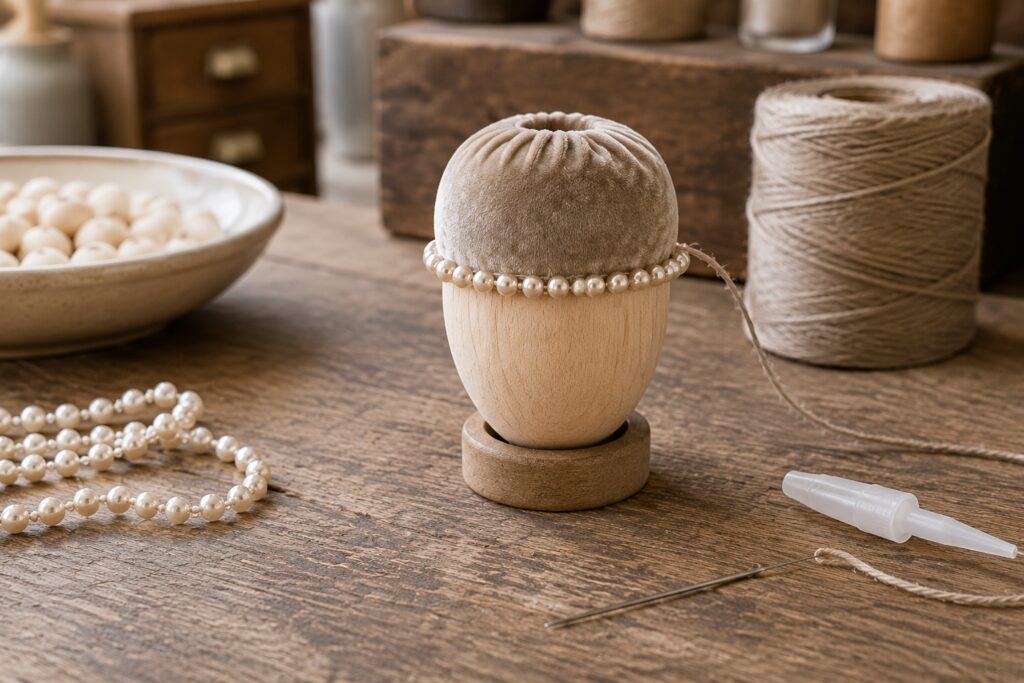
Wrap pearl trim around the base of the first cap and cut it with a slight overlap. Secure the starting end at the least visible side of the egg, then attach the trim a short section at a time. Keep it level where the velvet meets the wood. Finish by overlapping the ends by one or two pearls and trimming away excess backing or thread.
If you use loose pearl beads rather than connected trim, stitch them to a narrow ribbon first. A prepared strand is easier to keep straight and prevents individual pearls from sliding out of alignment.
4. Make the Flax Tassels
Cut a sturdy piece of cardboard to the desired tassel length. Wrap flax cord around it 25 to 40 times, depending on the cord thickness and the fullness you prefer. Slide a separate long tie cord beneath the wraps at one end and knot it tightly. Cut through the loops at the opposite end, then wrap a short piece of cord several times below the top knot to form the tassel neck.
Trim the skirt evenly, but do not cut the long tie ends. Those ends will travel through the wooden egg and become the attachment point for the garland.
5. Secure a Tassel Through Each Egg
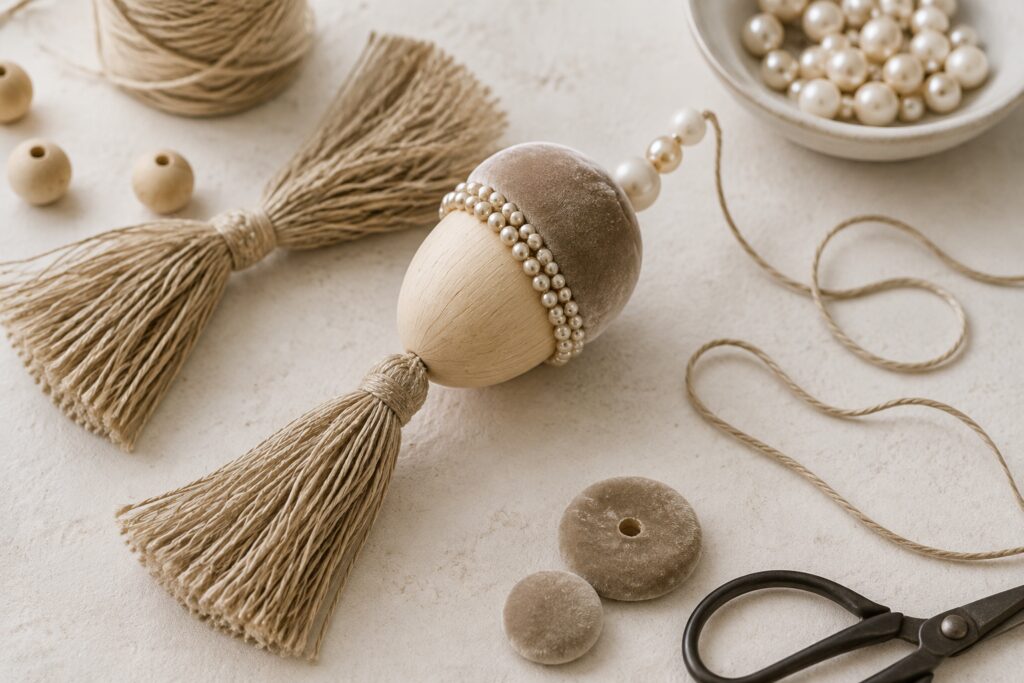
Thread both long tassel ties onto a long needle. Pass them from the pointed bottom of the wooden egg up through the drilled center channel. Pull until the tassel head rests neatly against the wood. Tie the two ends together above the egg to create a small, secure loop.
The loop should be large enough for the garland cord but short enough to disappear among the beads above the velvet cap. Add a tiny dot of adhesive at the bottom opening only if the tassel twists. The cord should carry the weight of the ornament.
6. Plan the Garland Pattern
Lay the main flax cord across the worktable and arrange the components beside it before threading. Start with an end loop, then alternate medium wooden beads, small groups of pearls, and acorn loops. A sequence such as two wooden beads, three pearls, one wooden bead, and one acorn creates variety without looking busy.
Keep the acorns about 6 to 9 inches apart. Slightly irregular spacing suits the handmade materials, but the visual weight should stay balanced. Place the largest or fullest acorn near the center and mirror the general rhythm toward both ends.
7. String and Finish the Garland
Thread the beads and acorn loops onto the main cord in the planned order. If the cord is too soft to pass through the beads, wrap its end tightly with removable tape or use a long needle. Tie a discreet stopper knot after each acorn section if you want the arrangement to remain fixed.
When the garland reaches the planned length, tie a strong hanging loop at the second end. Add a drop of clear-drying adhesive inside each final knot and let it cure fully. Trim stray tassel fibers and rotate the pearl seams toward the back.
Tips for Capturing the Vintage Neutral Look
- Keep the palette close rather than perfectly matched. Pale wood, warm ivory, oatmeal, flax, and mushroom velvet create depth while remaining neutral.
- Choose velvet with a short pile. It gathers more cleanly around a small form and shows fewer bulky folds.
- Use pearls as a fine border and occasional bead accent. Too many large pearls can overpower the quiet natural materials.
- Let the tassels hang slightly longer than the wooden bodies. That elongated proportion gives the acorns their elegant silhouette.
- Steam tassel fibers lightly from a safe distance or comb them with your fingers. Do not press a hot iron directly against synthetic pearl trim or velvet.
Easy Ways to Customize It
For a moodier version, replace the oatmeal velvet with smoky plum, faded charcoal, or muted bronze while retaining ivory pearls and pale wood. For Thanksgiving, warm caramel velvet and antique-gold beads will make the same design feel more harvest-focused.
You can also shorten the project to three acorns for a cabinet swag, make a single acorn as a doorknob ornament, or space the drops farther apart for a lighter window garland. If velvet is difficult to sew, use wool felt and cut shallow scallops around the cap edge instead of gathering a circle.
Displaying the Finished Garland
Drape it across a mantel, picture ledge, bookcase, mirror, or console. For Halloween, pair it with paper bats, smoky glass, aged books, or a few pale pumpkins so the subtle seasonal detail still reads. The garland is intended for indoor use. Keep it away from open flames, damp outdoor areas, and places where children or pets might pull on dangling tassels.
A Handmade Finish Is Part of Its Charm
The appeal comes from the contrast between humble natural fibers and a small amount of pearl polish. Your velvet gathers, tassels, and bead spacing do not need to duplicate the AI inspiration exactly. A consistent palette and a strong through-cord construction will preserve the same graceful acorn silhouette while producing a garland that is practical to hang and enjoy.