*This post may contain affiliate links for which I earn commissions.*
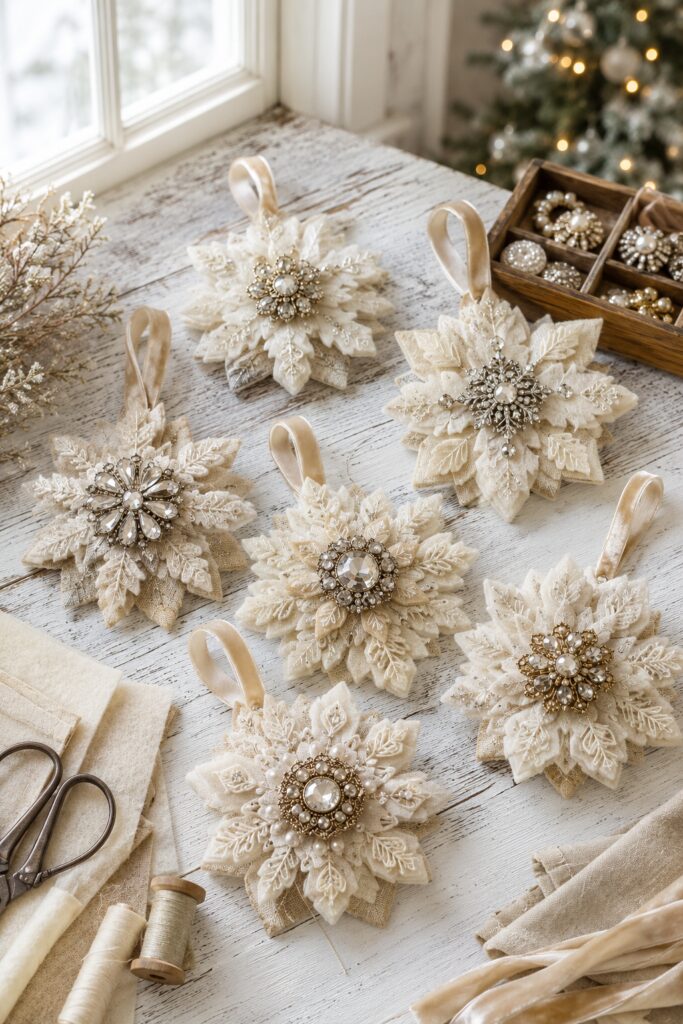
Soft ivory snowflakes, champagne velvet, natural linen, and jewel-like brooch centers give these handmade ornaments the character of treasures collected over many Christmases. The inspiration image suggests intricate embroidered layers, but the same heirloom mood can be achieved with graduated fabric snowflakes, a few restrained stitches, and securely mounted vintage-style brooches.
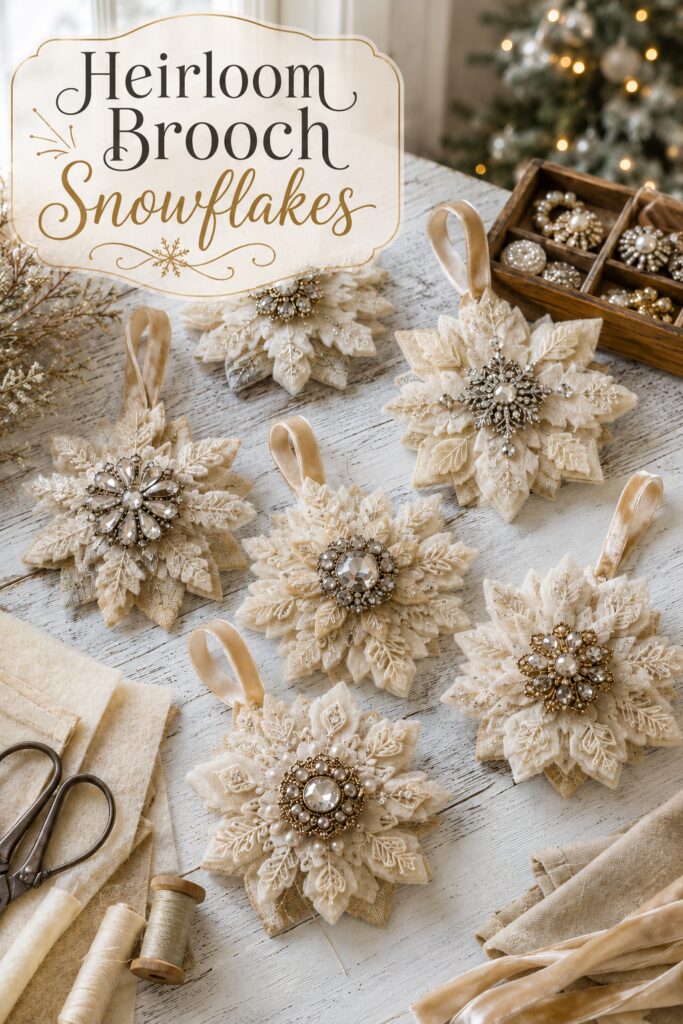
The inspiration image and instructional demonstration images for this project were created with AI. They illustrate the design and a practical DIY approach rather than documenting an actual project in progress.
What You’re Making
Each ornament is a layered six-point snowflake approximately 5 to 7 inches across. A sturdy felt backing supports linen and embroidered-fabric layers, while a champagne velvet loop provides the hanger. A small felt patch reinforces the back of the center so the closed brooch pin can be stitched securely rather than relying on glue alone.
The heavily dimensional embroidery in the inspiration is simplified by using embroidered fabric where available and adding optional seed beads or small hand stitches only to the top layer.
Materials and Supplies
Materials
- Ivory wool or wool-blend felt, about 1 to 2 millimeters thick
- Natural oatmeal or ivory linen
- Ivory embroidered fabric, lace, or lightweight textured fabric
- Vintage-style pearl, crystal, or rhinestone brooches, ideally about 1 to 1 1/2 inches wide
- Champagne velvet ribbon, approximately 3/8 to 5/8 inch wide
- Strong cream polyester sewing thread
- Cream embroidery floss
- Paper or lightweight cardstock for templates
- Small scraps of ivory felt for reinforcement patches
Optional Embellishments
- Seed pearls or small glass beads
- Metallic champagne embroidery floss
- Very small sew-on crystals
- Fabric stiffener for loose-woven linen
Tools
- Sharp fabric scissors and small detail scissors
- Hand-sewing needles, including one suitable for heavier thread
- Straight pins or fabric clips
- Washable or disappearing fabric marker
- Thimble
- Ruler and iron
- Fray-prevention liquid for linen edges, if desired
Before You Start
Inspect every brooch. Avoid pieces with loose stones, damaged clasps, sharp protrusions, or excessive weight. If using a family heirloom, choose a fully reversible attachment and do not apply glue to it. Keep brooches and loose beads away from young children and pets.
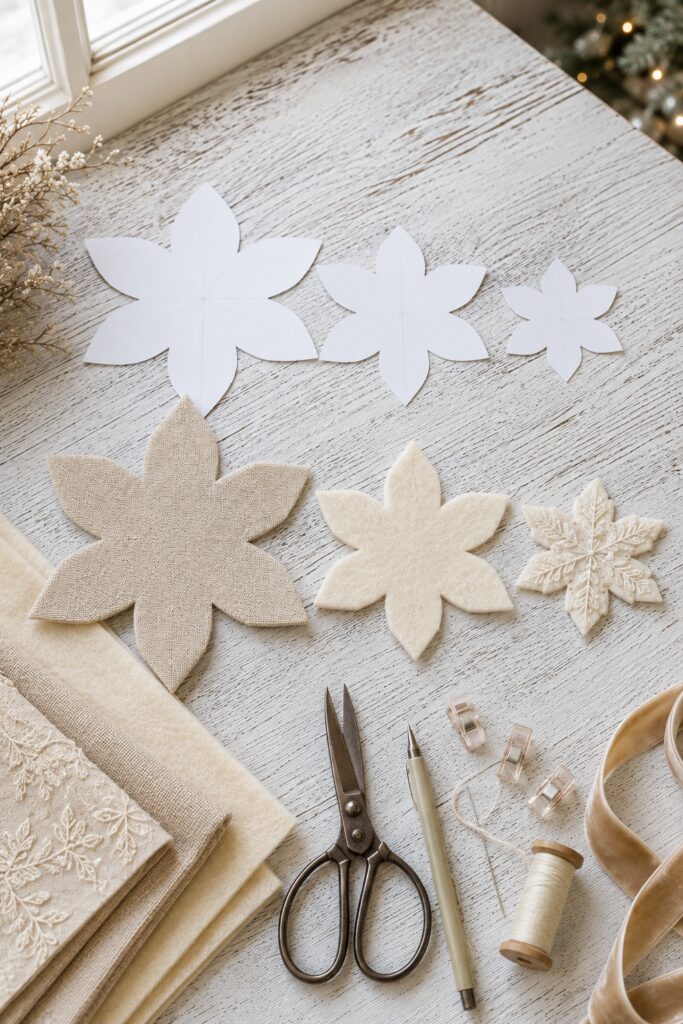
Make three six-point templates, usually around 6, 5, and 4 inches across. Simple tapered points are easier to cut and align than intricate lace-like arms. Test the largest template against the selected brooch so the center does not overwhelm the fabric layers.
1. Make the Graduated Templates
Fold paper into equal sections or draw one snowflake arm and repeat it around a center point. Keep the center broad enough to support the jewelry. Cut the three templates and stack them to confirm that each layer reveals a visible border below it.
2. Cut the Felt and Linen Layers
Trace the largest template onto ivory felt for the backing. Cut another large or medium snowflake from linen, then cut the smaller layers from felt, embroidered fabric, or lace. Use the same templates for a coordinated set, but vary which material occupies each level.
For loose linen, apply a tiny amount of fray-prevention product to a test scrap first. Another option is to cut the linen slightly smaller than the felt layer beneath it so the felt protects the points.
3. Arrange the Staggered Points
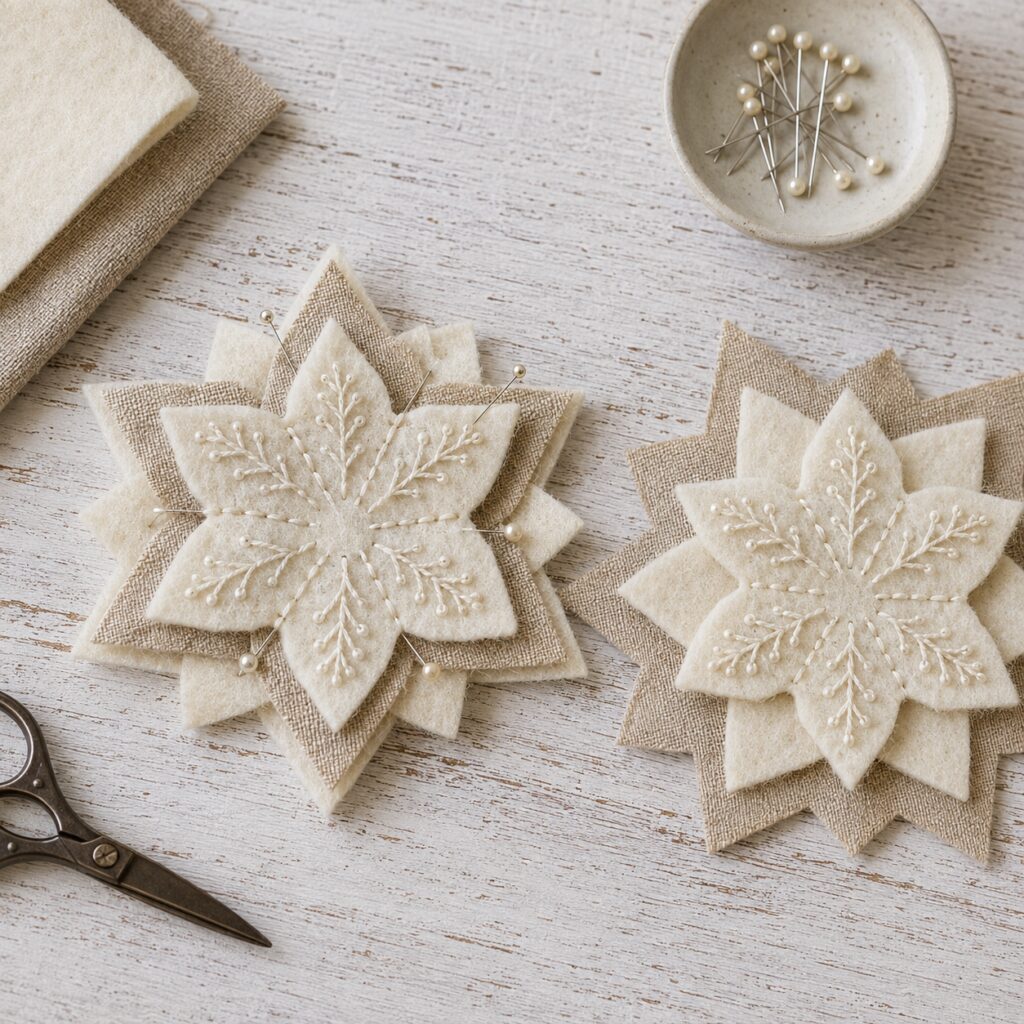
Place the largest felt backing flat. Center the linen layer over it, then rotate the next snowflake so its points fall between the points below. Add the smallest layer and adjust until the spacing feels even. Step back before pinning because slight misalignment is easier to notice from a distance.
4. Stitch the Layers Together
Secure the stack with clips or a few pins placed well away from the center. Use small running stitches around the inner portion of each layer. The stitches should hold the pieces firmly without flattening every point. If desired, add a blanket stitch to selected felt edges or a few branching embroidery stitches to the uppermost layer.
5. Add Subtle Embellishment
Stitch seed pearls or tiny beads along only a few upper points. Repeat the same embellishment at regular intervals so the ornament feels intentional rather than crowded. Knot securely between layers and trim thread tails where they will be hidden by the center.
6. Prepare the Velvet Loop
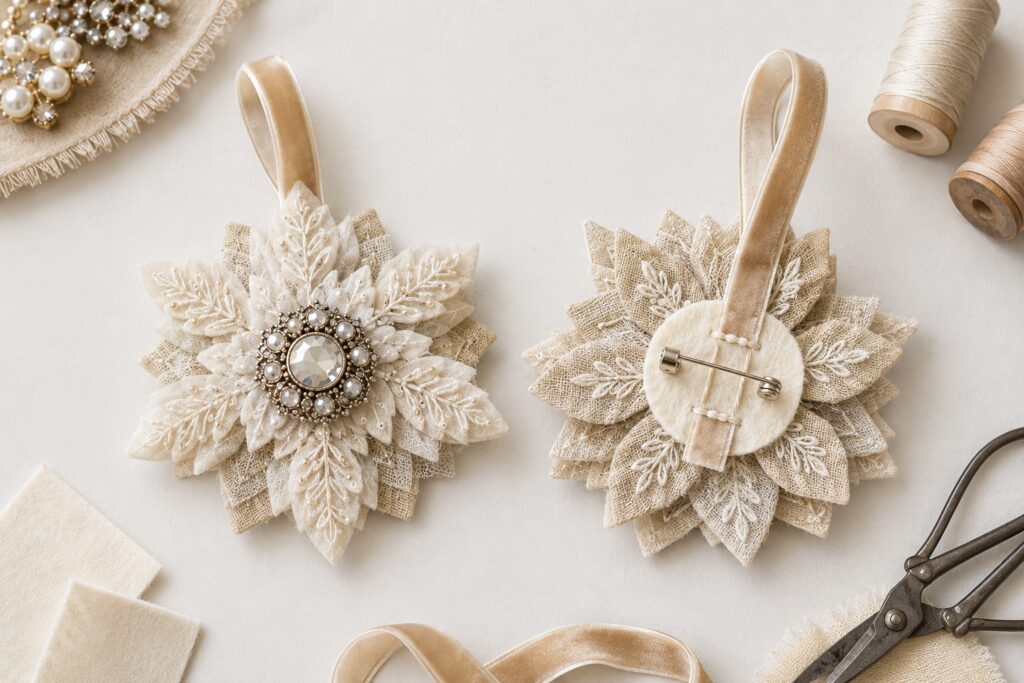
Cut a ribbon length that forms a comfortable hanging loop, usually about 7 to 9 inches before folding. Bring the raw ends together and place them against the back at the top point. Stitch through the ribbon ends several times.
Cover the raw ends with a small round or snowflake-shaped felt patch. Stitch around the patch so the hanger is sandwiched securely between it and the ornament backing.
7. Reinforce and Attach the Brooch
Center the brooch on the front and mark where its pin bar falls. Close the clasp completely. From the back, take several strong stitches around the pin bar or fixed hardware without passing thread across the visible stones. Tie the thread beneath the rear reinforcement patch or between fabric layers.
For a flat-back jewelry embellishment without a pin, use sew-through openings when available. If adhesive is necessary, choose one suitable for metal and fabric, test it first, and still add stitches wherever the construction permits.
8. Shape and Finish the Ornament
Gently lift alternating snowflake points to create shallow dimension. Do not fold the linen sharply or pull against the brooch. Check that the loop is centered and that the ornament hangs without twisting. Add a few hidden stitches if a heavy center causes the upper layer to sag.
9. Make a Coordinated Set
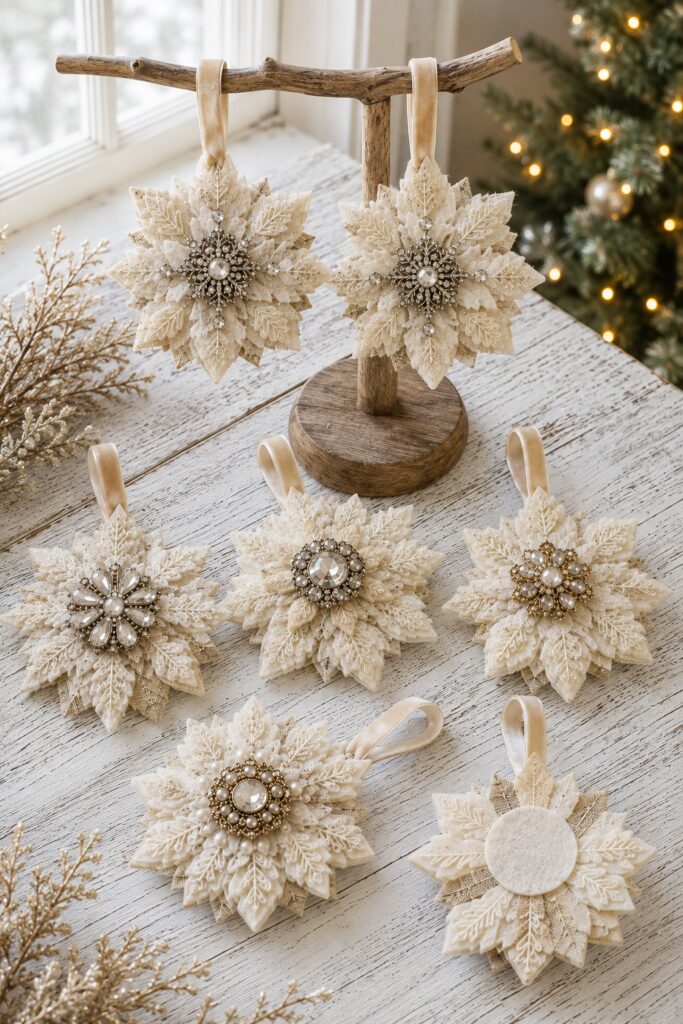
Repeat the same three template sizes for visual consistency. Change the brooch style, swap the order of the linen and felt, or vary the embroidery slightly. Keeping the ivory, oatmeal, champagne, pearl, and antiqued-metal palette consistent allows different centers to feel collected rather than mismatched.
Tips for Capturing the Heirloom Look
- Mix matte felt with lightly textured linen so the sparkle remains concentrated at the center.
- Choose antiqued silver, soft gold, pearl, and clear stones rather than highly saturated jewelry.
- Rotate each layer by the same amount to create an even halo of points.
- Use champagne velvet instead of shiny narrow cord for a softer finish.
- Limit beads to the upper layers so the ornament stays light enough for a tree branch.
Easy Ways to Customize It
Use pale blush velvet with rose-gold centers for a romantic set, or combine ivory felt with slate-blue linen and silver brooches for a cooler winter palette. Smaller four-inch versions make gift toppers, while larger eight-inch snowflakes can decorate a wreath or cabinet door. For a no-jewelry version, replace the brooch with a cluster of sew-on pearls and one flat crystal button.
Displaying and Storing the Ornaments
Hang the ornaments on sturdy branches, cabinet knobs, a garland, or a tabletop display tree. Keep heavy brooch versions away from delicate branch tips. After Christmas, wrap each ornament in acid-free tissue and store it flat in a divided box. Do not stack heavy centers directly over embroidery or velvet loops.
A Keepsake Set with Collected Character
The ornaments do not need identical brooches or elaborate embroidery to look special. Repeated snowflake proportions, quiet neutral textiles, secure hand stitching, and a few varied jewel centers create the collected heirloom effect.