*This post may contain affiliate links for which I earn commissions.*
The appeal of this Christmas village is the little square in front of the shops. There’s room for a tree, a pair of market stalls, and a few benches, while the buildings climb behind them. Your eye has somewhere to travel instead of meeting a single row of houses. The teal cabinet gives the scene a clear boundary, and the surrounding shelves make it feel at home in a study. I would borrow the arrangement before trying to match every building. A lively square and a raised back row can give a mixed collection a similar sense of place.
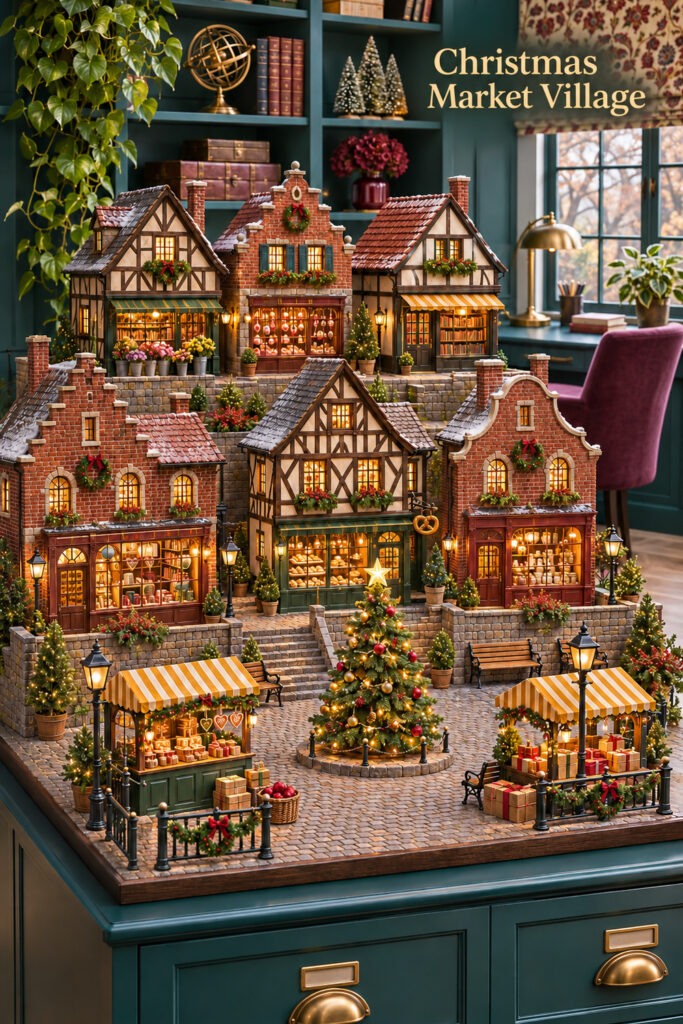
This image was generated with AI as decorating inspiration. Similar pieces can recreate the overall effect in your own home.
Begin with a Village Square
Choose the surface before choosing the village pieces. Measure its usable depth as well as its width, leaving room around the board for handling it. The inspiration shows a substantial display on a cabinet. At home, check the furniture’s load guidance and make sure the entire base rests on the surface. A scene that hangs over the edge will be awkward to move and easy to catch with a sleeve.
Lay out the square with paper cutouts standing in for the buildings. Keep an open area near the front center for the tree, then arrange the shops around it. This open patch is doing useful work. It lets the tiny stalls and shop windows remain visible even when several rooflines overlap behind them. You can get the same effect with fewer buildings by giving each one a clear position around the shared space.
The buildings can differ in height and facade treatment while still looking like neighbors. Compare doors, windows, and any model figures when judging scale. A towering doorway beside a tiny shop entrance can make the display feel accidental. Similar model scale matters more here than buying every piece from a single matching collection.
Find Illuminated Village Shops
Browse current Amazon options that can help you recreate this look.
Browse Illuminated Village Shops on Amazon →As an Amazon Associate I earn from qualifying purchases.
Give the Shops Their Own Layers
Raise the Rear Buildings on Firm Platforms
Use broad, rigid risers that support the full footprint of each building. The stone-looking terraces in the image suggest a hillside, but the underlying support needs to be dependable. You could cover sturdy display platforms with a scenic stone finish. Treat that finish as decoration, not as the part holding the weight.
Set the tallest pieces toward the back and offset the front buildings so their roof peaks don’t hide the windows behind them. View the arrangement from the height at which people will normally see it. You may find that a small sideways shift reveals an entire storefront. That’s a better correction than making the back platform taller and taller.
Make the Ground Connect the Collection
Cobblestone paving ties the scene together without covering it in snow. A textured scenic sheet or painted display board can suggest that ground. Keep the finish thin enough that buildings sit flat. Bring the paving around the tree and stalls so the separate objects appear to share one public square.
Add a few boundary pieces, such as short railings or low walls, where they help explain an edge. Leave openings where an imaginary shopper would enter. The image’s benches and tiny parcels add activity without requiring a crowd of figures. Choose a few understandable details rather than scattering something into every gap.
Repeat Warm Light and Small Christmas Details
Glowing shop windows make the buildings feel related, while wreaths, garlands, and the central tree identify the season. Start with the lighting already built into suitable village pieces. Route cables along the back and through planned gaps before filling those gaps with scenery. Leave switches and battery compartments reachable.
The mustard-striped stalls stand out against the brick and timber buildings. A pair of small market structures can bring that contrast to your version. If your houses are already colorful, keep the stalls quieter. The goal is to make the square inviting while allowing the shopfronts to remain individual.
The surrounding study can stay useful while the village is up. Keep the arrangement clear of papers, frequently opened drawers, and the chair’s normal movement. The image repeats the teal behind the model, but you could achieve a connection with a small tree grouping on one shelf instead of decorating the entire bookcase. Leave enough clear space beside the board to reach its edges when you need to move it.
Plan for taking the display down, too. Keep delicate accessories separate from the heavy buildings, and photograph the arrangement before packing it. Group the stalls and their tiny loose pieces together so next year’s setup doesn’t begin with a search for a missing railing. Label lighting leads if several similar connections serve different parts of the village.
Arrange the Display from Back to Front
- Clear and measure the support surface, then put the base board in place. Check that the cabinet doors and any nearby work area remain useful. Decide where the electrical connections will go before the buildings arrive.
- Set the rear risers and buildings first. Test the light connections and make sure each base sits level. Leave enough access to remove one building without taking apart the whole village.
- Add the lower shops around the square. Stagger their positions, checking that the rear windows remain visible. Keep the main opening wider than the narrow passages between individual buildings.
- Position the tree and stalls, then add benches, parcels, and railings. Make the tree the meeting point of the scene without blocking the most detailed storefront. Move a stall slightly toward an edge if the foreground starts to look crowded.
- Turn on the lights and look from your usual viewing spot. Tidy visible wiring, adjust overlapping roofs, and stop adding details when the square still reads clearly. A smaller surface can use one raised row, a tree, and one stall instead of squeezing in the entire arrangement.
Adapt the Collection and Choose Similar Pieces
Your existing village can guide the colors. Brick buildings work with the warm paving and gold-toned lights shown here, but painted wooden houses or simple ceramic shops could use the same square layout. Keep the terrain and accessories consistent enough to connect them. The study’s teal paint and plum chair are surrounding-room ideas; the miniature arrangement can work on furniture you already own.
Shop Similar Illuminated Village Shops
Look for buildings with readable storefront details and compatible model scale. Check the listed base dimensions and lighting requirements so you can plan the arrangement before ordering. A mix of corner shops and narrower buildings gives you more options around a square.
Look for Sturdy Display Risers
Choose platforms with flat tops and enough depth to support whole building bases. Broad steps are useful when you want an elevated neighborhood rather than isolated pedestals. Check the stated capacity for the actual pieces you intend to place on them.
Shop Similar Miniature Market Stalls
Small stalls with visible counters help establish the Christmas market idea. Striped awnings can introduce a contrasting color without changing the houses. Compare their height with the shop doors so they feel like part of the same miniature world.
Look for Cobblestone Scenic Sheets
Choose a paving pattern scaled to your village rather than to full-size craft projects. A flexible sheet may suit a flat board, while separate thin sections can follow supported terraces. Test the material under a building before committing to the full scene.
Final Styling Tip
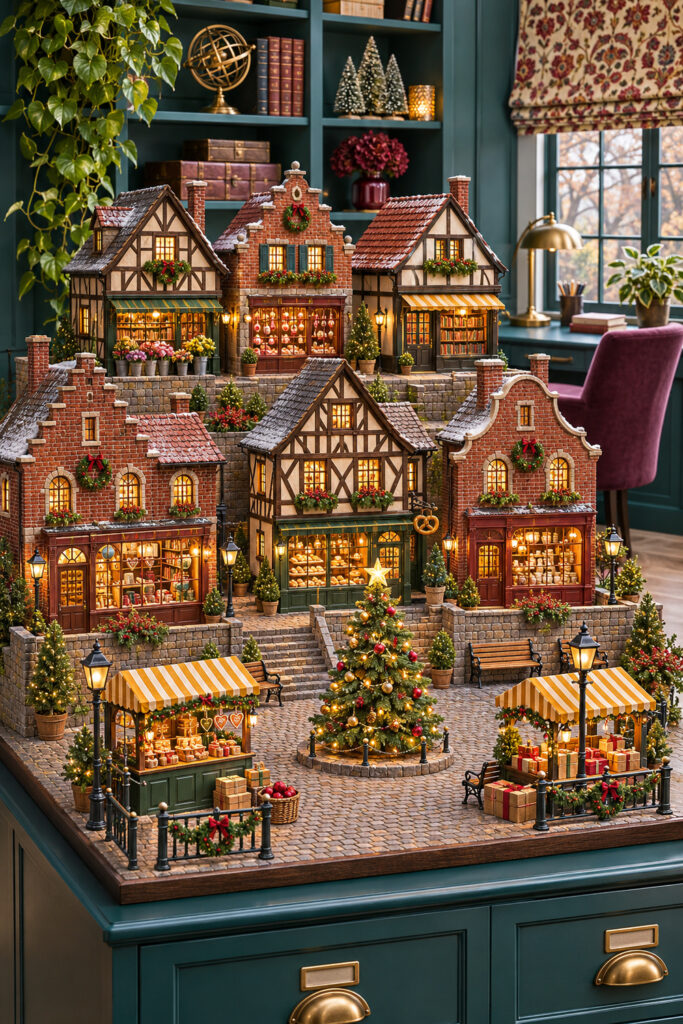
Take one photograph from the normal viewing position and check the shop windows. If several disappear, move the foreground pieces apart before adding anything else. Those small, glowing interiors are worth making room for.