*This post may contain affiliate links for which I earn commissions.*
These paper fan ornaments bring a little jewel-box sparkle to the Christmas tree. The pleats give even plain colored paper a lovely range of shadows. A single clear gem at the center catches the light, and a slim cord lets the ornament hang close to the branches. Start with one in red, then try the same folds in teal and magenta.

This image was created with AI as craft inspiration. The workshop images illustrate the proposed steps.
What you will make
Each ornament uses two equal accordion-folded strips. You open each one into a half fan, join the two straight edges on each side, and cover the center with a small cardstock disc. The disc makes a flat seat for the gem. The ornament shown in the inspiration is about three inches across. Treat that as a starting point you can adjust to suit your tree.
Set aside a flat work surface where the rosette can stay undisturbed while it dries. Lay a clean sheet of scrap paper over the worktop and replace it when it becomes sticky. Colored paper shows glue smears clearly, especially along the ridges, so a clean patch for turning the piece over is worth having.
Gather the paper and small pieces
- Two strips of folding paper for each ornament
- Matching cardstock scraps for the center disc and hanging tab
- A round clear lightweight acrylic flat back gem
- Thin gold hanging cord
- Paper craft glue and a clear drying craft adhesive labeled for the gem and paper
- Ruler, pencil, scissors and a blunt scoring tool
- Two small craft clips and scrap paper to protect the colored paper
Try a medium-weight colored paper that holds a crease when you press it between your fingers. Very stiff card can split where the folds come together. Save the firmer cardstock for the disc and hanging tab. For shopping searches, try jewel tone folding paper, round clear acrylic flat back gems, and thin metallic ornament cord. Choose the gem after you decide how large the center disc will be.
Step 1. Cut and mark two matching strips
Cut two strips 3 inches wide and about 8 inches long for a trial rosette. Mark short intervals of about half an inch along both long sides. A line connecting each pair of marks gives you a reliable place to start the fold. Draw lightly on what will be the back of the paper.
Test a fold on a scrap from the same sheet. If the surface tears, crease the scrap gently with a blunt tool first and try again. The folds need to stay crisp, and they should still open when you pull gently on the stack.
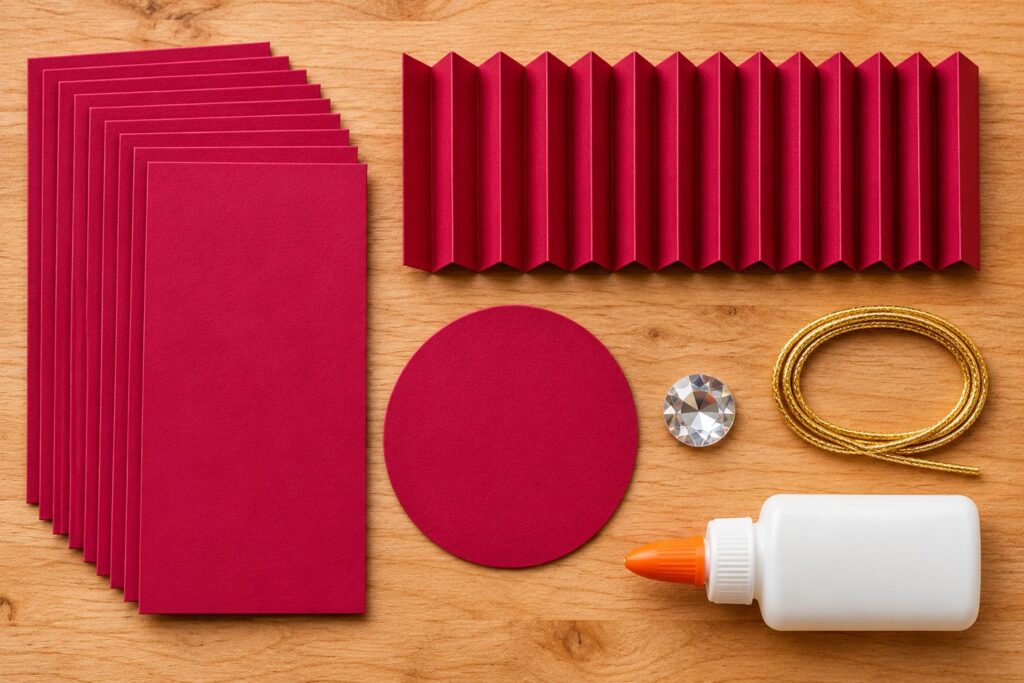
Fold the first strip back and forth across the marks. Align the edges each time before pressing the crease. Keep your thumb close to the line so a fold does not wander across the strip. Fold the second strip the same way. Lay the two compressed stacks beside one another and check that the ends sit at the same height.
Step 2. Form two half fans
Fold each compressed accordion stack gently at its midpoint. Bring the inner faces together so the open pleats spread to either side. Add a thin line of paper glue along the two faces that will touch and hold them closed with a craft clip padded by scraps. Let the joint set as directed by the adhesive.
Open the first fan until its outside edges form a straight line. Repeat with the second one. Set the fans next to each other with their midpoints touching. Check that the pleated edges meet at both ends of the line. Turn one fan over if that helps align the outer faces.
Add paper glue to the matching straight faces at one seam and join them. Repeat at the other seam and leave the rosette flat until both joints hold. If a seam tries to spring open, check whether a crease was reversed. Correct that fold while the glue is still workable and bring the faces together again.

Step 3. Add the center and cord
Cut a small cardstock disc wide enough to cover the joint in the middle. Test it before gluing. It should sit on the pleat tops without spreading too far across the folded paper. If the first disc looks too large, trim a second one instead of cutting while the piece is on the rosette.
Glue the disc to the center and press it in place gently. Once it is secure, put the gem on the disc with a small amount of the appropriate adhesive. Keep the ornament horizontal while it sets. A scrap of cardstock with one spare gem makes a good test piece if you are new to that adhesive.

Turn the rosette over after the gem is secure. Make a cord loop and set the ends against two pleats near the top. Attach them beneath a small tab with an adhesive suitable for both cord and paper. Hold the tab while it sets. The broad circle on the back in the workshop illustration is an optional matching cover. A small tab is enough to hold the loop. Wait until the adhesive has cured before lifting the ornament by the loop. Hold your other hand underneath for the first test.
Make a few adjustments before folding the rest
If the front looks lopsided, look along the ridges to find a fold that is wider than its neighbors. A ruler laid beside the stack makes the difference easier to see. The next ornament will open more evenly if both strips have the same fold count. Use the successful strip as your pattern for marking the rest.
If the finished piece turns forward when you hang it, check the weight of the gem and the position of the cord. A smaller acrylic gem keeps more of the weight near the paper. You can also try a slightly shorter loop so the ornament hangs nearer the branch.
Work in pairs if you are making a whole set
Mark all the strips before you begin gluing, then keep the two strips for each ornament together. Fold one teal pair and one red pair before deciding which paper feels easier in your hands. A change in finish or weight can affect how readily the center opens. Let the first pair lie flat for a moment after folding and see whether it tries to spring up. That gives you time to adjust the crease before the seam has glue on it.
Match each disc to a pair as you go. Put the smallest gems together and use those first. They give you more room to adjust the disc and see how its edge looks against the folds. Keep the dry ornaments on a separate part of the table, away from the scoring tool and adhesive. Once the loops hold, try them on a spare branch before packing them up or making a second set as gifts.
Put the colors on the tree
Start by placing one red, one teal and one pink fan at different levels. Leave some branches open between them so the folds are visible. Hang one against a darker pocket of greenery and another nearer a lamp. The two locations will show very different sides of the same paper.
Store the ornaments flat between clean sheets in a shallow box when you take them down. Put a small cardboard spacer at the edge of the box if you are stacking layers. That gives the center gems room and protects the folded fronts.
The lovely part of making the first ornament is deciding what the next one will look like. Try a quieter paper under a brighter gem, or make all three colors with matching centers. The simple fold holds the set together.