*This post may contain affiliate links for which I earn commissions.*
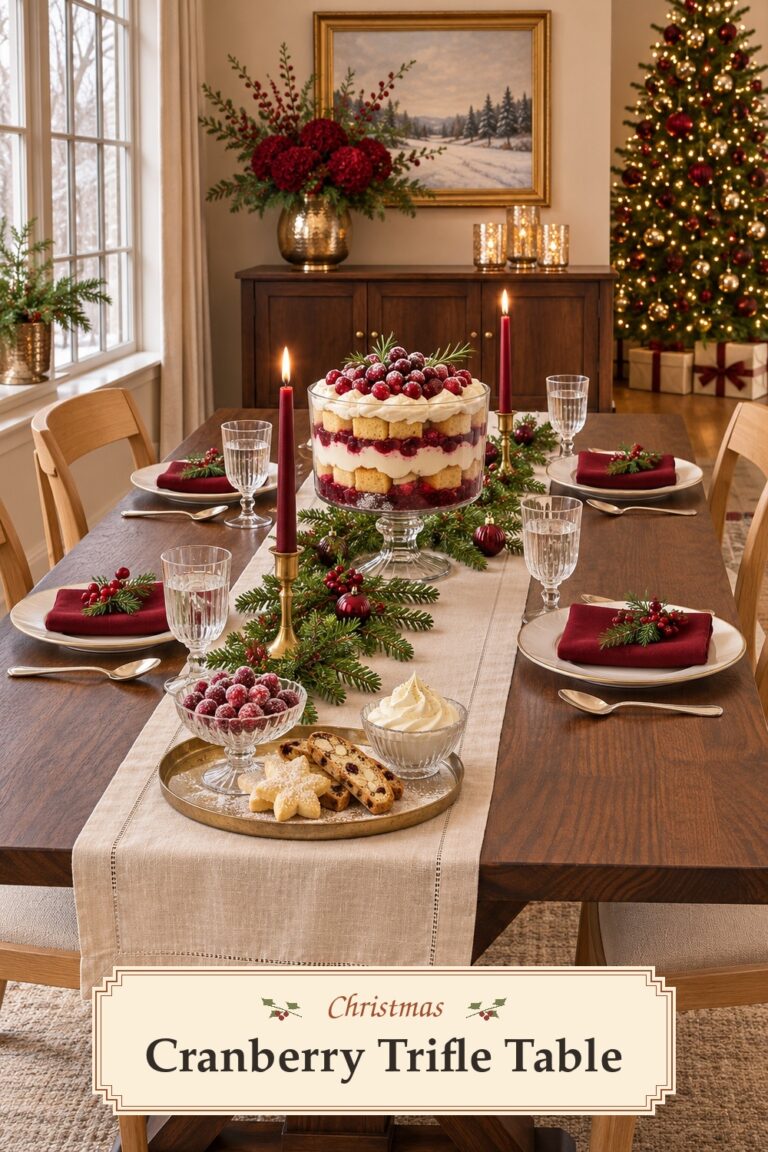
Three rows of broad ivory scallops give the base of this Christmas tree a pearly finish. The lower branches stay visible above the collar, and there are no parcels in front to hide the pattern. You can make a similar removable wrap from posterboard and pearl-finish cardstock. This version uses a simple open-backed band so it can go around an assembled tree.
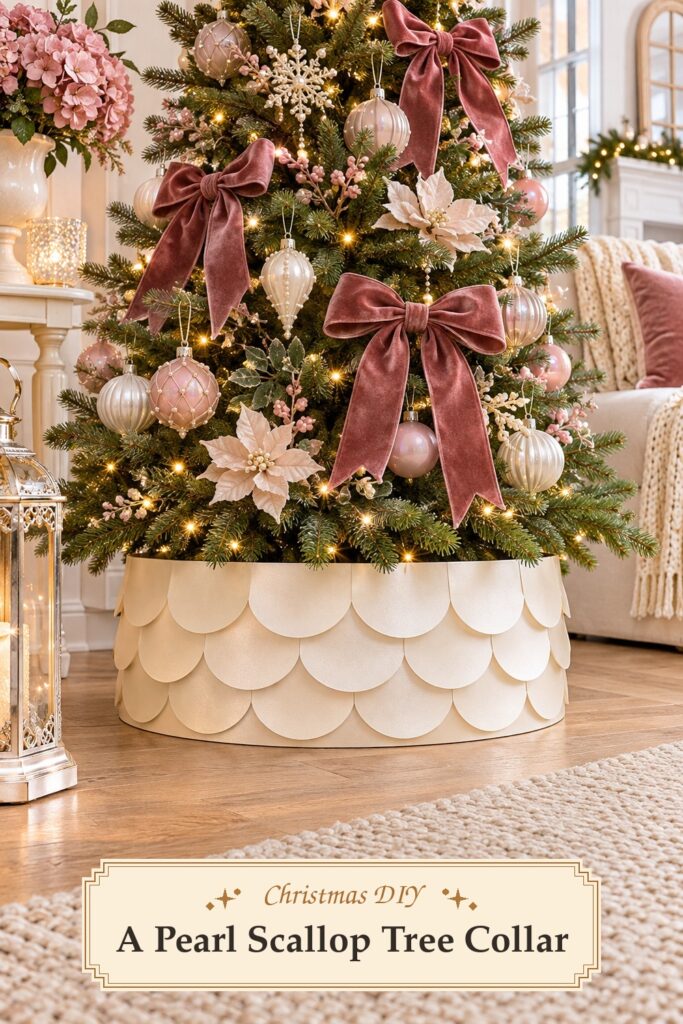
The inspiration and instructional images were created with AI. The steps describe a practical way to make a similar garland at home.
What You’re Making
The collar is a decorative cylinder with an open top and bottom. A firm card band holds its shape, while three paper strips overlap from the bottom upward. The smooth rounded scallops sit in staggered rows. The suggested starting size is about eight inches high, with a diameter that gives your own stand plenty of clearance.
This is a proposed paper adaptation of the inspiration. The collar does not hold the tree upright. Use it around a stable artificial tree, keeping all parts clear of lights, plugs and heat. The back opens so you can remove it when you need access to the stand.
Materials and Supplies
- Firm cream posterboard for the base band
- Pearl ivory cardstock for the three scalloped rows
- Removable tape for the rear overlap
- Double-sided craft tape for attaching the scallop strips
- Plain cardstock for a rounded scallop template
- A ruler, pencil and craft scissors
- A flexible measuring tape or length of cord
Choose cardstock that bends into a gentle curve without cracking. Very stiff glitter card can be harder to wrap neatly. Test the double-sided tape on a small scrap of both papers before you cut the full strips.
Before You Start
Measure around the outside of your tree stand with a cord, leaving room to remove the collar without catching a foot or adjustment knob. The finished band needs to be wider than the stand at its widest point. Check the height too. Leave clearance under the lowest branches and keep access to the tree controls.
Make a plain paper test band first. Wrap it around the stand and let the ends overlap at the back. Mark the overlap and trim the height until you like the proportions. This test tells you more than a fixed diameter would, since stands have different shapes.
Step 1. Form the Removable Base
Transfer the test band dimensions to the posterboard. If one sheet is too short, join two sections on the inside with craft tape, keeping their lower edges aligned. Curve the band gently around a broad round object or by easing it in your hands. Avoid a sharp fold.
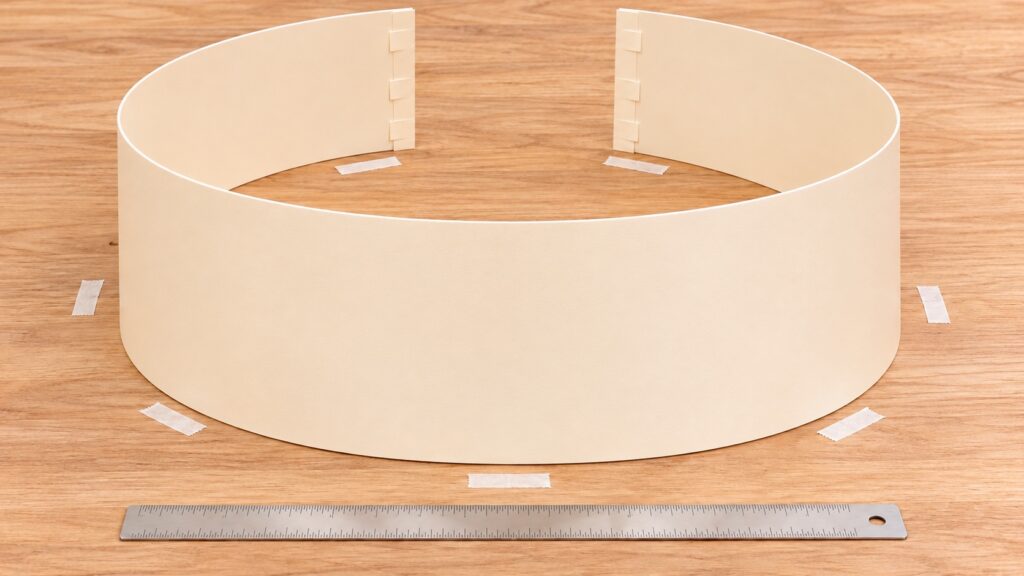
Set the band around the tree stand and overlap the two rear ends. Hold that overlap temporarily with a small removable tape tab. Check that the top and bottom edges are level and that the band stands clear of the tree trunk and cables. Open it again and move it to the worktable.
Step 2. Cut the Scalloped Strips
Make one broad semicircle template about four inches across as a starting point. Trace a row of touching semicircles along the lower edge of a cardstock strip. Leave a straight band above them for attaching the strip to the base. Cut the rounded edge smoothly, turning the paper as you go.
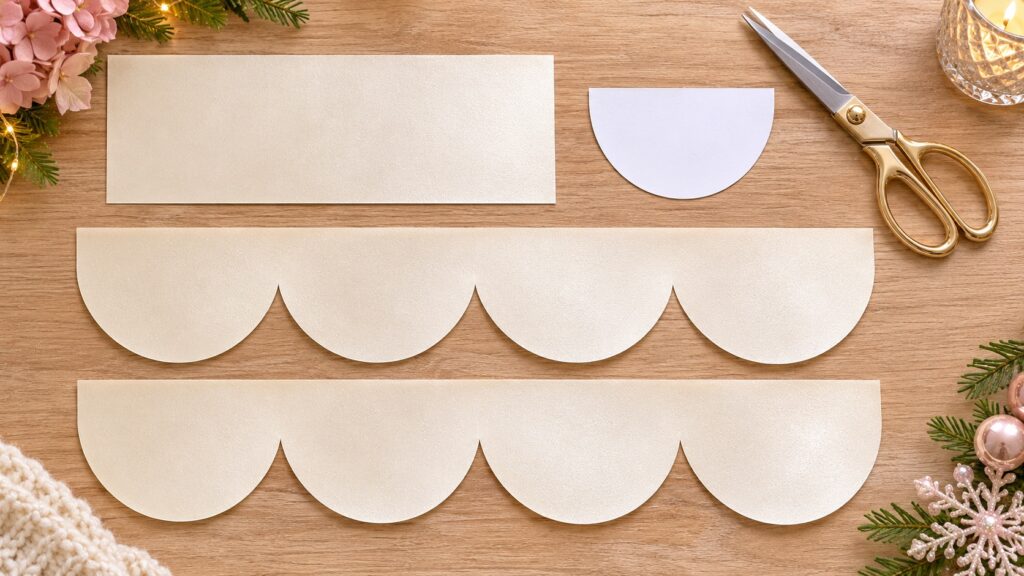
Make three rows in the same way. The strips should be wide enough to overlap slightly as they go around the base. You can join shorter lengths at the back, where the seams will be less visible. Try the three rows against the base before attaching them. Adjust the spacing so each row shows a clear curved edge without leaving the plain band exposed.
Step 3. Attach the Bottom and Middle Rows
Start with the bottom row. Lay the base band flat enough to work on, keeping its back overlap clear. Apply double-sided tape along the straight top band of the first scallop strip. Press it onto the base so the rounded tips come just above the floor line.
Place the middle row above it, shifting the pattern so the rounded centers sit between the scallops below. Its lower edge should overlap the first strip enough to hide the attachment band. Tape only the straight upper section so the curved edges can sit naturally.
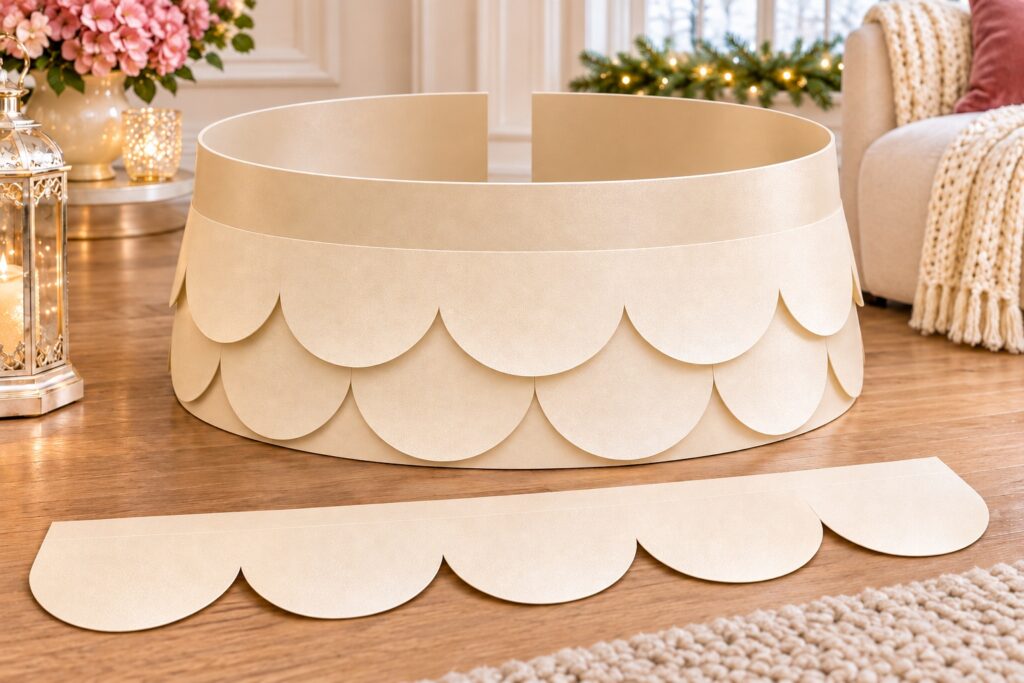
Curve the base gently to check the result before adding the top row. The scallops may open slightly as the band bends. Press the taped areas again and move any join that lands where it will be obvious from the front. Work in short sections if that makes the paper easier to control.
Step 4. Add the Top Row and Close the Back
Attach the third strip in the same way, staggering it against the middle row. Keep the straight top edge level with the base. Trim only the rear ends if they interfere with the opening. Leave the decorative strips separate at that opening so the collar can still unwrap.
Put the collar around the stand with its plainest seam at the back. Overlap the base ends and join them with two small removable tape tabs. Keep the tabs on the rear overlap rather than pulling tape across the scalloped front. Check that the cylinder stands freely and that no part is caught under a stand foot.
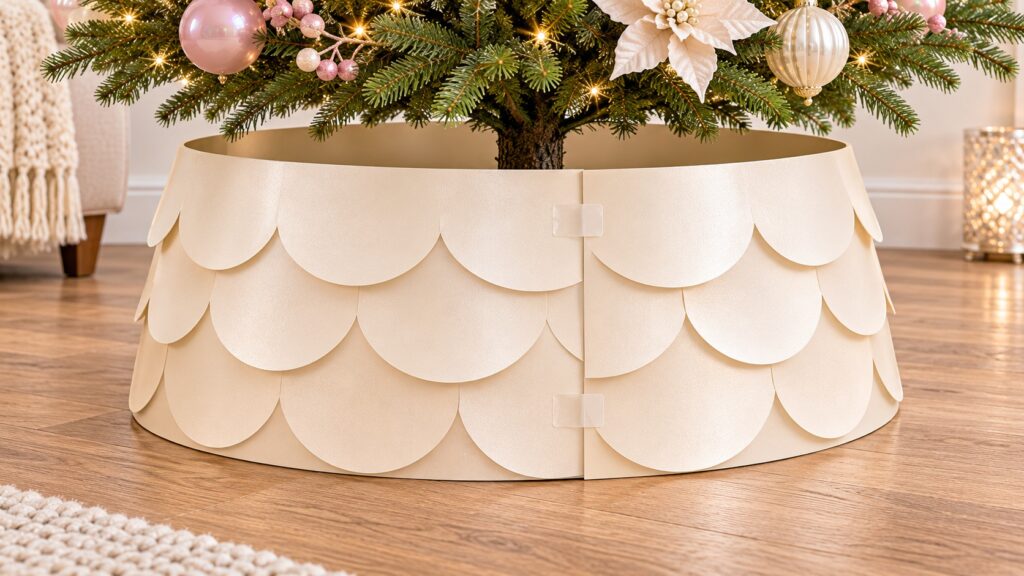
If the collar leans, open it and check the lower edge on a flat surface. A thick paper join or uneven strip can lift one side. Trim the base edge or reposition the strip rather than pushing the collar against the stand to hold it upright.
Tips for Getting the Finished Look
Keep the scallops broad and the rows evenly spaced. Small intricate cuts can look busy near tree needles, while a clean curved edge shows the pearl finish in the light. Try the card near your tree before buying several sheets. Some pearl papers look pink or silver under warm lights.
Leave the collar visible from the front. Put parcels at one side after you have checked the pattern, or save the clear front for the part of the season when you want to enjoy the paper detail.
A seam at the back is easier to disguise if the scallop strips finish at slightly different points. Keep each join within the rear overlap area and check the curve before pressing the tape firmly. If all three joins stack directly on one another, the paper may form a thick ridge. Offset them a little while keeping the base opening free.
You can make the attachment bands narrower once you have tested the overlap on a short sample. Leave enough straight paper for the tape to grip securely, and keep that band hidden beneath the row above. This lets the visible curved parts stay loose enough to catch a little light along their edges. If a strip looks buckled, lift a short section and smooth it around the curve without pulling it tight.
Easy Ways to Customize It
Use two rows on a shorter base or make the scallops wider for a larger tree. Change the card color to warm white, pale blush or soft champagne if that suits your ornaments. Keep the three-row method the same so the top attachment bands stay covered.
Displaying and Storing the Collar
Use the paper wrap indoors in a dry spot around a stable artificial tree. Keep it away from candle flames, heaters and warm light fittings. Leave electrical controls accessible. This paper version is a poor fit where a live tree needs regular watering, so choose a water-resistant alternative for that situation.
When the season ends, remove the rear tabs and open the band. Store it with a gentle curve or in a broad box so the scallops are not crushed. Make one short sample first if you want to try a different card next year.
Final Encouragement
Try one short strip on the test band before you cut the rest. Once the curve and overlap look right, the other rows become a repeat of that small piece. You can keep the finish simple and let the light from the tree bring out the pearl surface.