*This post may contain affiliate links for which I earn commissions.*
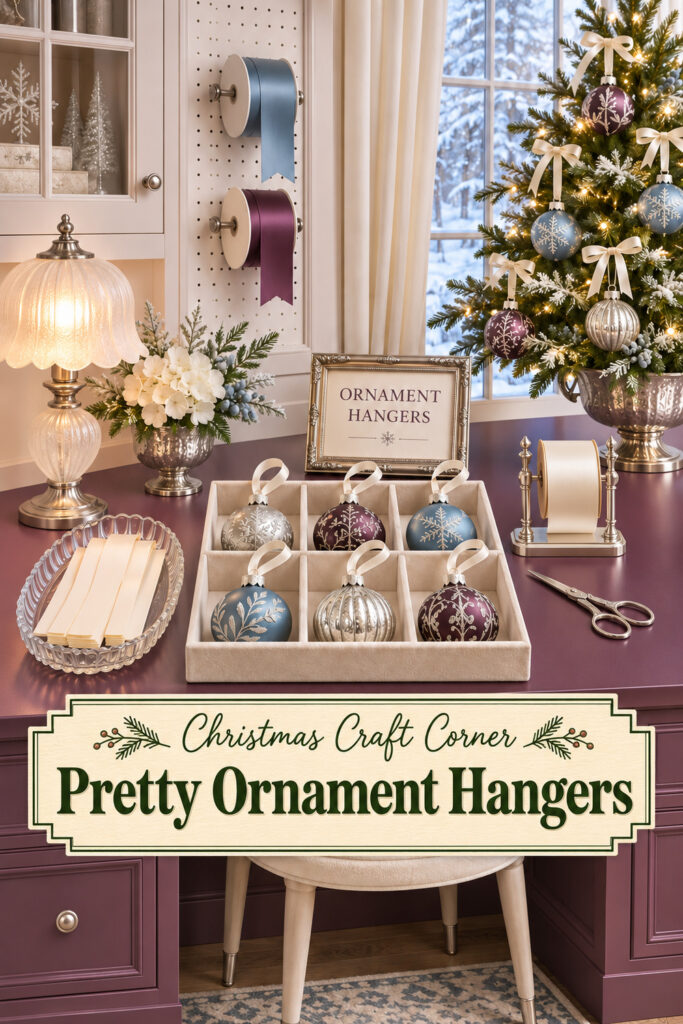
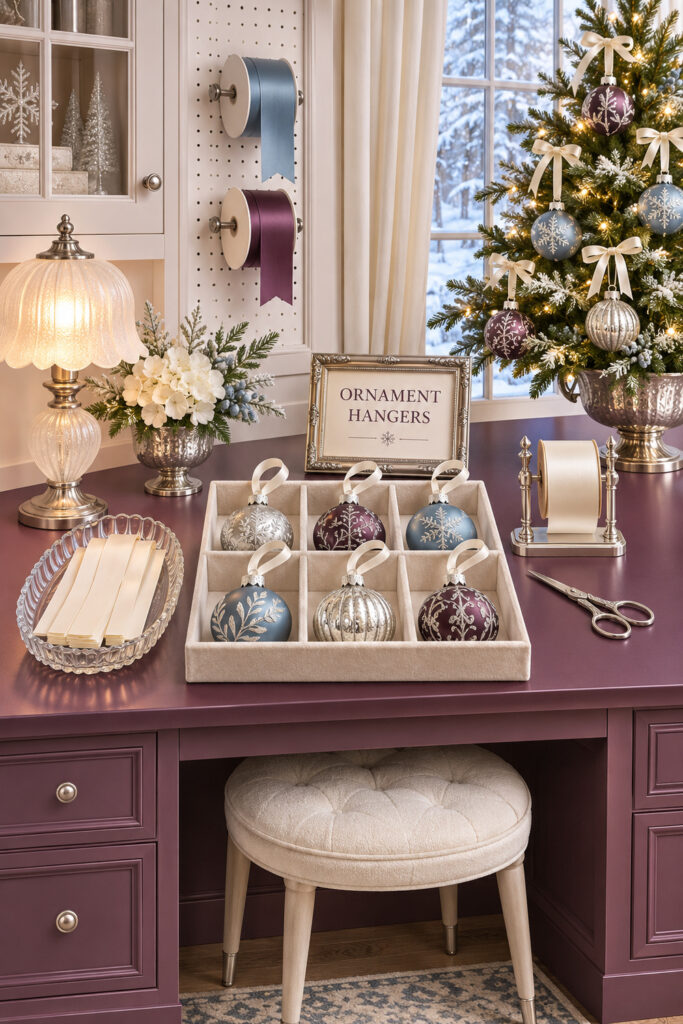
Ivory ribbon loops give these Christmas ornaments a tidy place to begin their trip to the tree. Six baubles sit in separate padded compartments, with precut ribbon in a glass dish and the spool close by. The plum counter and glowing little tree make a practical task feel like part of the seasonal decorating.
This is a useful station when ornaments need fresh hanging loops or when you’re sorting a collection before dressing the tree. The finished inspiration is orderly rather than crowded with supplies. You can borrow the divided tray, the limited ribbon palette, and the clear working space even if your craft area is a small desk that serves several other jobs.
This image was generated with AI as decorating inspiration. Similar pieces can help you recreate its effect.
Make a clear place for finished ornaments
The tray is the main organizing piece. Each bauble has a separate compartment, so its shape and hanging loop remain visible. That separation also makes it easier to choose one without pulling another ornament’s ribbon along with it.
Treat the tray as a place for checked, finished ornaments. Keep pieces that need attention in a different container. That simple division prevents an unchecked cap or unfinished loop from quietly returning to the ready-to-hang group.
The small sign names the task, while the tree shows the intended result behind it. You don’t need a sign at home if the arrangement already makes sense to you. Its visual job here is to connect the ribbon and baubles as one purposeful station rather than several unrelated decorative objects.
Choose compartments around the actual shapes
A padded tray should fit the ornaments without squeezing them. Measure the widest part of your largest bauble and allow enough room for fingers at its sides. A deep compartment can protect a shape while also making it hard to lift, so test the usable space rather than relying on the outside dimensions.
Look for a smooth lining that won’t snag glitter, wire, or delicate trim. A soft fabric surface can suit sturdy ornaments, but the best support depends on the individual piece. Keep fragile or unusually shaped decorations in appropriate fitted packaging when that is the safer choice.
Set round baubles so they can’t roll across the counter. The divided tray provides boundaries in the image, and a suitable padded insert can help with other shapes. Avoid using a loose towel that bunches under the ornaments and hides their caps.
Leave an empty compartment while you’re working. It gives the next ornament a resting place and helps you compare finished loop lengths. The tray can still look generous without every space being occupied. A little breathing room is useful when hands are moving between ribbon, tools, and fragile objects.
Present ribbon as an organized supply
The shallow glass dish holds precut lengths with their ends aligned. That repeated shape turns a necessary supply into part of the display. Choose a dish wide enough that the ribbon lies without becoming a tight tangled pile.
Use lengths suited to the ornaments and their intended branches. Don’t cut the whole spool before trying one loop. Different caps, tree positions, and ornament weights can call for different arrangements, so keep your first successful example as a guide rather than assuming one measurement fits the collection.
A spool holder keeps the remaining ribbon from rolling away. Position it beside your working hand without blocking the finished tray. If you have several colors, bring out only the ones you’re using and keep the others neatly stored.
Keep scissors closed when resting, with their points directed away from the tray. Give them a clear place of their own so you don’t reach beneath an ornament to find them. A separate small dish for offcuts can remain outside the hero arrangement while still making the task easier to manage.
Check the hanging points before styling the tree
The satin loops in the image attach to the metal hanging caps. For your own ornaments, inspect the existing attachment and follow any maker’s guidance. A fresh ribbon won’t correct a loose cap or a damaged hanging point.
Set aside any decoration with cracked glass, sharp edges, or an uncertain attachment. This station is for organizing and adding suitable hangers, not for disguising damage. Delicate pieces may need specialist care or a display method that supports them from below.
Once a loop is attached appropriately, hold the ornament over its padded tray and check that it hangs as intended. Keep the lift low and controlled. That lets you spot an awkward orientation without carrying the piece across the room first.
When moving to the tree, consider branch strength and the ornament’s actual weight. A ribbon color can connect the collection, but it doesn’t establish a load rating. Place heavier pieces where their support is suitable and keep the arrangement balanced across the tree.
Layer the craft corner without losing the counter
The plum cabinetry gives the pale ribbon and silver ornaments their contrast. Behind them, the miniature tree repeats the same bauble colors on a larger scale. This makes the station feel seasonal while showing how the finished pieces relate to one another.
The frosted lamp adds warm light from the side, leaving the center available for work. Test the lighting with a ribbon in your hands. You should be able to see the cap opening and the edges of the fabric without leaning into a shadow.
The wall-mounted spools make attractive storage, but keep their supports secure and their tails controlled. A long loose ribbon can catch on an ornament or a drawer handle. Use existing shelves or a closed box if a wall rail would crowd the space.
Keep the stool tucked in when you’re carrying trays. Check that the lamp cord and tree lights don’t cross the route to the larger tree. A decorated craft corner should still allow ordinary movements without shifting several objects first.
Photograph or note the loop length that works for a particular group before returning the spool to storage. Keep that note with the ornaments rather than relying on a general measurement for every shape. It will make the next seasonal setup more consistent.
Select pieces that help the task
Start with a suitable divided tray and the ribbon your ornaments need. Add a spool holder or small dish only if it makes the workspace easier to use. The surrounding tree and lamp can supply the decorative layers.
Look for narrow satin ornament ribbon
Choose a width that passes through the intended hanging point without force. Check that the finish and color suit the ornaments when seen against dark branches.
Shop similar padded compartment trays
Look at the inside measurements and lining as well as the number of sections. Leave room to lift an ornament without pressing on its neighbors.
Look for stable ribbon spool holders
A holder should fit the spool and stay put while ribbon is drawn from it. Keep it separate from the fragile finished pieces.
Finish by clearing the working space
Return spare supplies to their storage and remove loose offcuts. Check the tray once more before carrying it, making sure no ribbon stretches between compartments.
Keep one finished ornament visible beside the matching spool if you pause the task. That gives you a useful reference when you return, without leaving the entire counter occupied.
Final Styling Tip
Lay each finished loop inside its own compartment. The repeated ivory curves will connect the different baubles while keeping the station ready for the next step.