*This post may contain affiliate links for which I earn commissions.*
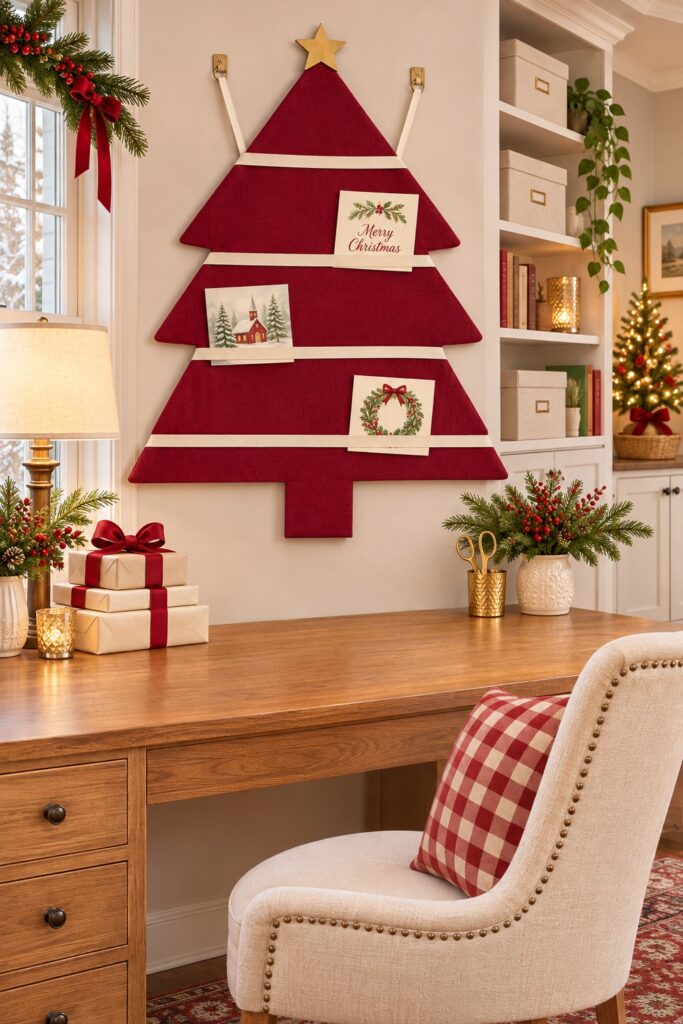
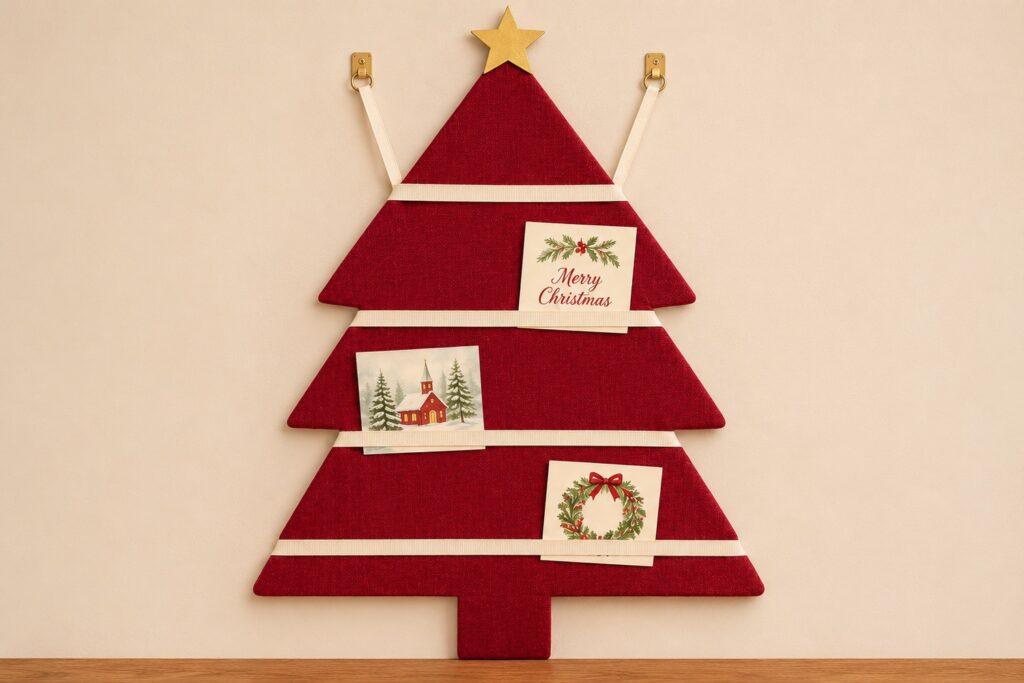
Four ivory ribbon bands cross this cranberry Christmas tree, holding a few cards where they can be enjoyed above a craft desk. The flat fabric surface, broad branch tiers, and small gold star make the shape easy to read. The desk stays open underneath, which is rather handy when December has already borrowed most of the room.
You’ll make a lightweight, fabric-covered foam-board display with ribbon bands fixed only at the back. The proposed method uses two reinforced hanging loops and paper cards, not pins or heavy ornaments. Adjust the size to your wall and start with a paper outline before cutting the board.
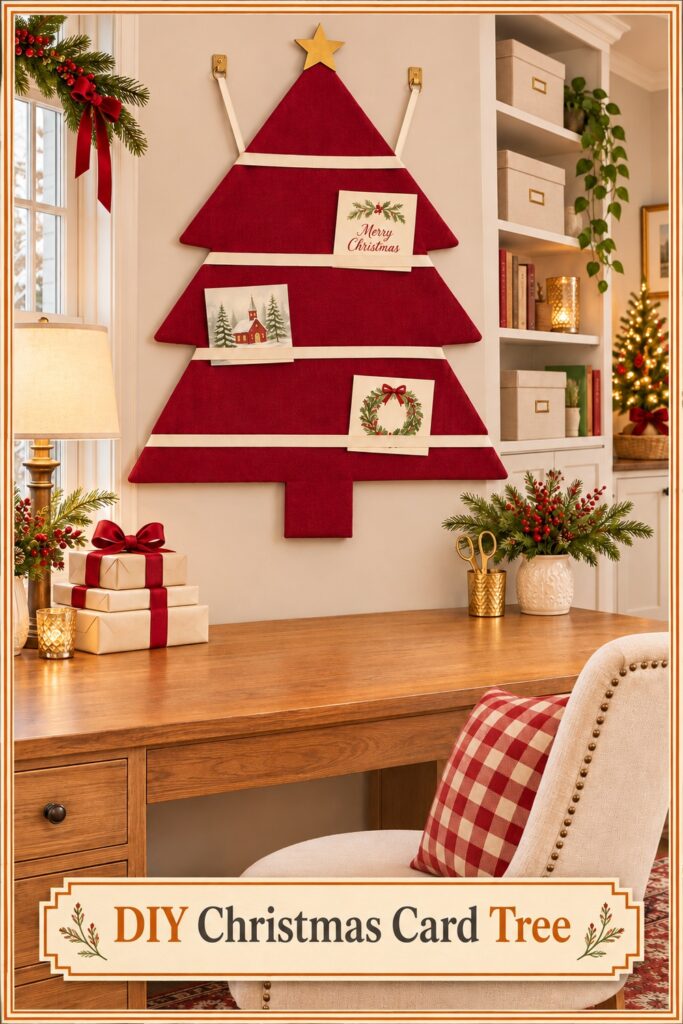
The inspiration and instructional images were generated with AI. This tutorial proposes a practical adaptation and does not document a physically tested project.
Gather a rigid backing and smooth cotton fabric
A suggested starting size is about 24 inches tall and 18 inches across the widest branch tier, excluding the separate star. Those are planning dimensions, not measurements taken from the picture. You can plan to make the tree any size you’d like to fit the space you want it displayed. Use a three-tier tree outline with a short rectangular trunk and broad, simple corners that fabric can wrap around.
Materials include:
- One sheet of rigid craft foam board large enough for the outline
- Cranberry cotton fabric, with extra around every edge for wrapping
- Elastic band – 1/2 to 1 inch wide
- Ivory grosgrain ribbon for four bands and two hanging loops (get ribbon wider than the width of your elastic band)
- Two broad cotton reinforcement patches for the back
- A small gold cardstock star
- Craft adhesive compatible with the fabric, ribbon, and foam board
- Three lightweight Christmas cards for the fit check
Tools include paper, a pencil, a ruler, fabric scissors, a craft knife, and a cutting mat. Use a protected workspace and handle the knife as directed by its maker. Choose a smooth fabric that folds neatly rather than a thick upholstery cloth. Measure each ribbon span and add enough length to turn both ends onto the back; the total depends on your outline.
Build the display from the outline outward
Step 1: Make a symmetrical paper pattern
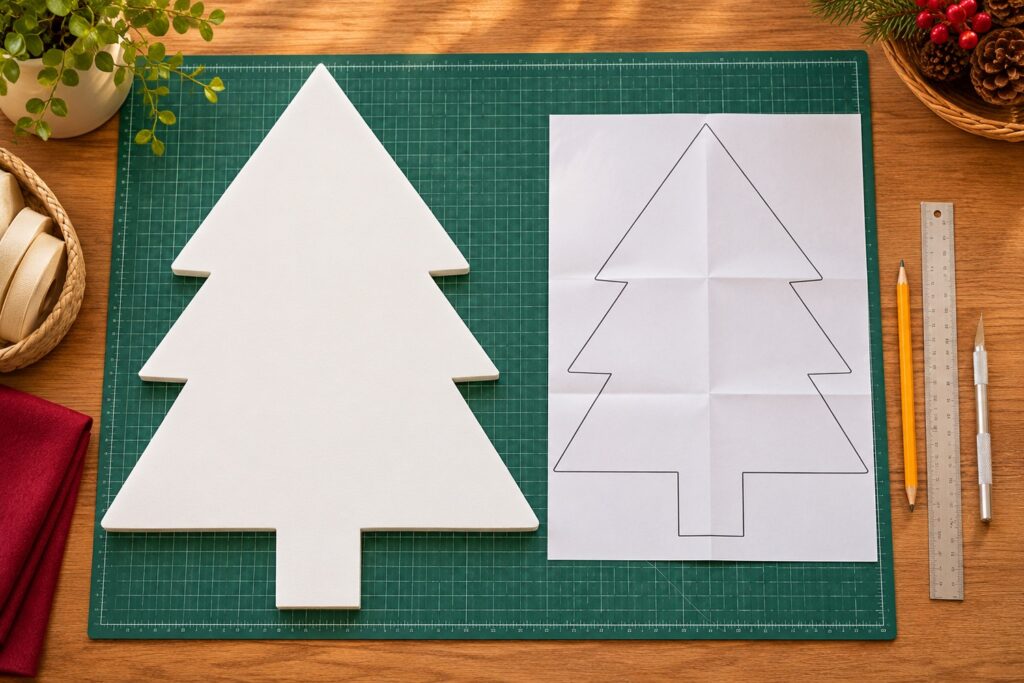
Fold a large sheet of paper lengthwise and draw half a tree against the fold. Use three broad branch tiers, a clear point, and a short trunk. Cut the folded paper, open it, and hold it against the wall to check the overall size before committing the backing.
Trace the pattern onto the foam board. Cut on the mat with controlled shallow passes rather than forcing the blade through at once. Keep fingers away from the cutting line. The outline should lie flat, with matching sides and no crushed branch tips. Smooth a rough edge gently before covering it.
Step 2: Wrap the fabric without rounding the tiers
Place the cotton face down and center the tree on it. Leave a wrapping allowance around the outline, then cut away the excess. Turn one edge at a time onto the back using a thin, even layer of compatible adhesive. Keep the front taut enough to remove ripples without bending the board.
At an inward branch corner, make a small relief snip in the fabric allowance, stopping short of the board. Fold the neighboring sections separately so they don’t bunch. Trim excess layers only where needed; don’t cut through the front fabric. Wrap the trunk and point carefully, then let the adhesive set according to its directions.
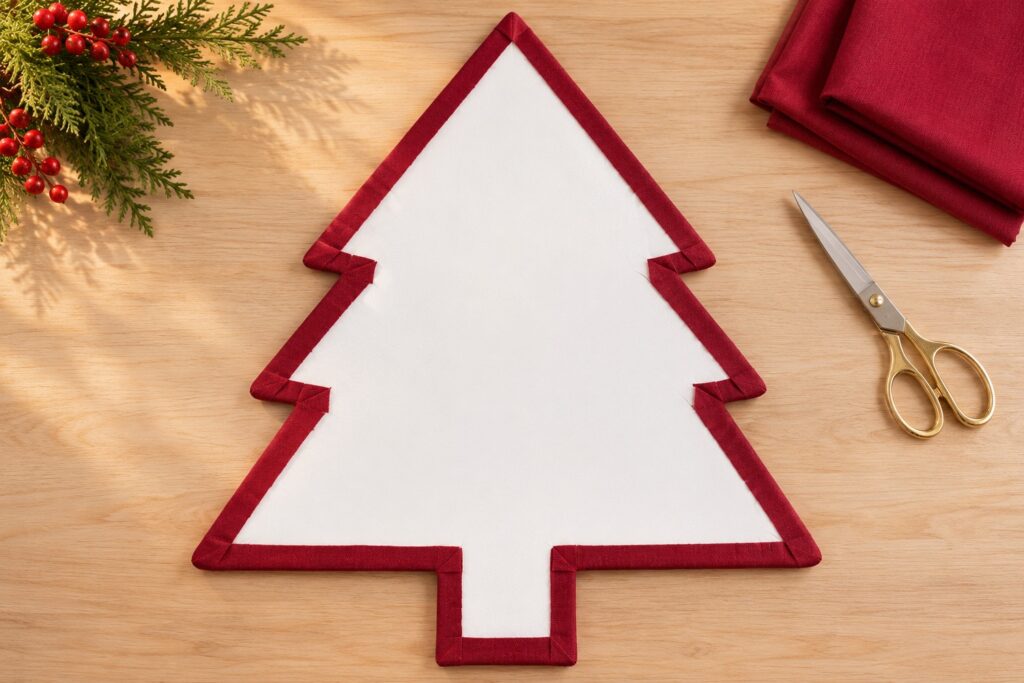
Turn it over and check the three branch tiers. If a corner looks padded or rounded by a fabric lump, flatten that fold now. This project has no stuffing or batting. The flat silhouette is what helps the ribbon bands sit close enough to hold cards.
Step 3: Fit four straight ribbon bands
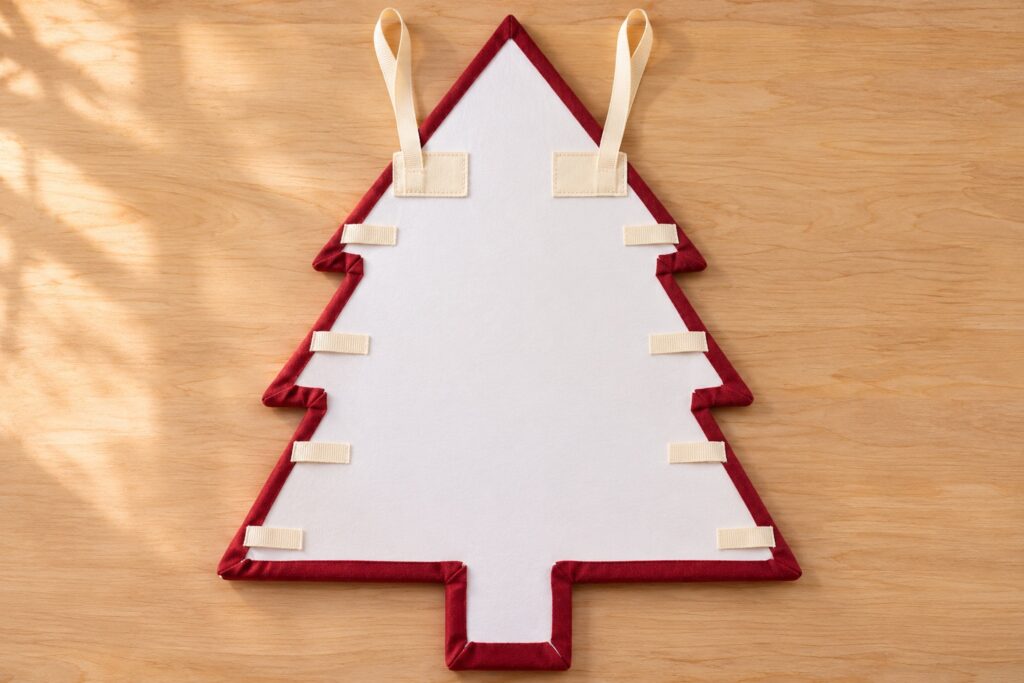
Secure four bands of elastic around the front and position them evenly.
Lay four ribbons horizontally across the front and over the elastic bands, spacing them to suit the three cards you plan to show. Keep every band parallel, with its ends turning around the tree edges. Slide a card beneath a ribbon before fastening anything. It should be held gently against the fabric without curling or requiring a determined tug.
Fix each ribbon’s two ends to the back with compatible adhesive, leaving the front span unglued. Allow a generous attachment area rather than sticking only a tiny tip. Check the band again before the adhesive sets. If it sags, shorten the span slightly; if the board bends, loosen it. Repeat for the remaining three bands and allow the attachments to set fully.
Step 4: Add two reinforced hanging loops
Cut two equal ribbon lengths and fold each into a loop. Position them symmetrically behind the upper part of the tree, with enough loop visible above the side edges to reach two wall hooks. Glue both tails of each loop flat to the back, then cover each attachment area with a broad cotton reinforcement patch and compatible adhesive.
Keep these patches on the back and clear of the ribbon spans that retain cards. Follow the adhesive’s full setting instructions before lifting the board. The reinforcement spreads the attachment over more backing; it is not permission to add heavy objects. If the paper facing starts peeling or a loop shifts, stop and remake that attachment before hanging.
Step 5: Check the display with its cards
Attach the gold cardstock star at the top with a small amount of suitable adhesive. Choose two wall hooks appropriate to the wall finish and the completed lightweight display, following their directions. Space them to match the loops, hang the empty tree, and check that it sits flat and level.
Add one card at a time beneath the front bands. Watch for slipping ribbon, lifting fabric, or movement at the hanging points. Use a smaller card or adjust the band if a card won’t stay. Leave the remaining ribbon visible so the tree shape and construction remain clear.
Finish the edges and keep variations lightweight
Trim any loose threads on the back and check that adhesive marks aren’t visible from the sides. The ribbon ends should disappear neatly around the outline. A plain cotton surface makes the ivory bands especially clear, though a small check could work if the cards remain easy to see.
You can change the fabric color or use a different ribbon width after testing its grip. Avoid stretch ribbon, which may let the cards sag, and thick trims that push them away from the surface. Keep the gold star flat rather than replacing it with a heavy topper.
Hang it above a desk with room to change cards
Position the tree where you can reach the bands without leaning over a lamp or a flower vase. Keep the bottom clear of the desk surface and the hanging loops clear of heat sources. The display is intended for a dry indoor wall and lightweight paper cards.
Before making another one, leave this version in its intended position and check the ribbon grip and attachments again. Correct a loose band or shifting loop while it holds only a few cards. The useful finish is a tree that stays flat and lets you change a greeting without disturbing the rest.