*This post may contain affiliate links for which I earn commissions.*
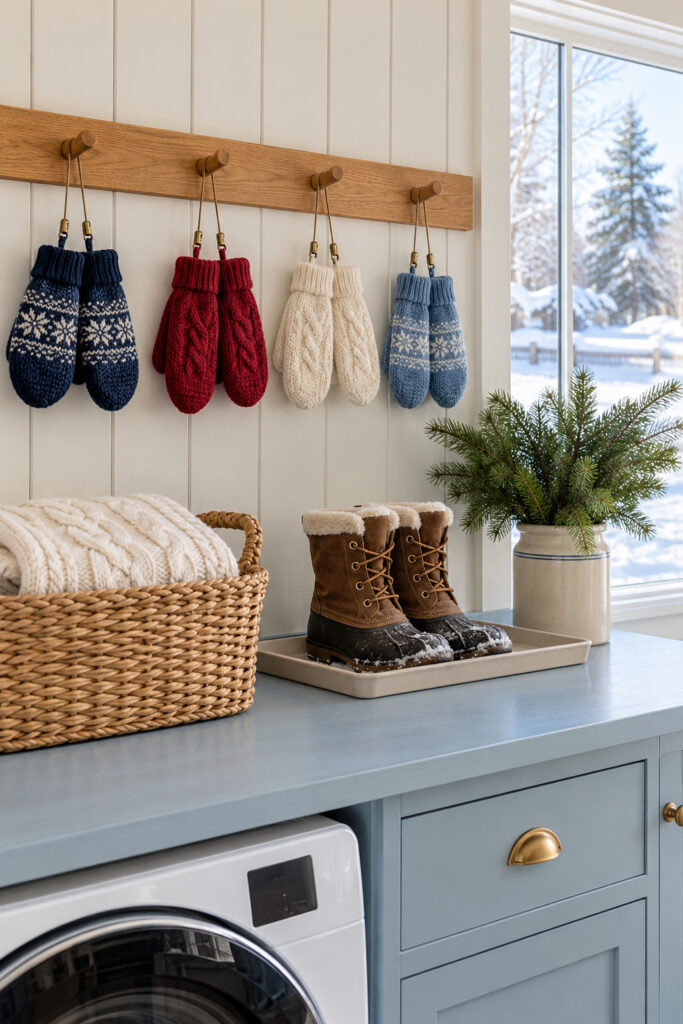
Winter mittens can be part of a useful laundry room arrangement when each pair has a clear place to hang. This inspiration lines up navy, red, cream, and blue knits along a wooden peg rail. Below them, a boot tray contains snowy footwear, while a woven basket and evergreen-filled crock soften the working surface.
The idea is appealing because it gives everyday winter gear a bit of order. But the photograph is decorating inspiration, so the practical version needs to account for water, airflow, and garment care. A row of dry mittens looks lovely; wet wool needs more consideration than a pretty clip.
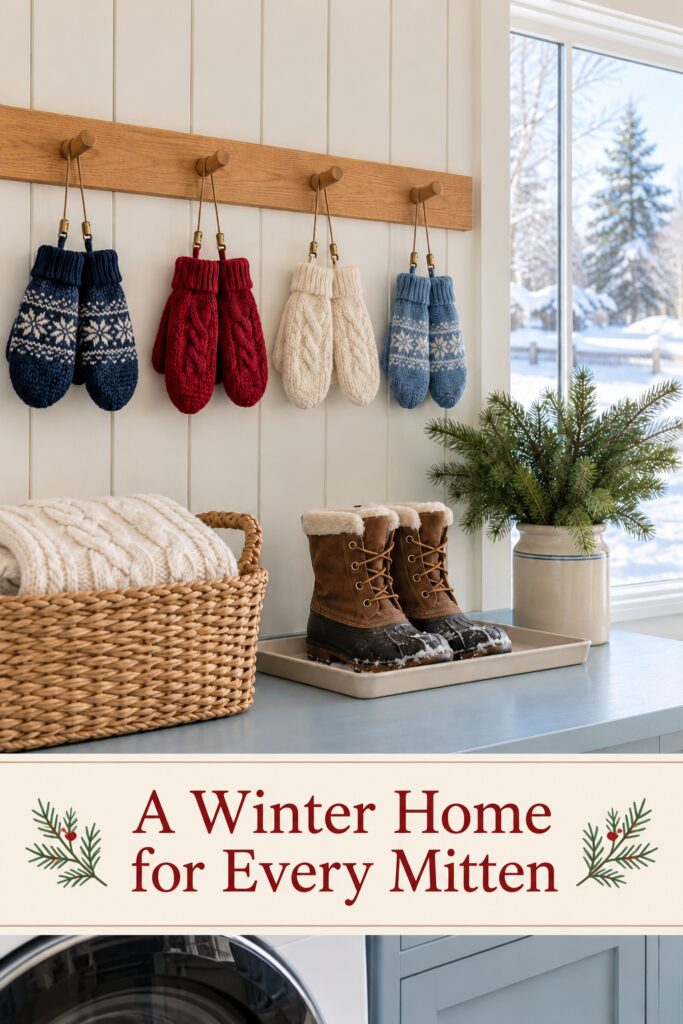
This image was generated with AI as decorating inspiration. Similar pieces can recreate the overall effect.
Start with an accessible wooden rail
The long oak-toned rail makes the mitten row read as one arrangement. Its simple pegs leave room for the knitted shapes, and the warm wood stands out against the pale paneled wall. Choose a rail with enough space between pegs that the gear you actually own won’t bunch together.
The pictured cords connect to clips at the cuffs. That gives each pair a tidy shape, but clipping damp knits by their cuffs may stretch them. Follow each garment’s care label. If it calls for drying flat, use a drying rack or mesh surface with airflow instead, then hang the dry mittens on the rail for storage.
For washable gloves that can hang dry, choose smooth clips that won’t snag the fabric and let each glove hang separately. Squeeze out excess water as its care directions permit before bringing it to the wall. Keep a waterproof catch surface beneath damp gear rather than allowing drips onto cabinetry or the appliance below.
Find wooden peg rails
Browse current Amazon options that can help you recreate this look.
Browse wooden peg rails on Amazon →As an Amazon Associate I earn from qualifying purchases.
Give wet gear and clean textiles different spaces
Use the colors already in the mitten pile
The pictured row alternates dark, bright, and pale knits, so the pairs remain easy to distinguish. You can borrow that spacing without buying matching winter accessories. Put similar colors farther apart, then arrange the largest mittens where they won’t hide a smaller pair beside them.
If several family members own similar gloves, assign each person a peg or a simple identifying tag. Avoid creating a color arrangement that everyone has to rebuild perfectly after each outing. The rail should make the next trip outside easier, not become another household display that nobody is allowed to touch.
A loop on the peg can keep paired dry mittens together. Check that it is short enough to avoid tangling with nearby items, and store long cords out of young children’s reach. You can use one small basket per person instead if loops and clips are more fiddly than helpful.
Contain the boots on a washable tray
The cream-colored tray gives the brown boots a definite boundary against the blue counter. In real use, choose a tray with a raised edge and enough space around the soles to collect drips. A snug decorative platter may look tidy at first but be awkward to lift once water gathers beneath the footwear.
A floor-level boot tray near the entry is usually a more convenient choice for wet boots. It also keeps outdoor dirt away from a laundry folding surface. If you use the counter for staging clean, dry boots, protect it and clean the area before folded clothes return. The pictured placement is a styling idea, not a reason to put snowy shoes wherever there is an empty worktop.
Leave ventilation around damp footwear, and follow its drying directions. Don’t balance boots over an appliance vent or set them against a heat source. The goal is a contained landing place where you can see and empty the collected water.
Separate the basket from the splashes
The woven basket holds a cream cable-knit textile, repeating the texture of the mittens on a larger scale. Use a basket for clean, dry blankets or spare winter items, with a little distance from wet gear. Wicker gives the room warmth, but it isn’t a dependable water barrier.
The evergreen branches in a cream crock bring in winter without turning the laundry area into a Christmas display. Keep the vessel stable and away from the appliance controls. If you use fresh stems in water, check for spills and keep the container where laundry won’t brush against it as you work.
Blue cabinetry and brass-colored handles complete the palette. You can suggest the same combination with a blue washable mat and a wooden rail in an otherwise neutral room. Changing the cabinets would be a very large step for an idea that begins with somewhere to put mittens.
Set up a winter landing place that earns its space
- Decide what the rail will hold: dry storage, garments approved for hanging dry, or a mixture with clearly separate places. Count the pairs your household uses, and choose the length from that need rather than the photograph.
- Mount the rail with hardware suitable for the wall and expected load. Leave clearance below the longest items, and keep the laundry machines’ doors, controls, and ventilation fully accessible.
- Arrange the dry pairs and test the clips on an inconspicuous cuff. If they leave marks or pull the knit out of shape, switch to baskets for storage and a proper drying surface for damp pieces.
- Put the boot tray and basket in separate wet and dry areas. Walk through your ordinary laundry routine, opening drawers and moving a basket of clothes, to check that the new station doesn’t interfere.
For a narrow laundry room, keep only the rail on the wall and put boots by the outside door. A compact tray on the floor can catch damp gloves temporarily while you prepare their drying space. You don’t need all the pictured elements on one counter to borrow the useful part of the arrangement.
Shop for care and convenience first
The visual rhythm comes from repeated mittens, simple pegs, and a few larger textures. Use the winter gear you have, then select organizers that suit its care requirements. That approach keeps the display honest to everyday use instead of requiring a new collection of decorative gloves.
Shop Similar Wooden Peg Rails
Look for clear mounting directions and pegs spaced for bulky winter accessories. Check the rail’s usable hanging area, since decorative end pieces can make it appear longer than the space available for gear.
Look for Smooth Garment Clips
Choose clips with fabric-friendly contact surfaces and no sharp exposed edges. Check them on your knits before regular use, and reserve them for garments whose care instructions allow hanging.
Shop Similar Raised Edge Boot Trays
Choose a washable material and enough depth to contain ordinary drips. Measure your largest boots with space around them, and make sure you can lift and empty the tray without tilting water onto the floor.
Look for Woven Winter Storage Baskets
Choose a basket that fits clean folded items without catching loose yarn on rough edges. Keep it in the dry part of the station, where it can add texture without becoming a damp catchall.
Final Styling Tip
Leave an empty gap between the mittens and the nearest branches. The knit shapes will read more clearly, and you’ll have room to reach for a pair without brushing the greenery.