*This post may contain affiliate links for which I earn commissions.*
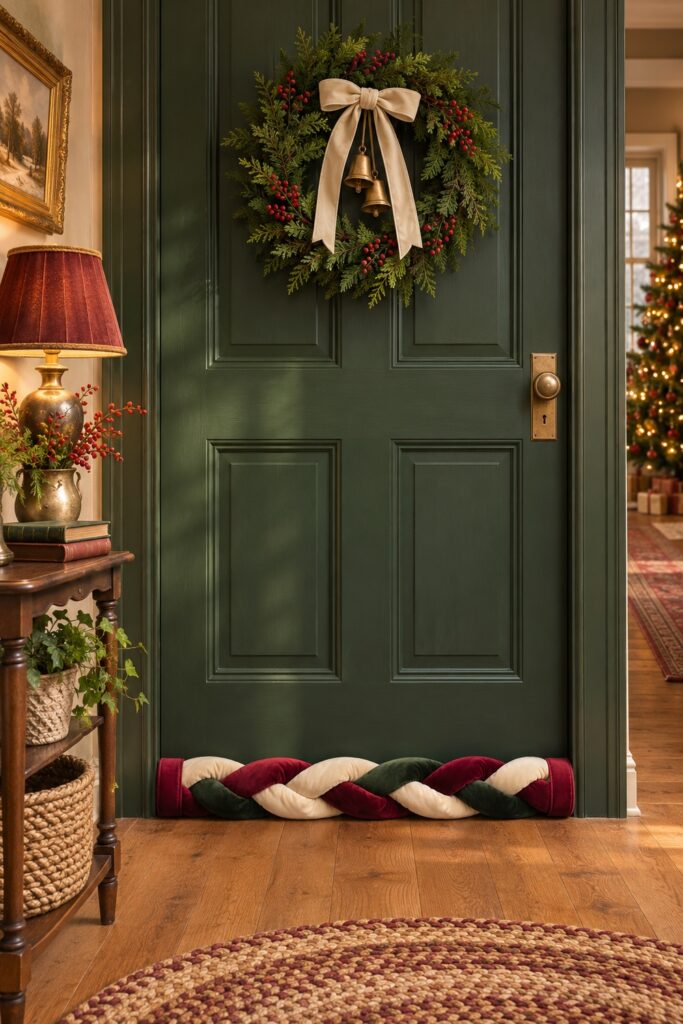
Three soft velvet tubes make the broad braid at the bottom of this Christmas door. Wine red, evergreen and ivory show clearly as they cross, with plain red caps finishing both ends. This tutorial translates the idea into a lightly stuffed fabric braid you can size for an interior door. Make a small sample first so you can judge the fabric, filling and finished width.
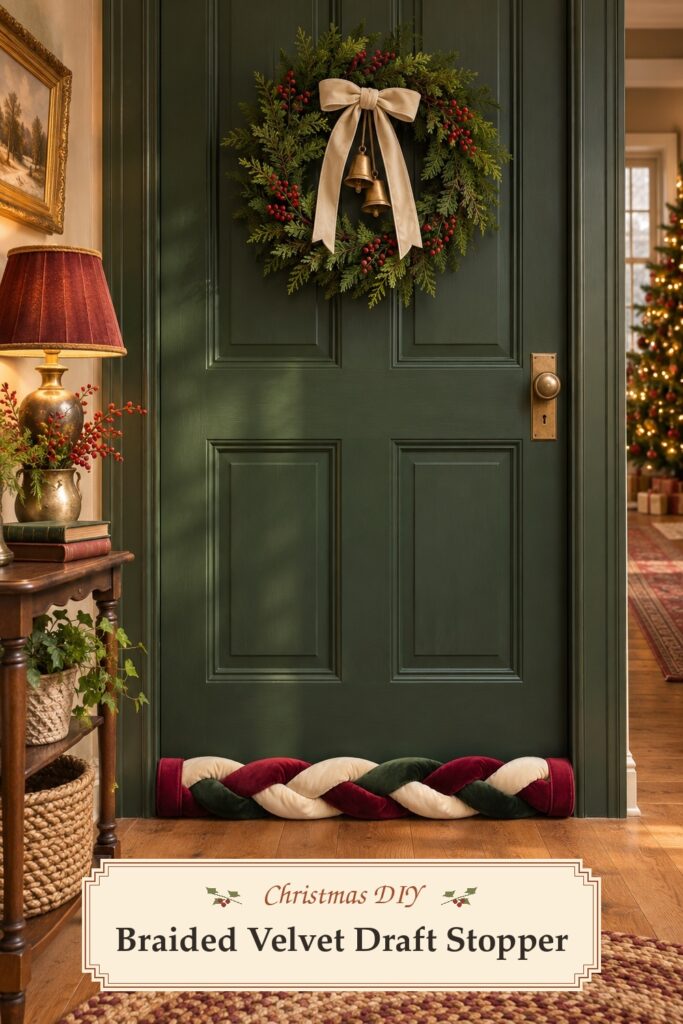
The inspiration and instructional images were created with AI. The steps describe a practical way to make a similar draft stopper at home.
What You’re Making
The finished piece is a long soft braid with three equal strands and a fabric cap at each end. A suggested starting length is about thirty-two inches, but measure your own door before cutting. Braiding shortens the tubes, so the unbraided pieces need extra length.
Use the piece at a suitable interior door and lift it away before opening the door. Keep it out of exit routes and walking paths. It is a loose fabric item, so choose the location with the way you use the room in mind.
Materials and Supplies
- Velvet or velveteen in wine red, evergreen and ivory
- Plain polyester fiberfill for light stuffing
- Matching sewing thread
- A sewing machine or hand-sewing needle suitable for the fabric
- Fabric scissors, measuring tape and sewing clips
- A blunt turning stick or similar smooth stuffing tool
- Extra wine-red fabric for the end caps
Choose three fabrics with similar weight and stretch. A stable fabric will be easier to keep even while sewing and braiding. Test the seam on scraps before you cut the long pieces, and follow the care directions for the fabric and filling.
Before You Start
Measure the width you want the finished braid to cover. For a piece around thirty-two inches long, a starting set of three strips about forty-eight inches long and five inches wide gives you room to test the braid and trim the ends. These are suggested dimensions.
Stroke each fabric to find the direction of the soft pile. Cut all three strips with the pile running the same way along their length. Keep the rectangles equal so the tubes will begin with similar proportions.
Step 1. Sew and Turn the Tubes
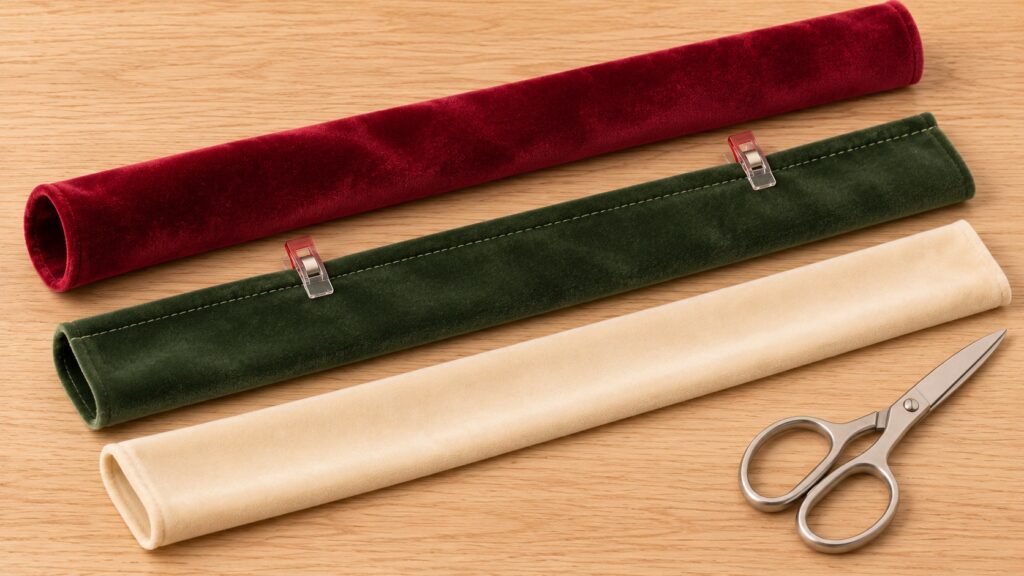
Fold one strip lengthwise with the right sides together. Clip the long edges, then sew along them with a suggested half-inch seam allowance. Use a stitch and needle suited to the fabric, testing first so the layers feed evenly. Sew across one short end and leave the other open.
Turn the tube right side out gently. A blunt tool can help ease the closed end through, but avoid pulling hard on the seam. Repeat with the other two colors. Lay the tubes beside one another and check that their widths are close before filling.
Step 2. Add Light Even Stuffing
Push small amounts of fiberfill toward the closed end. Work gradually along the tube so there are no hard lumps. Keep the tube flexible enough to bend around the other strands. A very firmly stuffed tube will be harder to braid and may pull the seams.
Leave a short unfilled margin at the open end. Fold that edge inward and stitch it closed. Repeat for all three tubes, aiming for similar softness. Lay them side by side and smooth the filling with your hands before moving on.
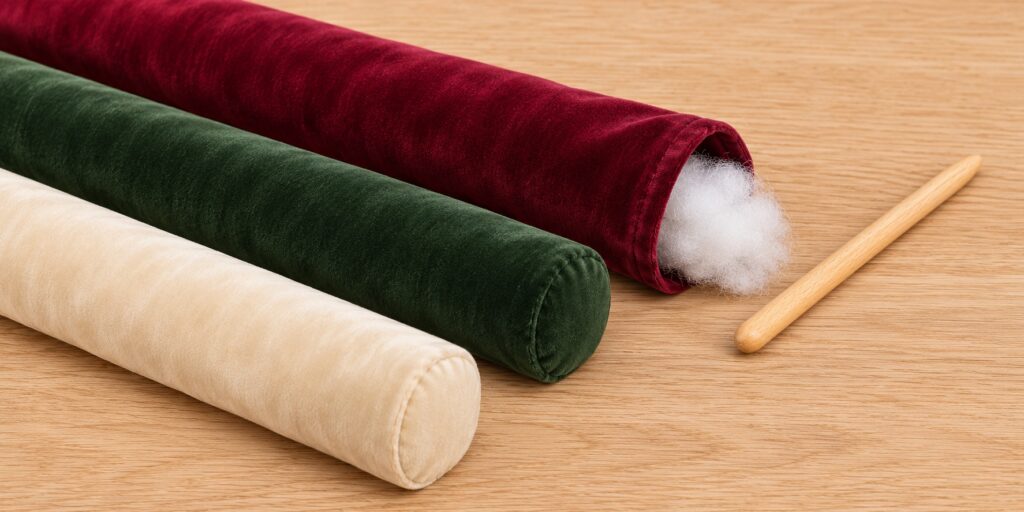
Step 3. Braid the Three Strands
Place the three tubes together at one end and join their flat ends with a few firm stitches. Hold that joined area under a suitable sewing weight or secure it to a work surface without damaging the fabric. Spread the loose lengths so you can see all three colors.
Bring the left outer strand over the middle strand. Then bring the right outer strand over the new middle strand. Keep alternating sides, allowing each soft tube to curve rather than pulling it tight. Straighten the loose tails occasionally so they do not twist around one another.
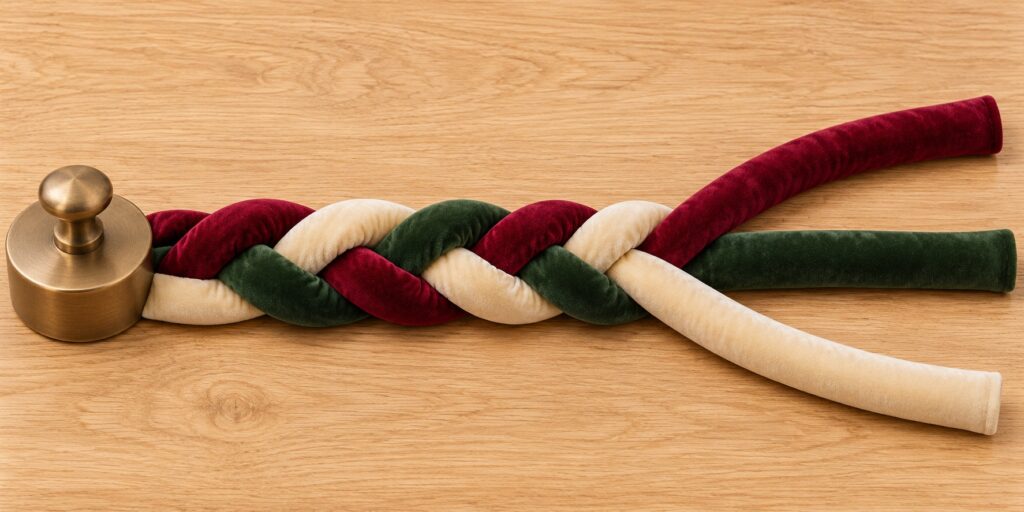
Check the width as you work. If the braid narrows sharply, loosen the last few crossings and make the curves more even. If it looks too loose, bring the strands closer together without stretching the fabric. Stop before the loose ends become too short to join neatly.
Step 4. Check the Length and Secure the Ends
Lay the braid straight on the floor near the closed door and measure it. Adjust the last few crossings if the length needs a small change. Join the three loose ends together with firm stitches where you want the finished braid to stop.
If the tubes are too long, open their end seams, remove a little filling and trim them evenly. Turn the raw edges inward and close them again before joining. Keep the gathered ends compact so the caps can cover them without a large lump.
Step 5. Sew the End Caps
Measure around one gathered end with a flexible tape. Cut a wine-red rectangle that measures that distance plus one inch for the seam, and about three inches deep as a starting point. Fold it right sides together, join the short edges with a half-inch seam, then sew across one open end to make a small cap.
Turn the cap right side out and fold its open rim inward. Slide it over the gathered braid end and check the fit. Adjust the cap before sewing it in place if it is too tight or too loose. Repeat for the other end.
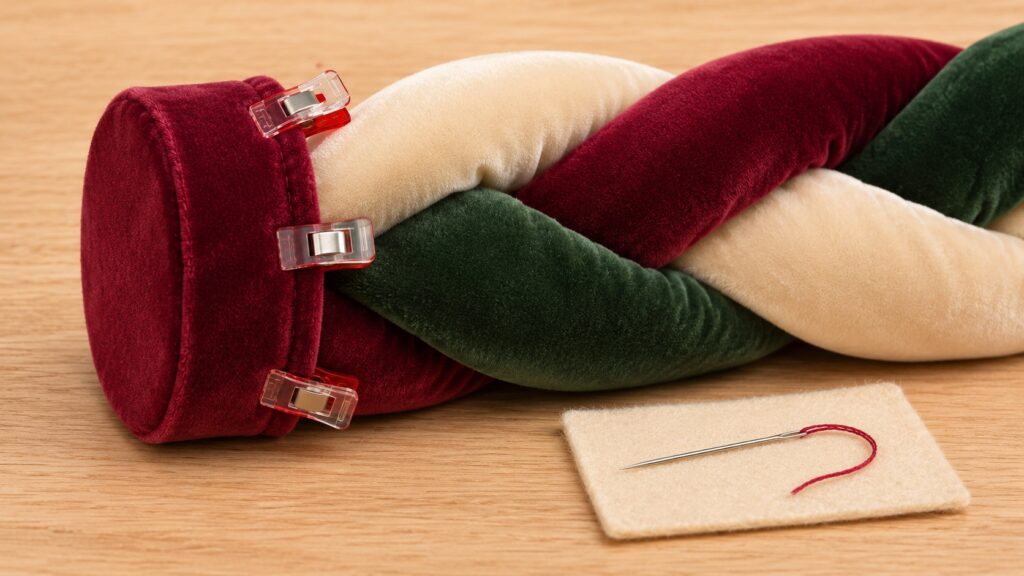
Hand stitch the folded rim securely to the braid with small stitches, catching the fabric without pulling the cap out of shape. Keep the stitches close enough to hold the cap evenly around the end. Remove all clips and check both caps before placing the piece at the door.
Tips for Getting the Finished Look
The three colors should remain visible through the crossings. Rotate a strand gently if one color keeps disappearing underneath. Keep the braid soft enough that the velvet folds catch the light along each curve.
Plain end caps give the braid a clean finish. A simple wine-red cap relates to the red strand without adding another pattern. Keep the cap depth modest so most of the finished length remains braided.
A small sample braid is useful before you fill the long tubes. Sew three short pieces at the same width and add a little filling to each. Cross them a few times to see whether the fabric bends comfortably and whether the three colors stay visible. You can then adjust the filling on the full-length tubes with a clearer idea of the result.
If the velvet shifts while you sew, pause and test a slower method on scraps. More clips or a temporary line of hand basting can help keep the long edges together. Remove any temporary stitches as appropriate after the seam is secure, and check that the finished tube has no tight sections before adding fiberfill.
Easy Ways to Customize It
Use two shades of one color with an ivory strand for a quieter version. Make shorter tubes for a narrow interior door, testing the braid before trimming. Keep the fabric weights similar so one strand does not become much thicker than the others.
Displaying and Storing the Finished Piece
Keep the braid dry, clear of heat sources and away from areas where it could be pulled apart by children or pets. Lift it away when the door is used and store it on a shelf or in a broad basket. Clean it only by a method suited to the fabrics and filling.
Final Encouragement
The first set of crossings will show you how much filling your fabric needs. Take time to make those curves even, then repeat the same loose rhythm along the braid. The three colors and simple end caps will give it plenty of Christmas character.