*This post may contain affiliate links for which I earn commissions.*
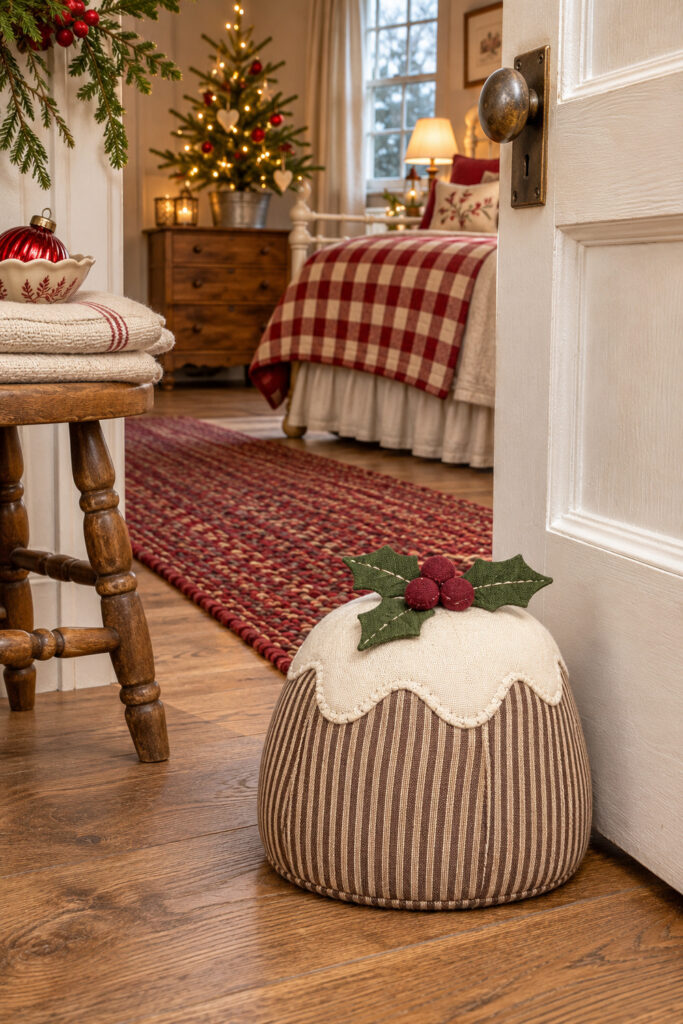
This little Christmas pudding belongs beside the door rather than on a plate. Brown ticking fabric, a soft cream cap, and stitched holly make a cheerful decoration, with a weighted base giving it a useful purpose. The bedroom setting shows how nicely its colors sit with checked bedding and warm wood.
The version below uses a round fabric base, one striped body panel, an enclosed weight pouch, and a separately sewn icing cap. It proposes a practical way to capture the inspiration’s appearance without needing a fitted sculptural pattern.
Suggested measurements are a starting point for this version, not measurements taken from the image.

The inspiration and instructional images were created with AI. This tutorial proposes a practical adaptation rather than documenting a tested physical project.
Plan a soft pudding with a settled base
Aim for a finished body around eight inches across, with a rounded stuffed top. The exact height will change a little as you gather the opening and shape the filling. Keep the brown stripes vertical and the pale cap large enough to overlap the upper body.
The weight belongs in a securely sewn inner pouch near the bottom, with soft stuffing around and above it. Plastic craft weighting pellets are one option; use their instructions and choose the amount for your actual door. A decorative fabric stop will not suit every heavy or self-closing door.
Use this indoors on a dry floor. Keep it out of escape routes, and never use it to prop a fire door open. The sewn berries and enclosed pellets also make this a household decoration, not a toy for children or pets.
Before cutting the decorative fabric, make a quick paper trial of the base and body seam. Check in advance to make sure you create a size that will fit where you want to use it without preventing people from walking by it safely.
Bring the body strip around the marked stitching circle, allowing for its side seam, and check that the two meet without a gap. This catches a cutting error before it reaches the ticking.
Choose the brown stripe spacing with the finished size in mind. Narrow stripes show the rounded sides clearly, while a broad stripe may leave only a few dark bands across the front. Hold a folded sample beside the cream fabric and burgundy scraps to check their contrast. Press the cotton before marking it, and prewash it if its care directions recommend that preparation for sewing.
Gather the fabric and tools
For the proposed size, prepare the following materials. Check the piece dimensions against your fabric width before cutting.
- Brown-and-cream cotton ticking: enough for one nine-inch base circle and one body strip about twenty-six and one-eighth inches long by nine inches high.
- Cream cotton: enough for two ten-and-a-half-inch circles for the icing cap.
- Tightly woven cotton for two nested weight pouches, using two six-by-eight-inch rectangles for the inner pouch and two seven-by-nine-inch rectangles for the outer one.
- Craft weighting pellets and polyester fiberfill.
- A small piece of dark green felt and scraps of burgundy cotton.
- Strong sewing thread in brown and cream, plus cream embroidery thread for the leaf detail.
You’ll also need paper, a ruler, a flexible tape or string, fabric scissors, pins or clips, hand-sewing needles, and a sewing machine if you prefer to machine-stitch the main seams. A funnel helps fill the pouch neatly. Use an iron suited to the fabrics when pressing seams.
The green felt is a practical simplification of the inspiration’s textured leaves. It gives a neat edge without turning tiny cotton pieces. Keep the main body and icing in woven fabric so the finished object retains that soft sewn appearance.
Cut and sew the pudding body
1. Make the base and check the body length
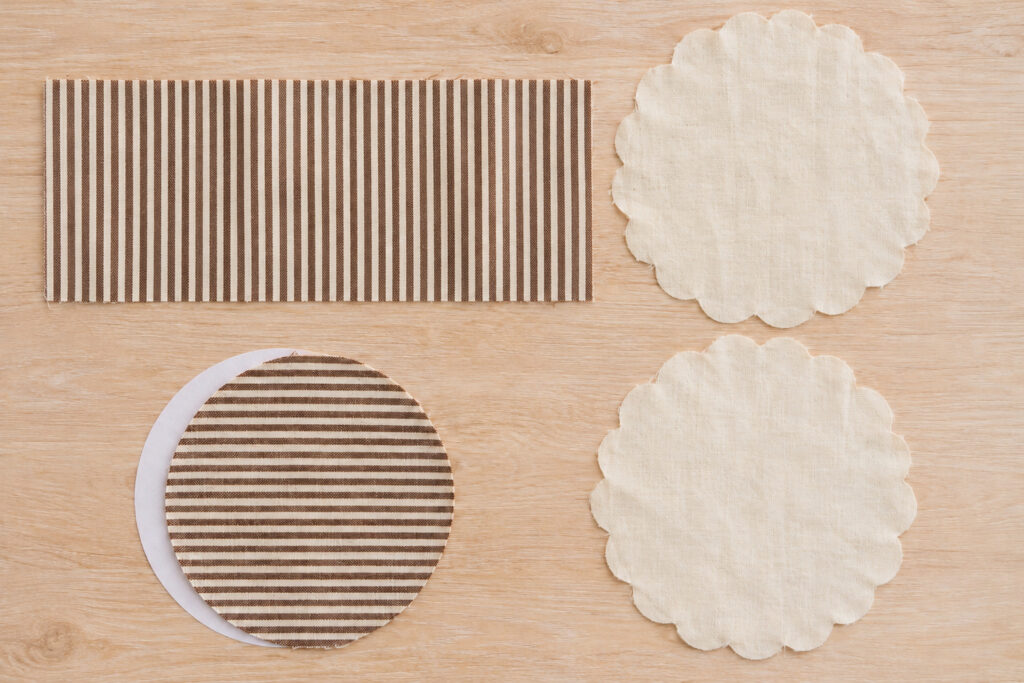
Draw a nine-inch circle on paper and mark a stitching line half an inch inside its edge. That inner line is eight inches across. Measure around the inner line with flexible tape or string, then add one inch for the body strip’s side seam allowances. The result is approximately twenty-six and one-eighth inches.
Cut the striped strip to that checked length and nine inches high, keeping its stripes running up and down. Cut one brown base circle. Mark quarter points on the base and along the strip’s lower stitching line; these will help distribute the fabric evenly when you join them.
2. Join the strip into a tube
Fold the body strip with right sides together and its short ends aligned. Stitch the short ends with a half-inch seam allowance, securing the beginning and end. Press the seam open, keeping the stripes straight rather than pulling the fabric diagonally.
Pin the tube’s lower edge around the base with right sides together. Match the quarter marks first, then fill the spaces between them with pins. The base’s marked stitching line should match the tube’s circumference; correct a measurement mismatch now instead of stretching one piece to fit.
3. Sew the base and turn the shell
Stitch around the base on the half-inch line, moving slowly and keeping the side fabric clear of the needle. Check for caught folds before trimming. If the seam is smooth, trim bulky allowance carefully without cutting the stitches, then finish raw edges with a suitable zigzag or hand-overcast stitch.
Turn the shell right side out and ease the base flat with your fingers. The side seam should sit toward the back. Leave the upper opening fully open for the next phase.
Add the enclosed weight and rounded top
4. Sew two nested pouches
For the first pouch, place two six-by-eight-inch cotton rectangles together. Sew around them with a half-inch seam, leaving a short opening at one end. Add a second line of stitching beside the first for the seams that will contain the pellets. Turn the pouch right side out.
Fill it loosely enough that it can settle into a flat bundle, then fold the opening inward and sew it closed securely. Make a second pouch from the remaining rectangles, place the first inside, and close that outer pouch too. Inspect both closures before putting weight inside the decorative shell. Keep loose pellets contained while you work.
5. Fill the shell in layers
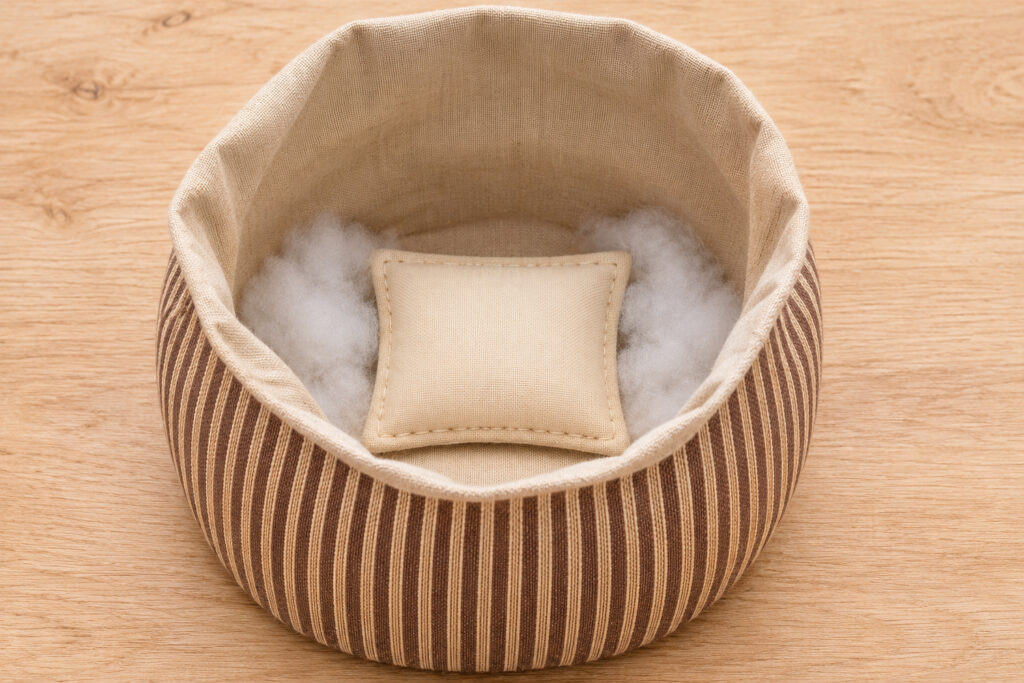
Lay a thin cushion of fiberfill across the base, then lower the enclosed pouch into the center. Tuck small amounts of soft filling around its sides so it stays low and doesn’t press a hard corner against the ticking. Add more filling above, shaping the body gently as you go.
Don’t force in enough stuffing to make the seams strain. The sides should feel full, while the base can still settle evenly. Set the pudding on the intended floor and check its balance before closing the top; you can adjust the enclosed weight and surrounding stuffing while the opening remains accessible.
6. Gather the opening closed
Turn the top raw edge inward by half an inch. With strong thread, sew a line of running stitches through that folded edge, leaving thread ends long enough to pull. Draw them in gradually while spreading the gathers around the opening.
Add a final little amount of soft stuffing if the top has an obvious hollow, then gather it closed. Secure the thread and stitch across the small center opening. Shape the top with your hands so it rounds gently into the side walls. The icing cap will hide this gathered area, so concentrate on a sound closure rather than decorative stitching here.
Sew the icing and holly finish
7. Make a lined cream cap
Use a ten-and-a-half-inch paper circle as the starting guide for the cap. Draw shallow rounded dips around its edge, keeping the center broad. Cut two matching cream pieces and place them right sides together. Sew a quarter-inch seam around the edge.
Make a short turning slit through the center of only the underside layer. Clip the inward curves carefully, avoiding the seam, then turn the cap right side out through the slit. Ease out the edge and press it gently. Close the underside slit by hand.
Set the cap over the stuffed top with its turning slit underneath. Turn it until the deeper dips fall attractively over the ticking. Attach it with small hand stitches around the upper body, catching the cap’s underside so the stitching stays discreet. Avoid pulling the edge so tight that it flattens the rounded top.
8. Add the leaves and fabric berries
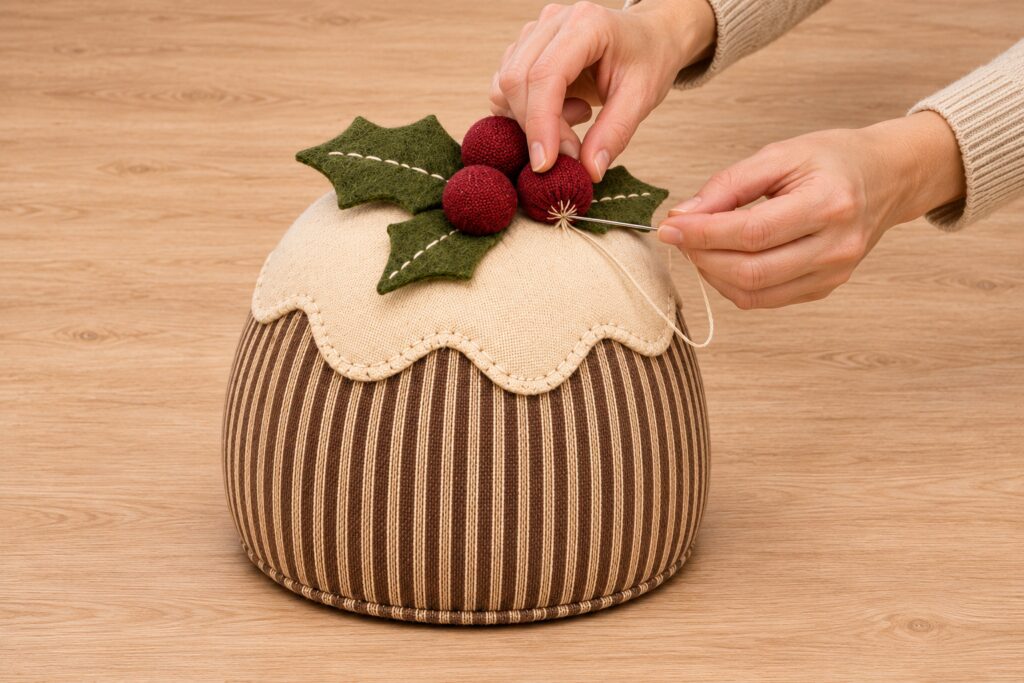
Cut three small felt holly leaves and stitch a simple pale vein along each. Position them across the cap’s center and sew their bases down securely. Keep their tips soft and free of wire.
For each berry, cut a two-inch circle of burgundy cotton. Run gathering stitches just inside the edge, place a little fiberfill in the center, and draw the fabric closed. Secure the gathers underneath. Make three berries and stitch each firmly to the cap, passing through its gathered base several times.
Adjust fullness and stitching
If the body leans, reopen the gathered top and settle the enclosed pouch lower before adding more stuffing. Extra filling at the top won’t correct a weight bundle sitting off center. Keep the base broad and the decorative crown light.
A puckered base seam usually needs a closer look at the stitching and the way the fabric was distributed. Remove and resew a caught tuck rather than trying to disguise it with trim. For an icing edge that flips upward, loosen overly tight attachment stitches and add a few discreet holding stitches underneath.
Keep the finish close to the inspiration
The narrow brown stripes, cream overlap, and small burgundy berries do most of the visual work. Keep the holly cluster modest so it doesn’t turn into a bulky ornament on top. Plain brown cotton can replace ticking with the same construction, while cream linen can replace cotton if you check its fraying and handle the seams accordingly.
Use and store the finished decoration
Place the pudding beside an ordinary interior door, clear of the main walking route, and check whether its weight and position suit that door. Move it by supporting the base, never by the berries or leaves. Check for loose stitches or escaping filling before use.
Spot-clean only as appropriate to the actual fabrics and filling. This permanently filled version has no removable cover, so don’t assume it can be machine-washed. Store it dry, without heavy items pressing on the icing cap. A final smoothing of the stripes and a little adjustment of the cream edge will bring back its soft pudding character when it comes out again.