*This post may contain affiliate links for which I earn commissions.*
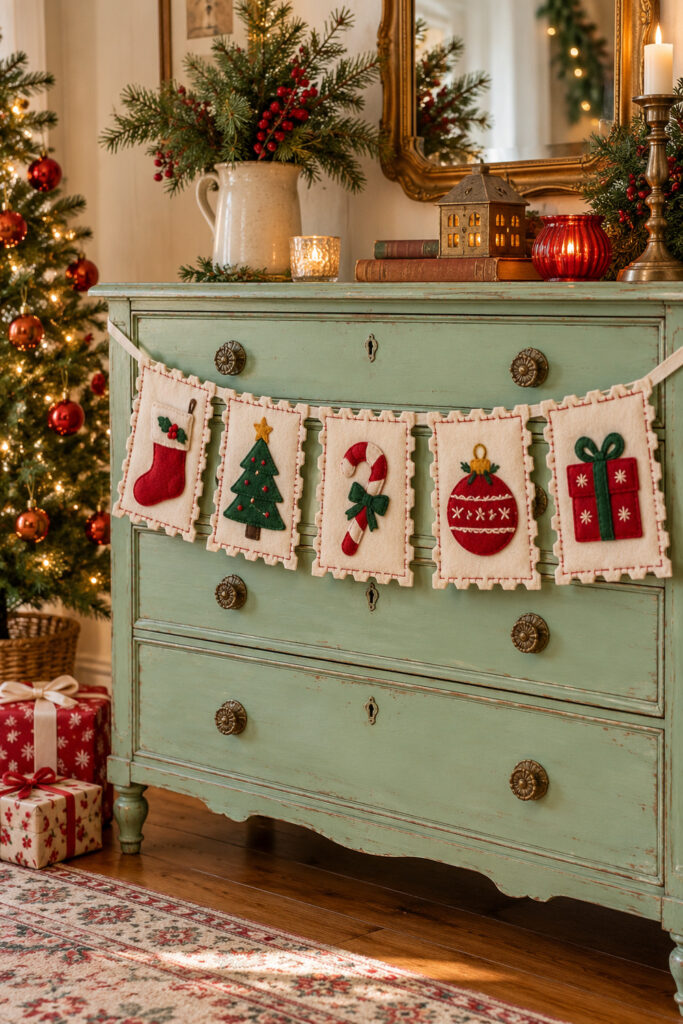
Five felt panels turn familiar Christmas motifs into a row of oversized postage stamps. The cream backgrounds, scalloped edges, and red stitching give the bunting its character, while each panel has a different little picture: a stocking, tree, candy cane, bauble, and wrapped gift.
This tutorial uses flat appliques, matching backs, and small hanging loops to make a practical version of the idea. The scalloped outline is worth keeping. It’s the detail that turns five decorations into a collection of Christmas stamps.
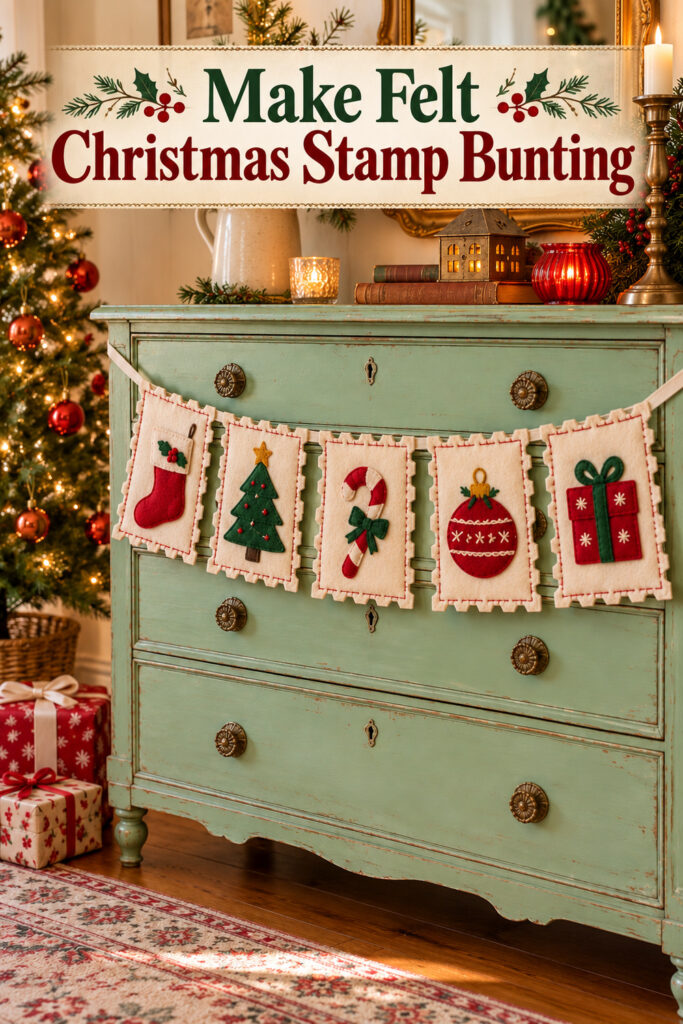
The inspiration and instructional images were created with AI and do not document a tested physical project being made. This tutorial proposes a practical hand sewn version of the visual idea.
What You’re Making
You’ll make five lightly structured felt stamps on one length of cotton tape. Suggested finished panels are about 4 by 5 inches, with a decorated span of roughly 23 inches when spaced three quarters of an inch apart. These are proposed working sizes, not measurements taken from the image.
Each motif is stitched to one front panel before a plain backing conceals the sewing. Two small loops at the top carry the hanging tape. That adapts the illustrated attachment into something you can sew and adjust without cutting holes through the felt.
Materials and Supplies
Felt and Hanging Materials
- Ivory felt for ten matching panels about 4 by 5 inches each plus a little extra for motif details
- Red and forest green felt for the five motifs plus small brown and mustard gold scraps (or a set of felt sheets in mixed colors so you have the scrap colors you need)
- Red, ivory, green, and gold embroidery floss with brown if needed for the tree trunk
- About one and a half yards of three eighths inch cotton twill tape for the hanging line plus ten pieces each about one and a half inches long for the hanging loops
Tools
- Paper pencil ruler and paper scissors for your original templates
- Sharp fabric scissors and optionally scalloped fabric shears
- A sharp embroidery needle that passes comfortably through your felt
- Sewing clips or pins and a removable fabric marking tool tested on a scrap
Want to Make This Bunting Decoration?
I’ve put together a convenient Amazon supply list featuring hand-picked, highly-rated products that match the above supply list so you don’t have to spend time searching for them.
See My Hand-Picked Supply ListAs an Amazon Associate I earn from qualifying purchases but this doesn’t increase your price at all!
Choose flexible felt that holds a clean cut without being so stiff that stitching becomes awkward. Check the actual sheet sizes before buying: ten 4 by 5 inch rectangles need more fabric than a small mixed scrap pack provides. Lay out your paper pieces on the planned sheets first.
Before You Start
Draw a 4 by 5 inch paper rectangle. Add a small repeated scalloped outline just inside its boundary, keeping the corners rounded and enough interior space for a motif. Cut the paper shape and trace it ten times. If you use decorative shears instead, test them on a scrap and cut all ten outlines the same way.
Draw each motif separately within an imaginary 2 and three quarter by 3 and a half inch box. Keep these drawings your own and use broad, simple shapes. Cut paper versions first, place them on a panel, and check that a clear border remains for the red stitching.
Step by Step Felt Stamp Bunting
1 Cut the Panels and Motif Parts
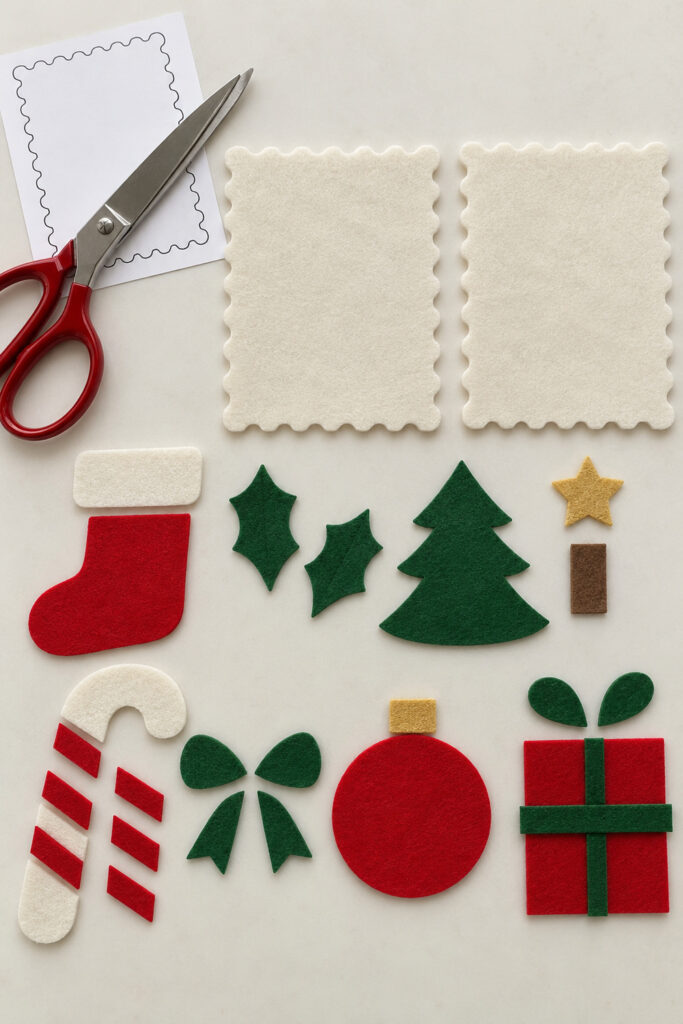
Cut five fronts and five backs from ivory felt. Pair each front with a matching back, adjusting any uneven edges now. Keep the backs separate while you decorate the fronts so your applique stitching won’t show on the finished reverse.
For the stocking, cut one red boot shape, a small ivory cuff, and simple green holly shapes. For the tree, cut one green tiered silhouette, a short brown trunk, and a gold star. Use a broad ivory candy cane shape with separate red bands. The bauble needs a red circle and gold cap. The present needs a red rectangle, green crossing strips, and flat green bow shapes.
2 Arrange the Five Pictures
Set one motif on each front panel in the order stocking, tree, candy cane, bauble, and present. Center the overall picture, including its star, cap, or bow, rather than centering only its largest part. Leave about half an inch of clear space around the designs where possible.
For the stocking, position the cuff across the top and tuck the small holly shapes above it. Place the tree trunk behind the tree silhouette and the star at its tip. Dry fitting first lets you catch a tree that is too tall or a gift whose bow reaches the stitching line.
3 Stitch the Appliques to the Fronts
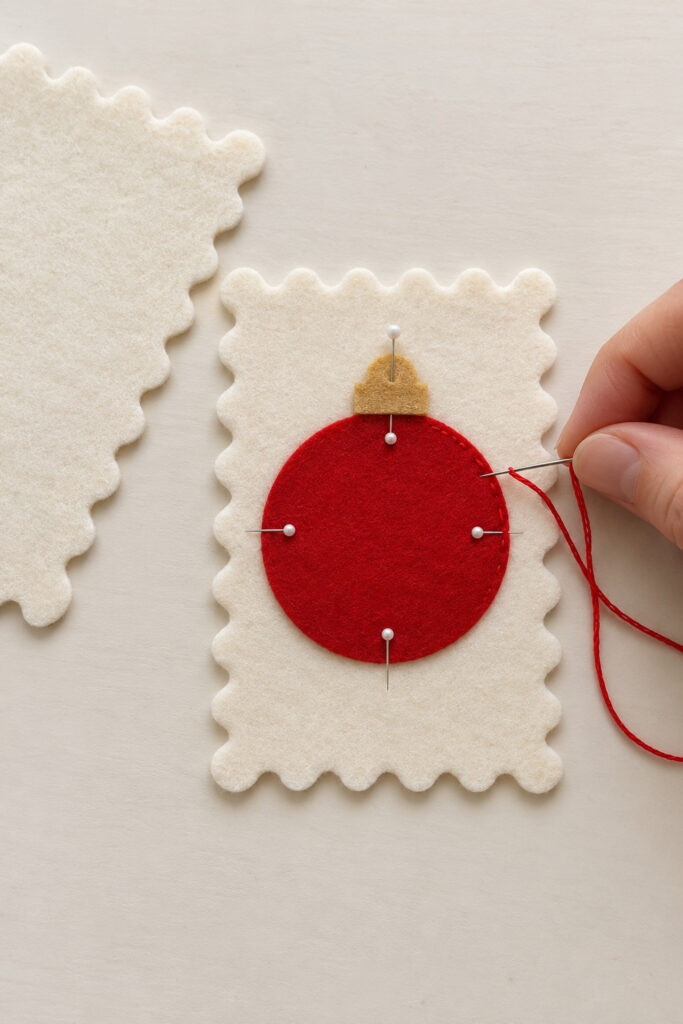
Use two strands of embroidery floss and small straight stitches around the main shapes. Bring the needle up through the cream front and motif near its edge, then down just outside that edge. Keep stitches close enough to hold the felt flat without pulling it into little ridges.
Sew lower layers first: tree trunk before tree, red present before green bands, and ivory cane before red stripes. On the cane, lay each red band across the ivory curve, trim its ends flush, and stitch it in place. Finish with the small green bow below the curved top.
4 Add the Small Embroidered Details
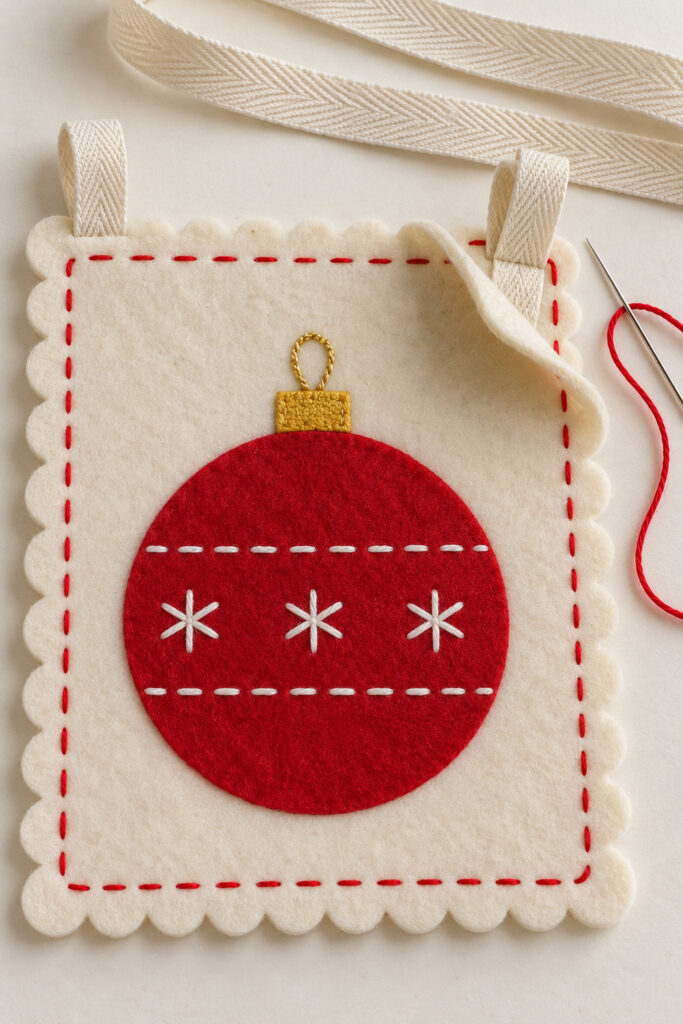
Make a few ivory straight stitches on the red bauble to suggest bands and small starbursts. A starburst can be three short crossing stitches; keep the thread tension gentle. Sew a small gold thread loop above the cap to suggest the bauble’s hanger. This decorative loop doesn’t support the panel.
Add tiny red stitches to the tree, and use ivory starbursts on the present. Make its bow from two small green teardrop shapes with their narrow ends facing each other, then cover the meeting point with a small felt knot shape. Flat details keep the bunting light and easy to store.
5 Add Backs and Two Hanging Loops per Stamp
Fold each short tape piece in half, bringing its cut ends together. At each panel’s top edge, place one folded loop near each corner with about a quarter inch of both raw ends tucked between the front and backing. The folded opening should project roughly half an inch above the top.
Before stitching, slide a scrap of the main hanging tape through a loop to confirm it fits. Adjust the loop size if needed. Clip the layers together and sew a red running stitch border about a quarter inch inside the scalloped edge, passing through both felt layers and securely through the tucked tape ends at the top.
A running stitch is a simple in and out line with small visible dashes. Keep it inside the shallowest part of the scallops rather than following every curve. Add a few extra securing stitches through each loop’s ends, knot the thread at the back, and hide the tail between the layers.
6 Thread and Space the Bunting
Feed the long tape through both top loops on each panel, keeping all five pictures facing forward. Leave roughly three quarters of an inch between stamps as a starting point, then adjust for your furniture. Leave generous free tape at both ends for tying or fastening to suitable supports.
Hold the row up before fixing its spacing. If the panels slide together, make a tiny removable securing stitch between one loop and the hanging tape on each panel. Don’t stretch the tape tight enough to curl the corners. A shallow curve keeps the pictures readable.
Tips for the Felt Postage Stamp Look
Keep the ivory backgrounds consistent and repeat the same red border thread on every panel. Individual motifs can vary, but those two shared details make the row feel related. Trim any uneven scallops with small cuts instead of shaving down the entire panel and changing its size.
If the felt puckers, loosen the last few stitches and try again with less tension. More stitches won’t flatten a shape that has been pulled too tightly. If a motif seems crowded, reduce the paper template before cutting another felt version.
Easy Ways to Customize It
For a shorter dresser, use three panels and keep the original panel size so the motifs remain easy to stitch. For a longer shelf, increase the spacing slightly or add another original motif. Adjust the tape length before threading so you still have enough at each end.
You can replace the gold details with muted yellow felt or simplify tiny embroidery. Keep the five distinct silhouettes, cream stamp edges, and visible red border if you want the closest connection to this inspiration.
Displaying Your Finished Bunting
Hang it indoors across a dresser front or along a shelf using supports appropriate to the surface. Keep it clear of drawer tracks and handles you need to use. Check that the tape can’t catch when drawers open, and keep the hanging line out of reach of children and pets.
Use battery lights if you want a nearby glow, keeping felt away from heat and open flames. Put needles and scissors away before hanging the finished row. Store the panels flat between clean sheets of paper, with the tape loosely folded beside them.
One Last Check Before Hanging
Give each loop a gentle tug, check the motif edges, and look for loose thread ends. Those small finishing checks are more useful than chasing identical stitches. A clear little picture inside each scalloped cream panel is what makes the handmade stamp idea recognizable.