*This post may contain affiliate links for which I earn commissions.*
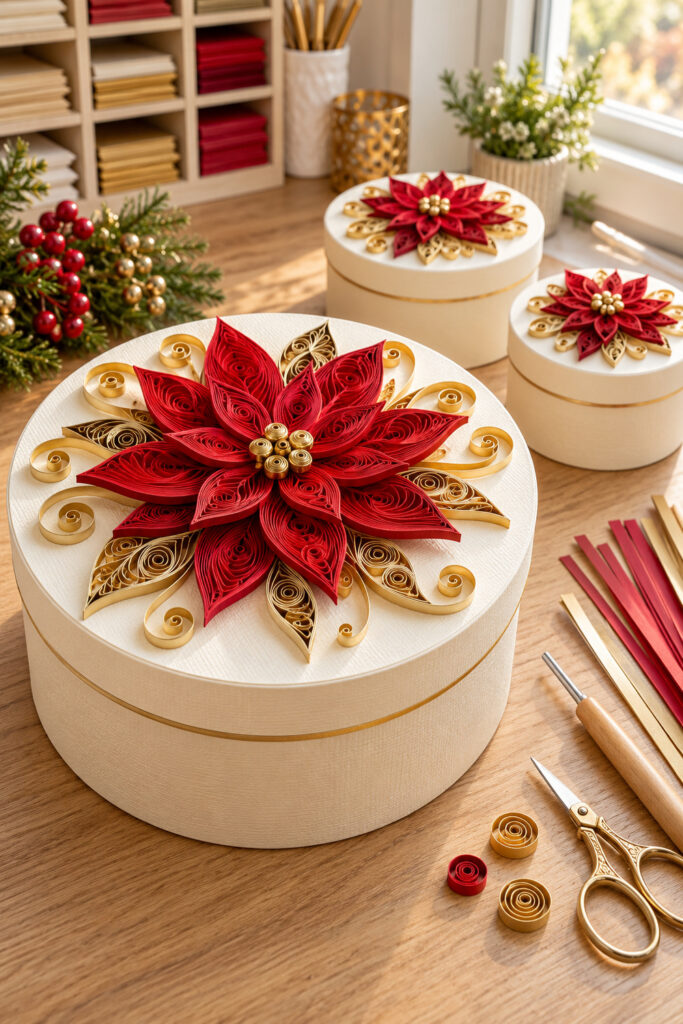
Red paper poinsettias and gold scrolls give these ivory keepsake boxes their character. The raised petals are the detail worth preserving: you can see the rolled paper inside each pointed shape, rather than a flat flower printed on the lid.
This tutorial proposes a manageable version using simple quilled petals, a small cardstock backing, and a removable box lid. The flower is made separately before it is attached, which gives you time to arrange the layers without working around the sides of the box.
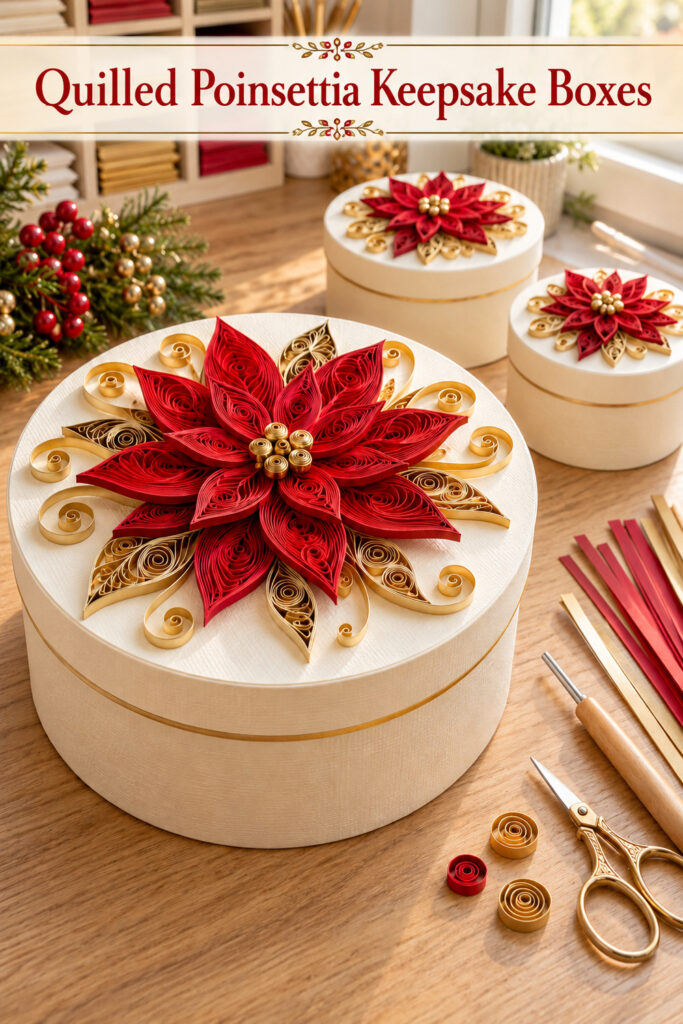
The inspiration and demonstration images were created with AI. They illustrate a proposed DIY method rather than documenting a physically tested project.
What You’re Making
You’ll decorate one round ivory lidded box with a two layer red paper flower, a small cluster of tight gold coils, and loose gold curls around the outside. The suggested design uses eight larger petals underneath and six smaller ones above. The offset layers suggest the fuller poinsettia in the inspiration without trying to reproduce every intricate paper loop.
Start with a box whose lid offers enough flat space around the flower. A lid roughly 15 to 20 cm across is a suggested starting size, not a measurement taken from the picture. Adjust the flower and backing to your own box.
Materials and Supplies
Materials
- One rigid round lidded box with a dry smooth ivory surface
- Red quilling paper strips in one consistent width such as approximately 5-6 mm
- Gold or yellow quilling paper strips in the same width with a surface compatible with paper glue
- Ivory cardstock for one small circular flower backing (the instructions below have you glue the flower to the cardstock and attach the cardstock to the box lid – this will keep you from ruining the box lid if you make a mistake)
- Clear drying craft glue suitable for paper and the box surface
- Optional thin gold ribbon or paper trim for the lid edge (or use a box that already has gold trim)
Tools
- Slotted quilling tool
- Circle sizing board or a simple drawn circle guide protected beneath a nonstick sheet
- Fine tweezers and a small glue applicator
- Scissors pencil and ruler
- Nonstick craft mat or release sheet
Strip quantities depend on the flower size and the length of the paper supplied. Make one large and one small sample petal before preparing the full set. Keep extra strips for practice and for adjusting the gold decoration.
Want to Make This Storage Box?
I’ve put together a convenient Amazon supply list featuring hand-picked, well-rated products that match the supply list above so you don’t have to hunt for the right items.
See My Hand-Picked Supply ListAs an Amazon Associate I earn from qualifying purchases but this doesn’t increase your price at all!
Before You Start
If your box needs painting, remove its lid and finish both pieces separately. Follow the paint’s drying guidance before adding paper. Keep the overlapping edges free of thick paint or decoration so the lid still closes properly. (I linked to a set of boxes above that won’t require painting.)
Trace a circle smaller than the intended flower onto ivory cardstock and cut it out. The backing should sit beneath the petal bases without showing beyond the flower’s outer points. Lay it on your protected work surface.
Choose two coil guide sizes by testing a pair of petals on the lid. As a suggested starting proportion, make the smaller finished petals around two thirds the length of the larger ones. The actual lengths can change to suit your paper and box. Save the successful samples as references.
Step by Step Poinsettia Box Tutorial
1. Roll and Shape the Red Petals
Insert the end of a red strip into the slotted tool and roll it into a coil with even tension. Slide it off carefully and let it relax inside your larger circle guide. Put a very small amount of glue on the outer strip end and press it against the coil to hold its size.
Pinch two opposite sides of the coil to form a pointed oval, often called a marquise. Keep the paper edges level so it will sit flat. Hold the shape gently until the join stays closed, then set it aside to dry according to the glue instructions.
Repeat until you have eight larger petals. Use your smaller guide for six smaller petals. If one strip gives a coil that is too small, join another strip end to end with a tiny overlap and let the join set before rolling. Use the same total strip length within each size group for consistency.
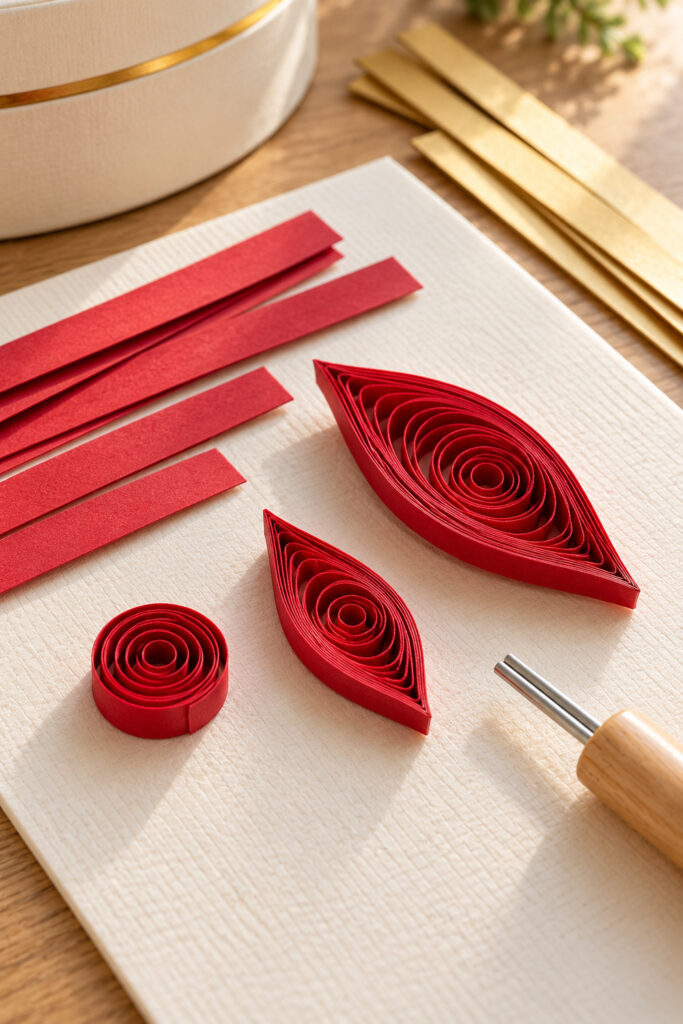
Small differences are fine, but very uneven petal lengths make assembly harder. Compare the pieces flat on the table and reshape them while the paper is still flexible. Don’t crush the centers to make them fit; the visible open coils are part of the decoration.
2. Arrange the Lower Petal Ring
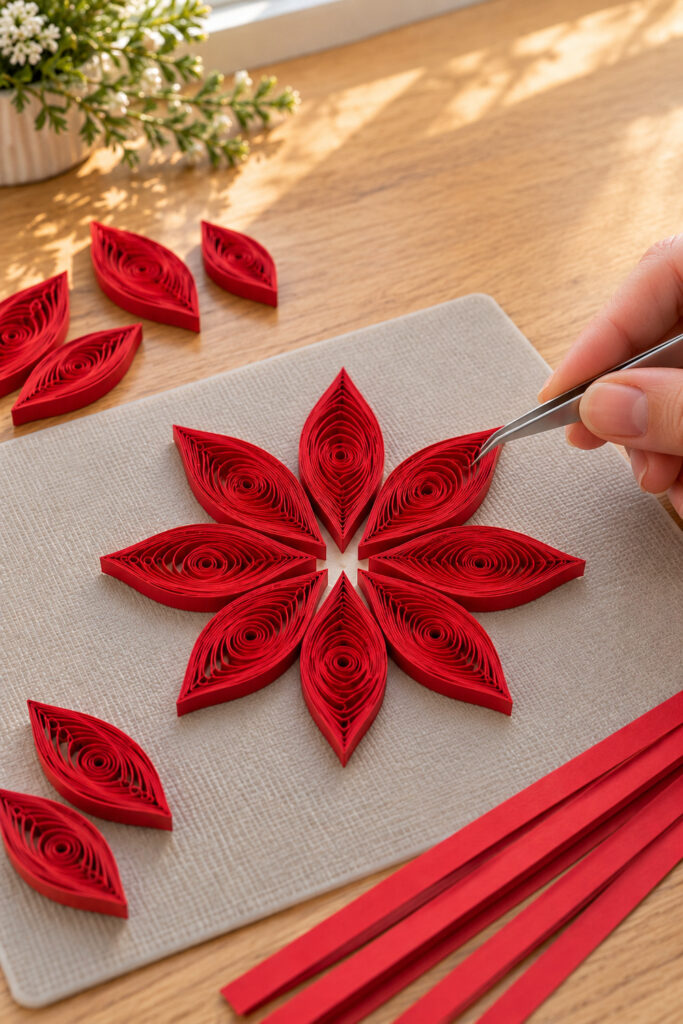
Dry fit the eight large petals on the cardstock disc with their outer points facing away from the center. Think of the first four as a cross, then fill the spaces between them with the remaining four. This gives you a useful starting arrangement without needing a printed template.
Move the petals until their inner points gather around a small central opening. Check that the backing is hidden from an overhead view. Apply small amounts of glue to the underside edges that contact the disc, position the petals again, and let that lower layer become stable before adding weight above it.
3. Add the Offset Upper Layer
Arrange the six small petals on top with their outer points falling between the larger petals wherever possible. Because the two rings have different numbers of petals, the spacing won’t repeat perfectly all the way around. Aim for a balanced flower rather than forcing every gap to match.
Keep the upper petals mostly flat, overlapping the inner portions of the lower ring. Glue only where paper surfaces actually meet, using tweezers to settle each piece. Avoid large wet blobs, which can soften the paper and remain visible between the coils.
Let the flower dry on the mat. Lift it by supporting the backing, never by pulling an outer petal. If a section is still loose, add a tiny amount of glue at the contact point and give it more drying time.
4. Make the Gold Center and Curls
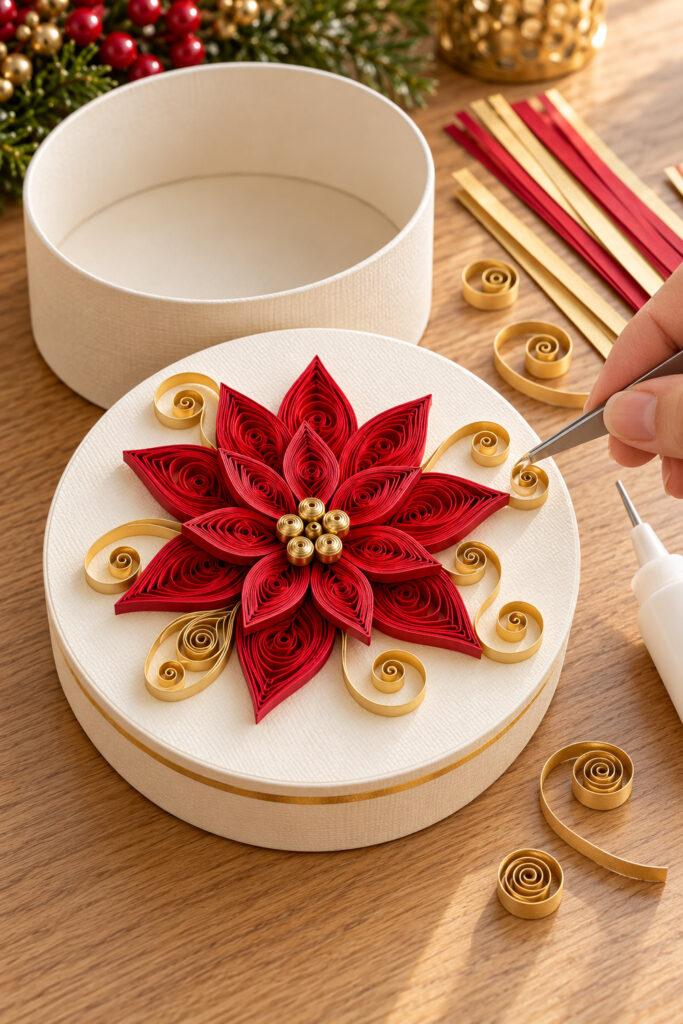
Roll five short gold strips into tight coils, keeping each one wound rather than allowing it to expand. Glue the end of each coil and let it set. Group the five coils over the flower’s central opening, then attach them where they contact the paper below.
For the surrounding scrolls, roll one end of a gold strip loosely around the tool, slide it off, and allow the curl to open. Curve the remaining length gently with your fingers. Prepare a few scrolls of different lengths rather than trying to copy the inspiration’s elaborate nested gold shapes.
5. Attach the Flower to the Lid
Place the lid flat on the table and set the flower in the center. Dry fit the gold scrolls around it, leaving a visible ivory margin near the edge. Turn the lid a little at a time to check that the decoration looks balanced from different directions.
Lift the flower with its backing supported, apply an appropriate thin layer of glue beneath the cardstock disc, and return it to the lid. Add the gold curls with tiny glue contacts along the paper edges that touch the surface. A curl can tuck near a petal, but shouldn’t have to support the flower.
6. Finish the Edge and Check the Lid
If you want the fine gold line shown in the inspiration, add narrow trim around the outside edge of the lid only. Keep it clear of the overlapping rim and the box opening. Follow the adhesive’s setting instructions before handling the decorated piece.
Open and close the box gently to check that nothing catches. Keep the raised decoration clear of your usual grip area, and lift the lid from its edge rather than holding the paper flower. Don’t stack another box on top of the petals.
Tips for Getting the Finished Look
Keep the red paper dominant and use gold to separate small details. Too many scrolls can make the lid look crowded and obscure the layered petals. The ivory spaces around them are useful because they make each curl easier to see.
For a coordinated collection, repeat the same paper widths and colors on different box sizes. Scale down the petals and scrolls for smaller lids. A small box needs fewer flourishes rather than a miniature copy of every detail on the largest one.
Easy Ways to Customize It
Use burgundy paper for the lower petal ring and a brighter red above if you want a subtle color difference. Test the two papers together first; a strong contrast can make the layers look like separate flowers.
You can also leave off the outer curls and keep just the poinsettia and gold center. This simpler version is especially useful on a narrow lid or when you’re making your first quilled flower.
Displaying and Using the Finished Boxes
Display the boxes indoors on a dry shelf or dresser. Paper coils are decorative and can be damaged by moisture, rubbing, or pressure. Keep them away from candles and heat, and use an appropriate inner container if the box will hold something that could stain it.
These are better suited to keepsakes or carefully presented gifts than frequent rough handling. Store them in a larger protective container with space above the flower when the season ends.
A Useful Place to Begin
Make the two sample petals first and check their size on the actual lid. Once that proportion feels right, the rest of the project becomes a repetition of a few simple shapes. The layered red flower and restrained gold curls will carry the idea even when your finished box differs from the illustration.