*This post may contain affiliate links for which I earn commissions.*
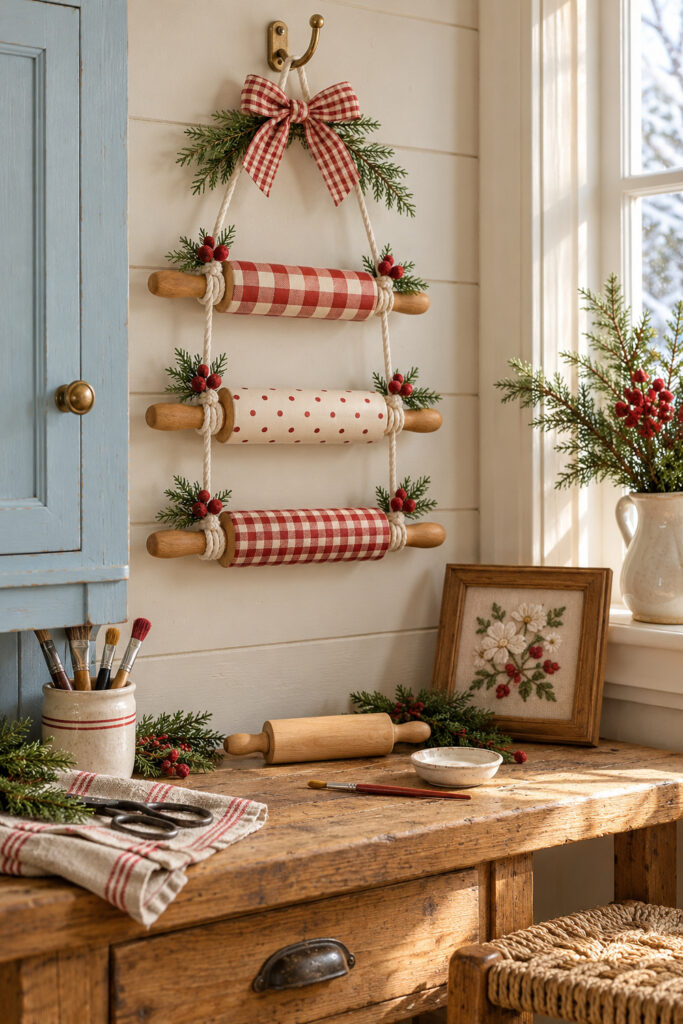
Three little rolling pins, a few lengths of cotton cord, and red-and-cream patterns make a Christmas decoration with a clear baking theme. The inspiration combines two checked barrels with a dotted one, leaving the wooden handles exposed. Small cedar and berry accents gather at the knots, while a checked bow finishes the top.
This tutorial proposes a practical version using fixed-handle craft rolling pins. The cords hold the pins at their narrow handle necks, making a small hanging ladder without drilling through the wood. Use it on an indoor wall, cupboard side, or protected interior door where the pieces won’t be knocked each time someone passes.
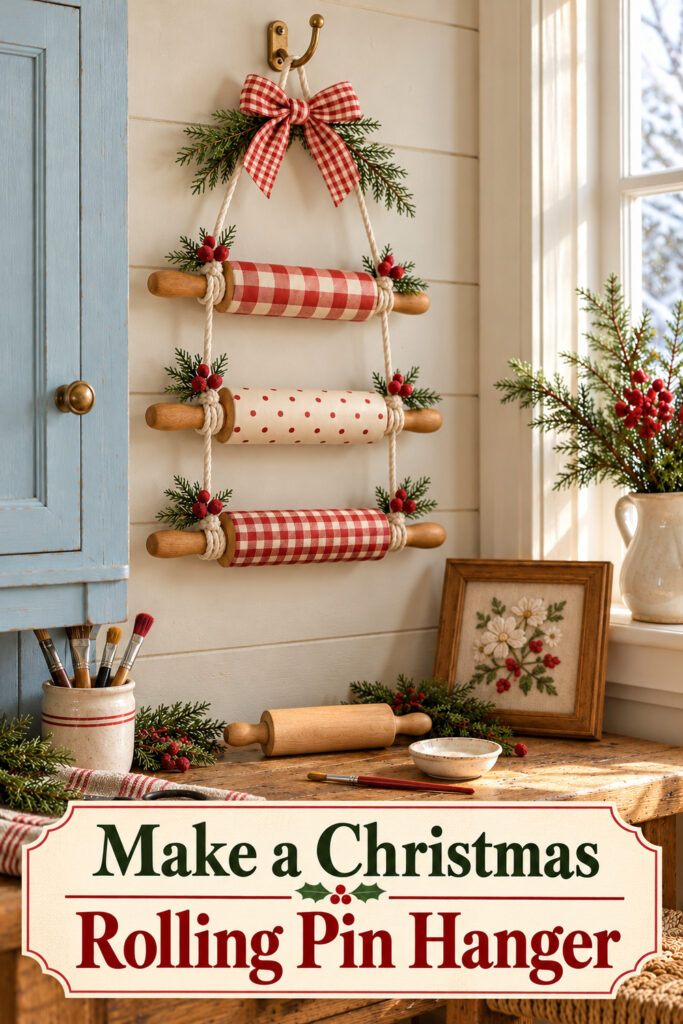
The inspiration and instructional demonstration images were created with AI. They illustrate a proposed DIY method rather than an actual project in progress.
What You’re Making
You’ll make three horizontal rolling-pin rungs suspended between two cords, with a loop above and greenery at selected attachment points. As a suggested starting size, choose pins around 8 to 10 inches long overall, with barrels roughly 5 to 6 inches long. Actual sizes vary, so plan the spacing around the pieces you have.
Choose pins with handles fixed firmly to the barrel and a distinct neck or shoulder at each end. Freely turning handles and straight cylindrical dowels make this attachment less dependable. The proposed hanger is decorative, not a rack for towels or kitchen tools. Once painted, these pins should be reserved for decoration.
Materials and Supplies
Materials
- Three lightweight unfinished wooden craft rolling pins with fixed handles and defined handle necks (see NOTE below!)
- Cream and muted red water-based craft paint (see NOTE below!)
- Cream cotton cord approximately 3-6 mm thick with enough length for both sides and all knots
- Red-and-cream checked ribbon for the upper bow
- Small faux cedar and red berry sprigs
- Fine green floral wire for securing the small accents
NOTE: To be clear, I get these project ideas from AI. I go through them myself, I gauge whether they’re really doable, whether I think they’re cute or not, and I try to publish the ideas that I, myself, would actually create. This is definitely one of them because I LOVE pie! BUT I’m not this artistic. I wouldn’t paint the rolling pins. I’d do one of two things instead. I’d either buy cutesy-cutesy small rolling pins from someplace like Home Goods or Hobby Lobby and use those in the rest of the idea OR I’d wrap wooden, unfinished rolling pins in contact paper or wrapping paper to get the same effect. Just a hint!
Tools
- Fine sandpaper and a dry cloth
- Flat and fine paintbrushes plus a small dotting tool or blunt brush handle
- Low-tack painter’s tape and a ruler
- Scissors and wire cutters
- A suitable wall hook rated for the completed decoration
Optional Finish
A compatible clear water-based craft finish can protect the painted barrels. Check its instructions for use over your chosen paint, and test on a spare piece first. You’ll also need a protected work surface and scrap paper for planning the patterns. Set the cord, ribbon, and greenery aside while painting so they stay clean.
Before You Start
Dry-fit the three pins flat on your table in the order you want them. Put large checks at the top, dots in the middle, and smaller checks at the bottom to echo the inspiration. Suggested clear space between pins is about 2 inches, but adjust it so the patterns and small sprigs remain separate.
Measure the route for each side cord from above the top pin to below the bottom pin. Add generous extra length for wrapping six handle necks in total, tying the upper loop, and making adjustments. Use two separate cord lengths rather than cutting close to the apparent finished height. A little spare cord is easier to manage than a knot that needs another inch.
Step-by-Step Tutorial
1. Prepare and Base-Coat the Barrels
Lightly smooth rough areas with fine sandpaper and wipe away the dust. Mask the handles where they meet the barrels, leaving the natural wood exposed. Apply thin cream coats to the barrels, following the paint’s drying instructions between coats. Rotate the pieces on protected supports so wet paint doesn’t stick to the table.
Keep paint out of the handle necks where the cords will sit. Bare wood gives the wrapping a more distinct seat and preserves the warm detail seen in the inspiration. Before painting the patterns, check that the cream base feels dry and isn’t lifting when you remove a small test piece of tape.
2. Paint Two Checks and One Dotted Pattern
For the large check, mark a simple grid around the first barrel using the ruler and light guides. Test the spacing on a paper strip wrapped around the barrel before transferring it. Paint alternating rows and columns in a diluted red, then deepen the overlapping squares once the first pass has dried. The darker intersections suggest woven gingham.
Use the same method with narrower spacing on the bottom pin. Keep the middle barrel simpler by adding small red dots with a dotting tool or the blunt end of a brush. Turn the pin as you work and let one side dry before resting it down. Slightly uneven checks suit the handmade character, but leave enough cream showing to keep both patterns readable.
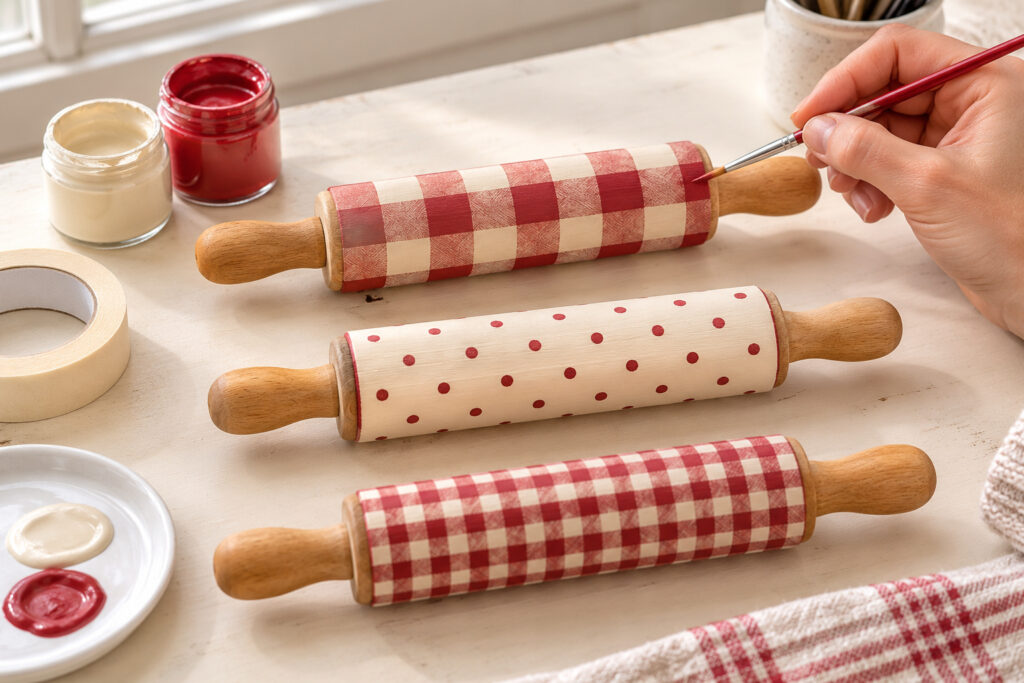
Let the paint dry fully according to its label. If using a clear finish, apply it now and let it cure as directed before handling or tying the cords. Remove the masking tape carefully, pulling away from the painted edge. Touch up a rough boundary with the fine brush rather than sanding across the finished pattern.
3. Tie the Side Cords Around the Handle Necks
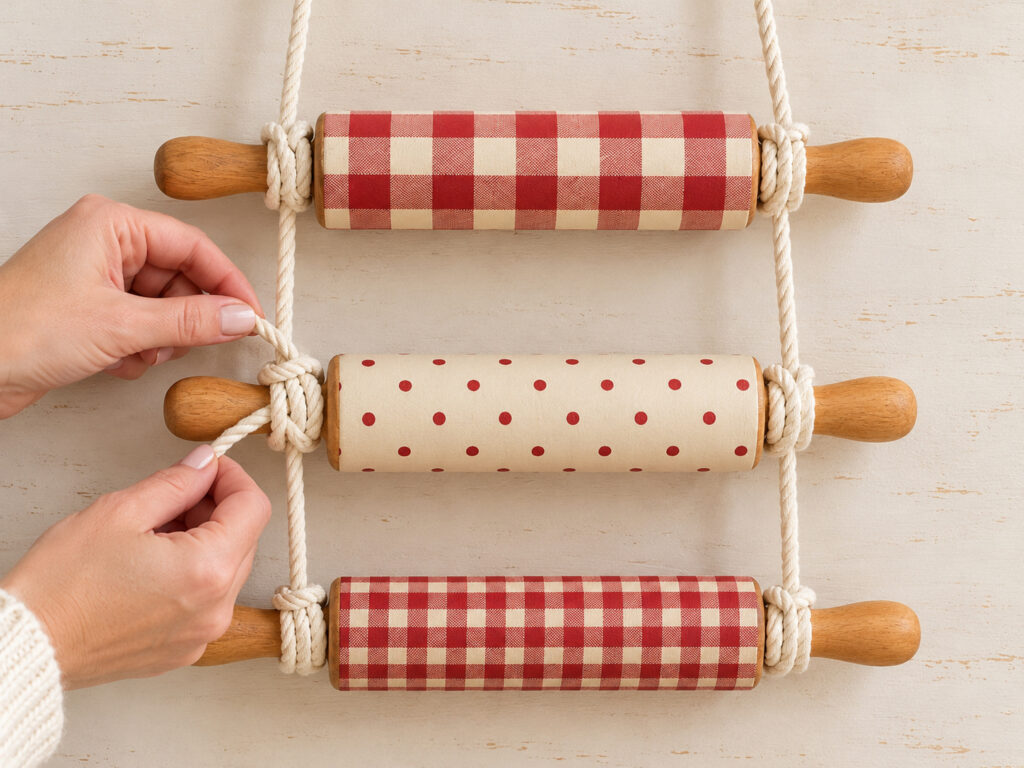
Lay the pins parallel on the table with the planned gaps between them. Run one cord down each side, just outside the painted barrels. At each handle neck, wrap the cord in a clove hitch: make two loops around the neck, crossing the second over the first, then pass the working end beneath the crossed section and tighten.
Add a small half hitch immediately beneath each clove hitch as a backup. Keep every wrap seated against the wider barrel shoulder, rather than near the rounded end of the handle. A clove hitch can shift on smooth wood, so test each connection by pulling gently before moving on. If it slides toward the handle tip, choose a better-defined neck or a different pin; don’t rely on greenery or glue to hold it.
The demonstration image illustrates cord placement rather than a precise knot diagram so follow the knot directions above. Start with the top pin, then repeat at the middle and bottom pins on both sides. Compare the gaps as you work and loosen knots to adjust them while the project is flat. Leave short tails below the bottom knots until the hanging test is complete. Keep the cord wraps clear of the painted barrels so the three patterns remain visible.
4. Form the Upper Hanging Loop and Test
Bring the two upper cord ends together above the top pin. Tie them into one secure overhand loop, leaving enough rise for the sides to form a shallow triangle. Hang the unembellished piece low over a padded surface and check that all three pins stay horizontal. Adjust the side knots until the weight is shared evenly.
Gently check each rung for slipping and retighten the connections. Recheck after the cord has settled. If any pin rotates or a knot creeps away from its shoulder, stop and correct that connection before adding decoration. The pictured cord arrangement is inspiration, so the actual stability of your own pins and knots takes priority over copying its exact spacing.
5. Add Cedar Berries and the Checked Bow
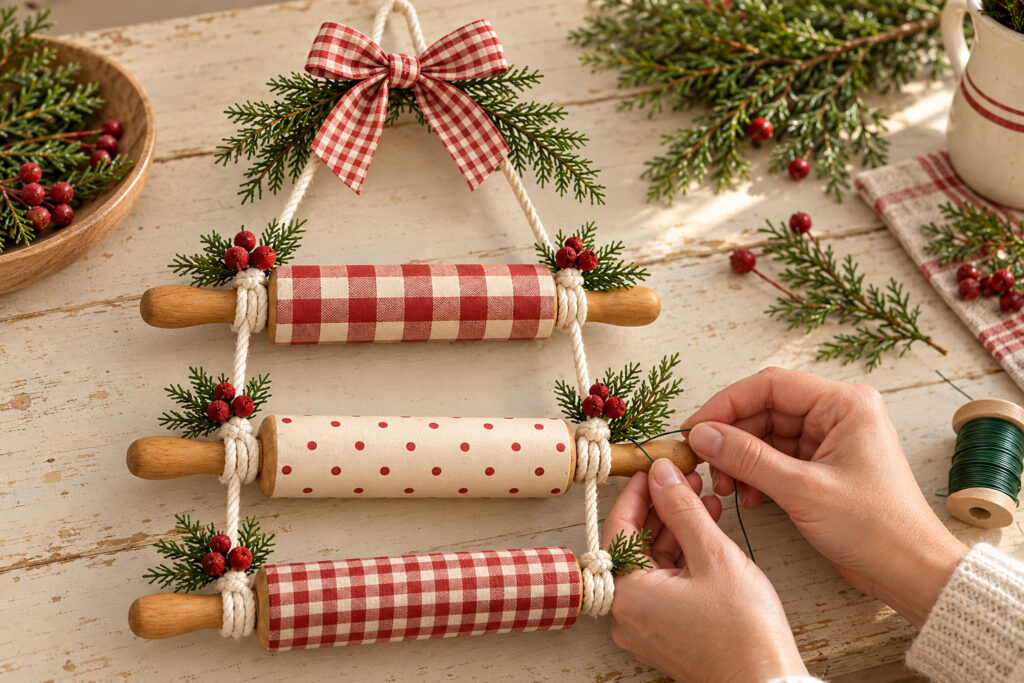
Group a short cedar sprig with a few faux berries and position it just above a handle knot. Bind the stems together with fine floral wire, then wrap the wire around the cord knot to secure the cluster. Twist the ends behind the knot and tuck them inward so they won’t scratch the wall or catch a hand.
Use small clusters so the natural handles remain exposed. Attach a slightly wider cedar spray near the upper loop, then tie a checked ribbon bow over its binding. The embellishments cover their own attachments, but they shouldn’t hide a slipping structural knot. Trim the cord tails only after the last hanging check, leaving enough beyond each knot for it to remain secure.
Tips for Getting the Finished Look
Keep the two checked barrels different enough to notice. Large squares above and smaller ones below create variation within the same palette, while the dotted middle rung gives the eye a break. Use the same red throughout rather than introducing several competing shades. The small accents should sit beside the painted areas, not cover them.
Easy Ways to Customize It
Blue-and-cream checks could suit an existing kitchen palette, while plain cream barrels with red dots would reduce the painting work. Keep the same cord-supported structure and fixed handles. For a shorter decoration, use two pins and adjust the upper loop rather than crowding three rungs into a small space.
Displaying the Finished Hanger
Use a hook and mounting method suited to the wall and total weight. Keep the hanger indoors, away from heat, splashes, young children, and pets. On a door, make sure it can’t strike the frame or swing into someone; a stationary cupboard side is often easier. Check the knots and mounting point when putting it out each season.
Final Encouragement
Paint the first checked barrel before tackling the whole set. It will help you choose a comfortable pattern size, and that one decision makes the dotted middle and smaller lower checks much easier to plan.