*This post may contain affiliate links for which I earn commissions.*
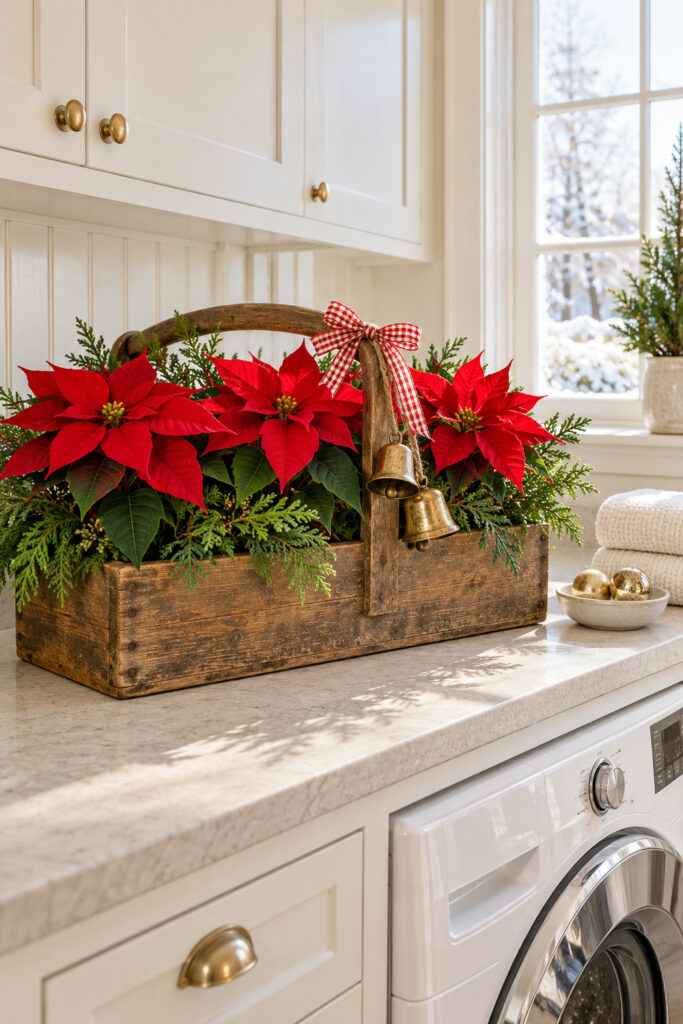
A weathered wooden toolbox is an unexpected place for red poinsettias, especially on a laundry room counter. The flowers fill its open compartments, cedar shaped greenery softens the edges, and a gingham bow with brass colored bells hangs from the raised handle. It feels festive without asking the room to stop being useful.
The contrast is the interesting part: rough brown wood, crisp red leaves, and pale cabinetry. You can use a similar handled tote as a temporary holiday container, keeping the plants in separate protective pots inside it. That way the toolbox provides the look while the inner containers handle the practical work.
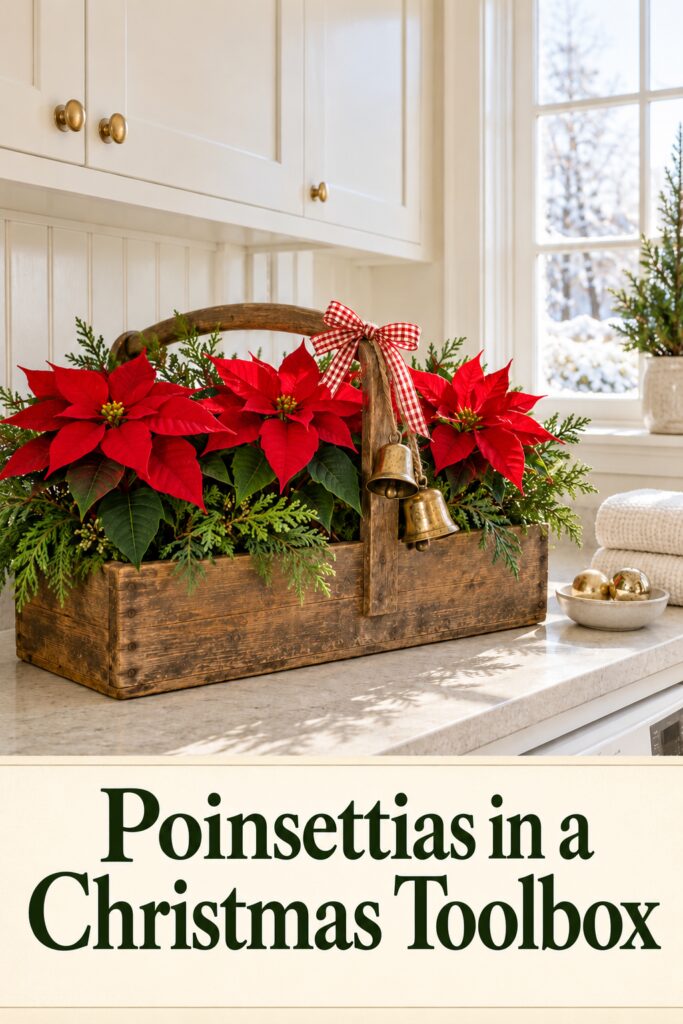
This AI generated image is decorating inspiration rather than a photograph of a completed real arrangement.
Choose a Toolbox with a Visible Handle
The raised handle gives this display its recognizable shape. It arches above the flowers and comes down at the center front, where the ribbon and bells have a clear place to hang. If greenery covers the entire handle, the container starts to look like an ordinary rectangular planter.
Look at the tote’s structure before thinking about color. It needs a flat base, sound joints, and enough room to hold the inner containers upright. Old wood can be attractive, but loose boards, splinters, and a weak handle don’t become decorative advantages in a working room.
Set the empty tote where you plan to use it and open every nearby cupboard. Check that the handle clears the cabinet doors and that the arrangement won’t block outlets, controls, ventilation, or access to the washer. A laundry counter needs to keep earning its keep.
If using real plants, keep them in pots with drainage and use individual watertight outer containers or saucers that protect the wood and counter. Remove the pots for watering, let them drain, and return them afterward. A liner alone isn’t a reason to pour water directly into a wooden tote.
Find Wooden handled totes
Browse current Amazon options that can help you recreate this look.
Browse Wooden handled totes on Amazon →As an Amazon Associate I earn from qualifying purchases.
Layer Red Flowers with Greenery and Small Accents
Keep the flower faces above the rim
The poinsettias appear as a continuous line of red across the upper part of the box. Their dark leaves fill the middle, while greenery falls over the front and ends. Let the red portions sit high enough to be seen without raising the plants so far that their containers show.
Try your pots inside the tote before adding any filler. Different plants may need different positions to create an even looking group. Use secure, moisture tolerant supports if a pot needs lifting, and keep each base fully supported rather than balancing it on a narrow scrap.
Faux poinsettias are an alternative if your laundry room lacks suitable light or experiences frequent temperature changes. Choose a few believable flower heads with visible green leaves. A tightly packed mass of red fabric would hide the useful contrast between flowers and foliage.
Let the greenery soften the box
The greenery around the base breaks up the straight wooden rim. It also links the pointed red leaves with the rougher container. Use small sprigs to cover gaps between the pots rather than pushing in one large bunch that lifts the plants or catches the handle.
You can use realistic faux cedar shaped picks for a reusable version. Bend them gently around the outside of the inner pots and keep the ends contained. If you use cut greenery, check it regularly and replace it when it dries or drops, especially near folded laundry.
The goal is an irregular fringe, not a uniform hedge. Let a few tips extend at the corners while keeping the front short enough that you can see the wood.
Tie the bow where the wood changes direction
The gingham ribbon sits near the join between the upper handle and front support. That position makes the bow look connected to the container rather than attached to a random flower. Its small checks add a familiar farmhouse detail without taking over the red palette.
Tie the bow loosely first and check the tails. Trim them only after you’ve decided how far they should hang. Very long tails can tangle with foliage or dip toward damp pots, while a tiny bow may get lost against the broad handle.
Suspend lightweight bells from a separate tied cord so the bow doesn’t have to carry their weight. Keep them against the wood rather than swinging into the leaves. If you skip the bells, a fuller bow can still mark the handle nicely.
Keep the neighboring counter calm
The folded cream towels and shallow ornament dish are lower than the flowers. They give the display room to lead and keep the setting recognizably practical.
One small dish is enough for the gold accent. Place it away from the edge and from places where it will be moved repeatedly during chores. Loose ornaments rolling into the washing area would be a rather memorable decorating decision, but probably not the one you intended.
Put the Display Together in Place
- Protect the surface and position the empty tote. Check its feet or base for rough edges, then use a discreet protective layer if needed. Keep the main folding space and machine access clear.
- Fit the inner pots or faux stems. Confirm that the containers sit securely and that the plants don’t lean heavily on one another. Leave the upper curve of the handle visible above them.
- Build the red grouping from the center outward. Turn the strongest flower faces toward the room, then adjust the end plants so they don’t look like separate displays. Keep their natural leaves visible between the red areas.
- Add greenery to hide container edges. Stand back before filling every gap. A little visible dark space can make the flowers easier to distinguish, while too much filler makes the tote look stuffed.
- Attach the bow and bells, then check the room in use. Open doors, reach for detergent, and lift a towel as you normally would. If something catches or has to be moved every time, reduce the arrangement or relocate it.
For a smaller counter, use a short handled caddy with one plant and a little greenery at either side. Keep the same relationships: flowers above the rim, visible wood below, and an accent on the handle. You don’t need three plants to preserve the idea.
If the tote is heavy once filled, lift it by supporting the base rather than assuming an old decorative handle will carry the load. Remove the individual pots before moving it any distance. It’s easier to adjust a display in parts than rescue it in midair.
Shop for the Parts That Matter
A sturdy wooden box with an attached handle can stand in for a vintage toolbox. Preserve the warm wood, vivid flowers, and tidy upper accent, and let the exact shape vary with what fits your room.
Shop Similar Wooden Handled Totes
Check the inside dimensions against your actual plant containers, allowing space for protective pots. Look for a stable base and securely attached handle rather than choosing solely for a distressed finish.
Look for Compact Red Poinsettias
Choose plants or faux stems that leave the tote handle visible when arranged. For real plants, read the care information and decide whether your available light and room conditions are suitable before buying.
Shop Similar Red Gingham Ribbon and Brass Colored Bells
A modest check pattern and lightweight bells suit the scale of the handle. Choose ribbon that forms a tidy bow and keep the bell attachment separate so the fabric can be adjusted easily.
Final Styling Tip
Leave a strip of the wooden rim visible across the front. That little boundary keeps the flowers, greenery, and container from merging into one busy block.