*This post may contain affiliate links for which I earn commissions.*
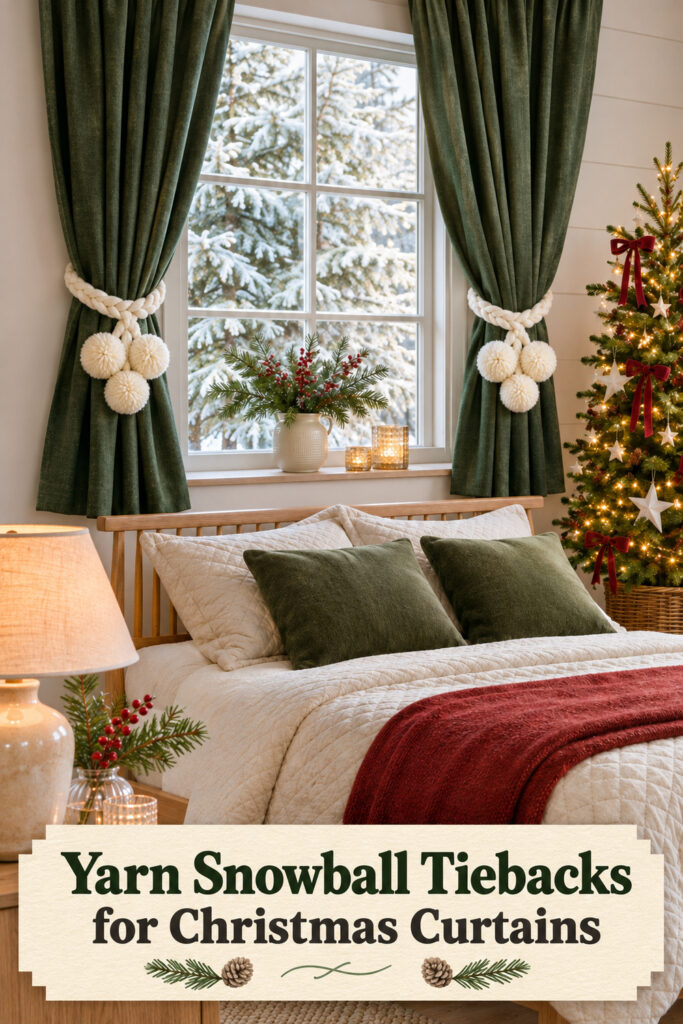
Three fluffy yarn snowballs turn a plain ivory braid into a Christmas curtain detail. The pale ties stand out against green panels, while the soft round shapes repeat the knitted bedding and winter view. A nearby tree gives the simple yarn colors a clear holiday setting.
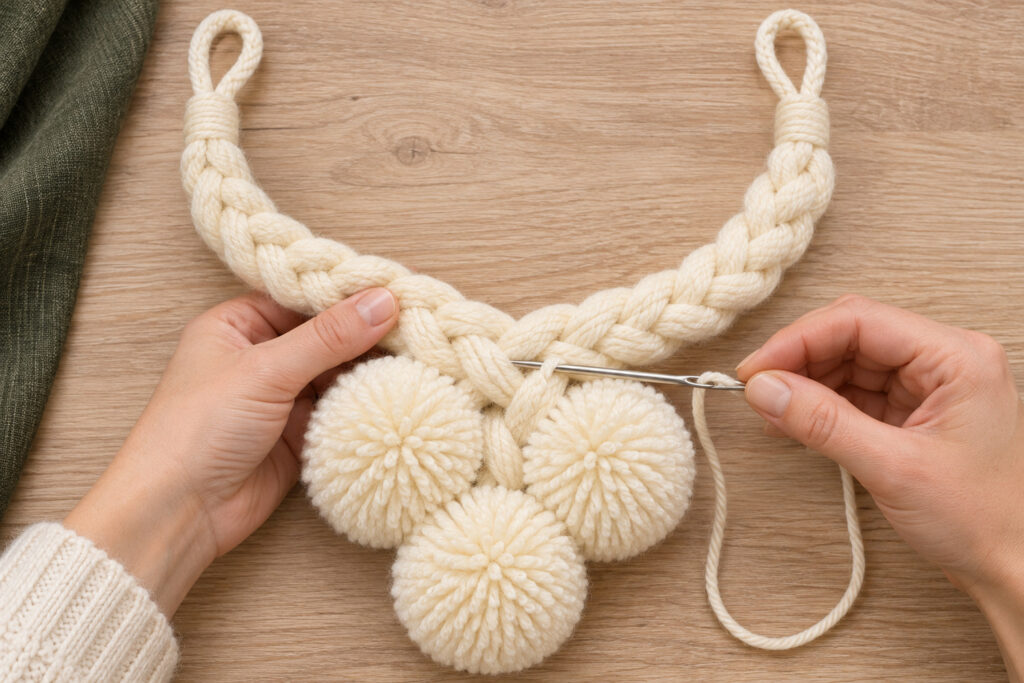
This proposed version uses a three-bundle braid with bound loops at both ends. Those loops slip over an existing suitable curtain holdback hook behind the panel. Make one tie first, check its fit, and then repeat the measurements for the other side of the window.
The inspiration and instructional images were generated with AI. The tutorial describes a practical adaptation rather than a physically tested project.
Gather the Yarn and Simple Tools
For a matched pair, gather:
- Ivory plied yarn for two braided bands and six pom-poms
- Strong ivory cotton thread for binding loops and tying pom-pom centers
- Firm cardboard for two matching pom-pom rings
- A blunt yarn needle and a small sewing needle
- Scissors, a ruler, a measuring tape, and removable work-surface tape
- Two existing curtain holdback hooks suitable for your window and use
Choose yarn with distinct strands that braid neatly. A smooth wool or wool-blend yarn can work; another fiber is fine if it produces a firm braid and full pom-poms. Avoid relying on very loosely formed yarn that falls apart when cut. Make a small sample before committing to both ties.
Yarn requirements depend on the curtain fullness, yarn thickness, and pom-pom size. Measure the planned band first, then calculate twelve strand lengths per tie, plus yarn for the six balls. Check the yarn’s listed yardage and allow extra for wrapping tests and trimming.
The suggested pom-poms are about 3 inches across. Choose a smaller size if the finished cluster overwhelms the curtain. These are proposed starting dimensions, not measurements taken from the image.
Braid the Bands and Add Three Snowballs
Step 1: Measure the Gathered Curtain
Gather one panel loosely at the height you want to hold it. Use a measuring tape to follow the route around the fabric and back to the hook, without squeezing the curtain tightly. Include the space needed for both end loops to reach the same hook.
Record that finished route. As a starting allowance for braiding and finishing, cut each yarn strand about one and a half times that length, plus 8 inches. Keep the pieces longer until the first braid is fitted; different yarns shorten by different amounts when braided.
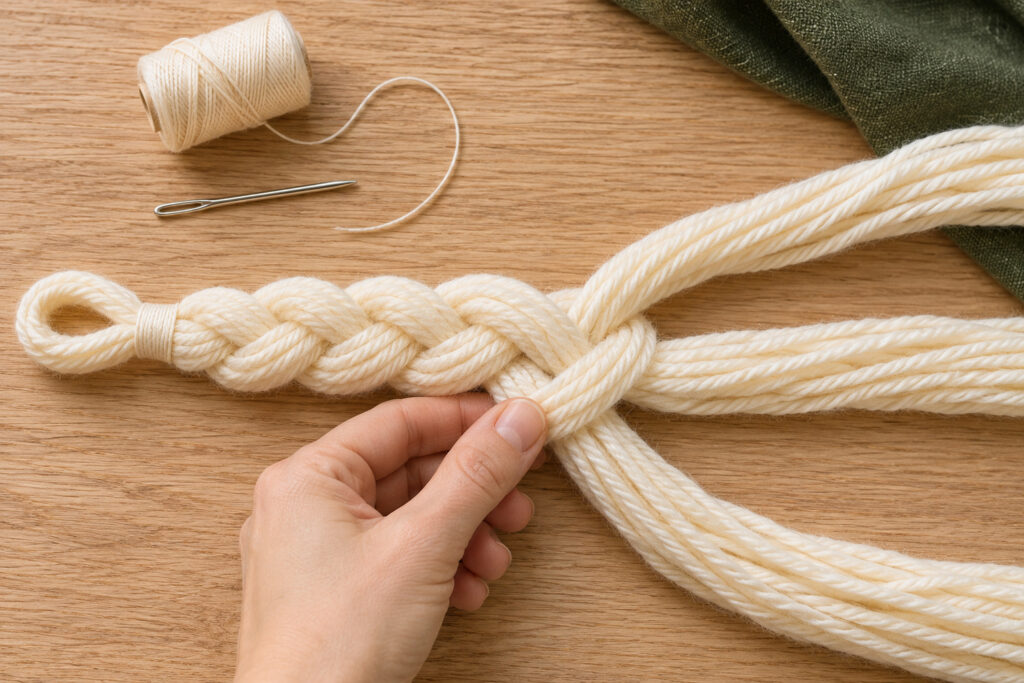
Step 2: Make the Braid and Bound Loops
Divide twelve strands into three equal bundles of four. Leave enough yarn at one end to fold back into a small loop, bind the grouped strands temporarily, and tape that end to your work surface. Braid the three bundles with even tension, crossing an outer bundle over the middle in turn.
After a short section, fold the starting tail back to form the first loop. Wrap its neck firmly with cotton thread and stitch through the bound area several times. Trim only loose ends that sit outside the binding, keeping the structural strands intact.
Continue braiding, then test the band around the curtain before finishing the second end. Form and bind a matching loop where it reaches the hook comfortably. Both loops should slip on without stretching the braid or crushing the fabric. Rework a tight section rather than forcing it into place.
Step 3: Make Six Dense Pom-Poms
Cut two matching cardboard C-shaped rings for a test pom-pom. A suggested outside diameter is 3 1/2 inches, with an opening about 1 inch across and a narrow gap from the outer edge to the center. Keep the two rings together and wrap yarn around them until the ring is thickly covered.
Holding the center firmly, cut the yarn along the outside channel between the cardboard layers. Keep the rings in place while passing a long cotton tying strand between them. Pull it tightly around the yarn bundle’s center and secure it with a firm double knot. Leave long tying tails for attachment.
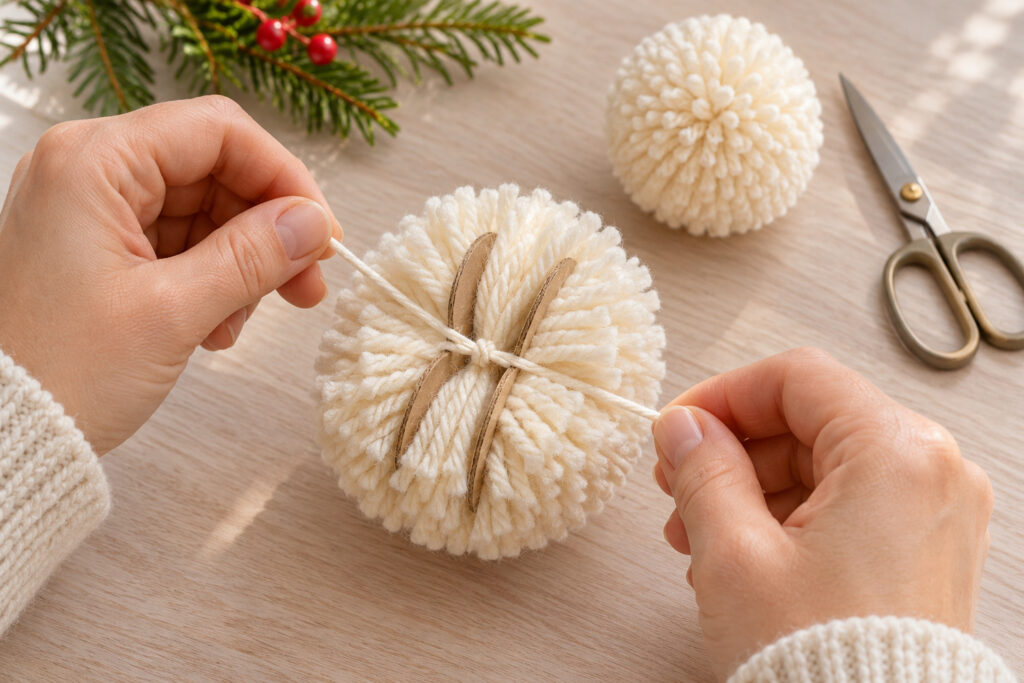
Slide out the rings, fluff the ball, and trim it gradually into a sphere. Keep the long tying tails separate from the short yarn ends. If the center loosens or strands pull out easily, retie it more firmly or start another ball. Repeat until you have six similar pom-poms.
Step 4: Attach the Triangular Cluster
Fit the braid to the curtain and mark its visible front middle. Remove it and arrange three pom-poms there, with two slightly higher and one below. Let the balls touch lightly without compressing them into one solid mass.
Thread each ball’s long tying tail through a braid crossing with the blunt needle. Secure the tails around firm strands at the back, knot them, and weave the remaining ends through several braid sections. Give each pom-pom its own attachment rather than hanging all three from one loose thread.
Lift the band and check that the cluster stays together. Shift an attachment if a ball turns toward the back or leaves a large gap. Once the arrangement is secure, trim stray fibers without cutting the center ties or stitched bindings.
Match the Second Side and Finish the Yarn
Use the first finished band as a measuring guide, then check the second curtain separately. Panels that look identical may gather slightly differently. Keep the visible braid thickness, ball size, and cluster position similar even if the hidden route to the hook needs a small adjustment.
For a softer winter version, leave the ivory yarn unchanged and remove nearby Christmas accessories later. You could also use a muted red yarn for the braid while keeping the snowballs ivory. Test colored yarn against the curtain before making both bands so the contrast stays clear.
Put the Ties Where They Can Work Safely
Slip both loops over the existing holdback hook behind each curtain, following the hook’s intended use. These ties gather fabric; they aren’t designed to support the weight of the curtain rod or panel. Keep them away from heaters and flames, and remove them before cleaning the curtains.
Curtain loops and loose decorations should be kept out of reach of children and pets. This design is intended as an adult-room decoration, not a toy. Check the center knots and loop bindings occasionally, especially when the curtains are moved often.
Start by fitting one completed tie at the window. Once the braid sits comfortably and the three snowballs face into the room, repeat that placement on the other side.